
Introduction In our previous blog post , we explored Helm, a package manager for Kubernetes, and discussed its significance in simplifying the deployment of applications. We demonstrated a basic Helm chart deployment on a Kubernetes cluster tutorial, utilizing predefined Helm charts provided by Helm itself. However, in this blog post, we delve deeper by creating a custom Helm chart tailored specifically for a frontend application of a shoe store. This will enable us to gain a more comprehensive understanding of Helm's capabilities, and how we can leverage it to deploy complex applications effectively. Before proceeding with this blog, we would suggest reading the Part 1 Part 1: Mastering Helm: A Comprehensive Guide to Kubernetes Deployment
Prerequisites In the last blog, we demonstrated the installation of Helm, so we hope you have:
- An up-and-running Kubernetes cluster
- Helm installed
Step 1: Clone the Frontend-Application Let’s clone the below GitHub repo: https://github.com/SneakyFit-Full-Stack-Web-Application-v1/FrontEnd_SenakyFit.git . If you have VS Code installed, it would be great. We are using VS Code for this demonstration.
Step 2: Build The Docker Image and Push it to Your Docker Hub Account. Move inside your repo, and run the following command sequentially: 1. To build the docker image docker build -t // docker build -t frontend-2 2. Tag the image so you can push it to your hub account docker tag / // docker tag frontend-2 rishi93rich/frontend-2 3. Login to DockerHub docker login → it will ask for a username and password. Enter your values and hit enter You can see the login success message. 4. Push the image, docker push 5. Go to your dockerhub and cross check if the image is there or not.
Step 3: Create The Image Pull Secret Since our application image is stored within a private Docker Hub registry, authentication is required for pulling images. To facilitate this, we create a Kubernetes secret that contains the necessary credentials. This secret can then be utilized by our Kubernetes cluster for pulling images securely from the private registry. Use the below command to create a secret: kubectl create secret docker-registry docker-hub-secret --docker-email= --docker-username= --docker-password= --docker-server=https://index.docker.io/v1/ Check your secret is created or not, kubectl get secret docker-hub-secret
Step 4: Create Helm Chart Now let's create the Helm Chart Kubernetes for our application, move inside your repo and run the below command: helm create // helm create frontend-chart This will create the new directory in your repo, and check the structure. This structure was explained in the Part 1 blog.
Step 5: Passing Values in Helm Chart Go to your Helm chart, open the values.yml and edit the following fields:
- image-name
- image-tag
Need help with your cloud infrastructure?
Our experts at CloudZenia are ready to help you build, scale, and secure your setup.
Book a Free Consultation- Container-port
- Service-type
- ImagePullSecrets
Step 6: Install Your Helm Chart on a Kubernetes Cluster Now everything is ready, let’s install your Helm chart; run the below commands sequentially: Cd helm package . → this will create a chart-zip file. helm install → this will deploy your chart to the Kubernetes cluster. helm list → this will list all the releases present in your cluster installed through Helm.
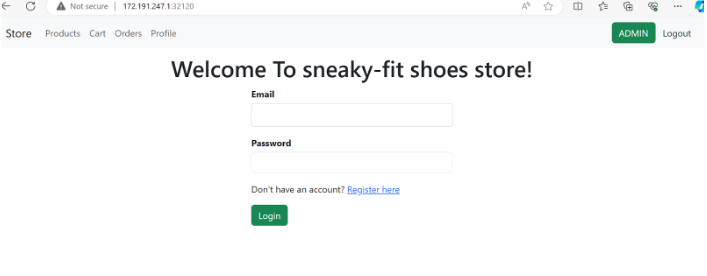
Step 7: Access The Application
- Run the kubectl get svc command and check the node port.
- Open the node port in SG and copy the external IP of the node using the below command: Kubectl get nodes Access the Application URL , http://:
Step 8: Cleanup Run the below command to delete your release, helm uninstall
Conclusion In conclusion, mastering the creation and customization of Helm charts in Kubernetes, along with the ability to pull images from private registries, empowers us to efficiently manage and deploy complex applications in Kubernetes environments. Through practice and experimentation, we continue to refine our expertise and enhance our capabilities in the dynamic world of cloud-native development . Now that you are familiar with what a Helm chart is and how to create a custom Helm chart, we encourage you to try it on your own. Happy learning! Visit CloudZenia for more such do-it-yourself and informational blogs or reach out to us for consultations and cloud computing knowledge.

Rushikesh Ghate Linkedin Apr 25, 2024
Filed under