
Today, we're deploying our GitHub code using GitHub Actions with OpenID Connect (OIDC). OpenID Connect (OIDC) provides an extra layer of protection. It allows GitHub Actions to assume an IAM role in AWS directly, eliminating the need to store long-term credentials. It's a way to give users access to AWS resources without having to manage their credentials directly. Instead of storing usernames and passwords, AWS OIDC relies on a trusted third party to authenticate users. This reduces the risk of credential theft and simplifies the management of access to your AWS resources.

Security Have you ever wondered how you can securely manage access to your AWS resources without Access keys and Secret Keys? OpenID Connect AWS might sound like a complex term, but it's actually a straightforward concept once you break it down. Let's implement it step by step.
Step 1: Creating an OIDC Provider for GitHub
- Open the IAM Console: Log in to your AWS Management Console and navigate to the IAM (Identity and Access Management) service.
- Access Identity Providers: In the left navigation menu, click on "Identity providers."
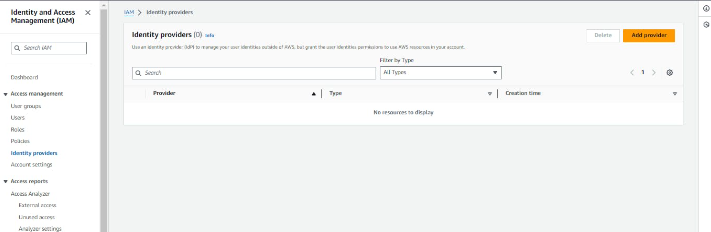
• Add a New Provider: In the Identity providers pane, click on "Add provider."
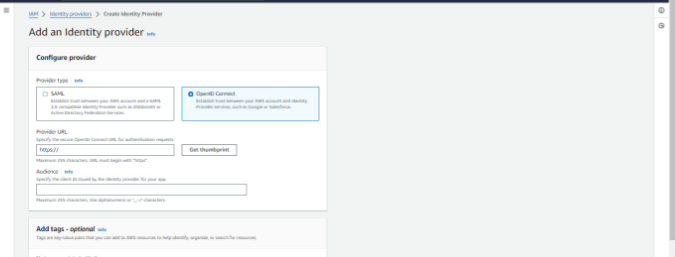
- Select Provider Type: For the provider type, choose "OpenID Connect."
- Enter Provider URL: For the Provider URL, enter the GitHub OIDC IdP URL: https://token.actions.githubusercontent.com.
- Get Thumbprint: Click on "Get thumbprint" to verify the server certificate of your IdP. For more information on OIDC thumbprints, refer to the AWS documentation on Obtaining the thumbprint for an OpenID Connect Identity Provider.
- Specify Audience: For the Audience, enter sts.amazonaws.com. This allows the AWS Security Token Service (AWS STS) API to be called by this IdP.
Need help with your cloud infrastructure?
Our experts at CloudZenia are ready to help you build, scale, and secure your setup.
Book a Free Consultation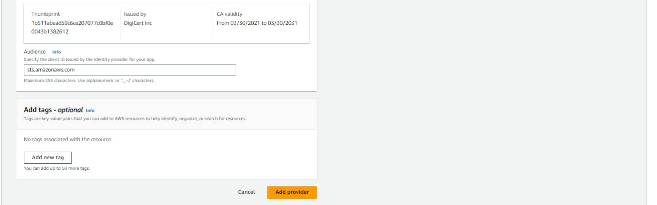
Step 2: Creating an IAM Role and Scope the Trust Policy
- Create Role: On the Create role page, "Web identity" should be already selected as the trusted entity, and the Identity provider field should be populated with your IdP. In the Audience list, select sts.amazonaws.com, and then click "Next."
• Set Permissions: On the Permissions page, click "Next." You can add permissions as needed.
- Add Tags (Optional): On the Tags page, you can add tags to this new role, and then click "Next: Review."
- Review and Create Role: On the Create role page, enter a role name, such as "GitHubAction-AssumeRoleWithAction." Optionally, add a description. Click "Create role" to finalize the creation of the role.
Trust Relationship Policy Ensure that the trust relationship policy for the IAM role looks like this: { "Version": "2012-10-17", "Statement": [ { "Effect": "Allow", "Principal": { "Federated": "arn:aws:iam::123456789:oidc-provider/token.actions.githubusercontent.com" }, "Action": "sts:AssumeRoleWithWebIdentity", "Condition": { "StringEquals": { "token.actions.githubusercontent.com:aud": "sts.amazonaws.com" } } By following these steps, you'll have set up an OIDC provider for GitHub and created an IAM role that can be assumed by GitHub Actions. This setup enhances the security of AWS resources by leveraging the identity federation between GitHub and AWS.
Step 2: Create GitHub Actions Workflow With our IAM role ready, we proceed to our GitHub repository and seamlessly integrate the OIDC step into our GitHub Actions workflow as follows: jobs deploy: permissions: id-token: write contents: read steps: - name: Configure AWS Credentials uses: aws-actions/configure-aws-credentials@v1 with: role-to-assume: arn:aws:iam::123456789012:role/MyGitHubActionsRole aws-region: us-east-1 This setup will allow GitHub action to use AWS resources without an access key and secret key. Now the final step is to test the setup and how is it working!
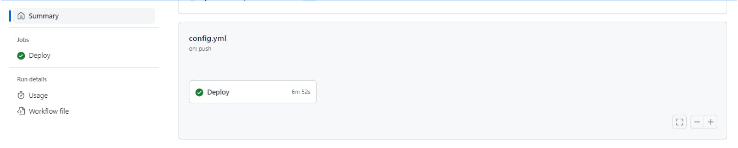
Step 3: Deploy GitHub Code on AWS Finally, we triggered the GitHub Action CI/CD pipeline, and it successfully deployed our GitHub code to AWS, using the OpenID Connect flow. This integration worked flawlessly.
Success in Integrating AWS OIDC with GitHub Actions In this article, we show step by step how to create an OIDC provider, attach an IAM role with it and integrate it with GitHub Action deployment. Following these steps, you can now easily create a trusted way to provide access to your AWS resources with the help of GitHub integration, using the OpenID Connect flow. We hope this article has helped you. For more such informational and do-it-yourself blogs, visit our website CloudZenia . Happy Learning!

Arun Chandel Linkedin Apr 02, 2024
Filed under