
Introduction
In the fast-paced world of technology, ensuring optimal performance and reliability of applications is crucial for businesses. This blog post aims to delve into the features and capabilities of New Relic and integrate it with AWS, shedding light on how it revolutionizes the way organizations monitor and optimize their applications.
Understanding NewRelic
New Relic is a comprehensive APM tool designed to provide insights into the performance and health of applications. It goes beyond traditional monitoring by offering a holistic view of the entire software stack – from infrastructure to code. By collecting and analyzing data in real-time, New Relic empowers developers and IT operations teams to identify and address performance issues proactively. NewRelic Documentation
Let's Integrate NewRelic with AWS
- Step-01: Create a Free Tier Account with NewRelic
- SignUp Free
- Click on the above link and create your NewRelic account.
Step-02: Create an IAM Role and Policy in your AWS Account:
- To send your resources metrics or data, you need a dedicated IAM role for the grant you would need to access the 3rd party monitoring services.
- Also, if you need budget info, then you need to create a view budget policy.
- Follow the complete docs for a better understanding of how to integrate NewRelic AWS.
- AWS Integration Guide
• You can see in the above GIF that almost all the AWS services are ready to integrate with NewRelic; you just have to click and add a Role ARN and your AWS account name.
- This is a crucial step when you are pairing both accounts with each other. While creating the Role, select another AWS account and fill in the account ID given in the NewRelic steps.
- For more assistance, check out the below GIF.
Need help with your cloud infrastructure?
Our experts at CloudZenia are ready to help you build, scale, and secure your setup.
Book a Free ConsultationStep-03: Add an IAM Role ARN and account name in NewRelic:
- After Role creation is done, just copy the “IAM Role” ARN and paste it into the last step of integration.
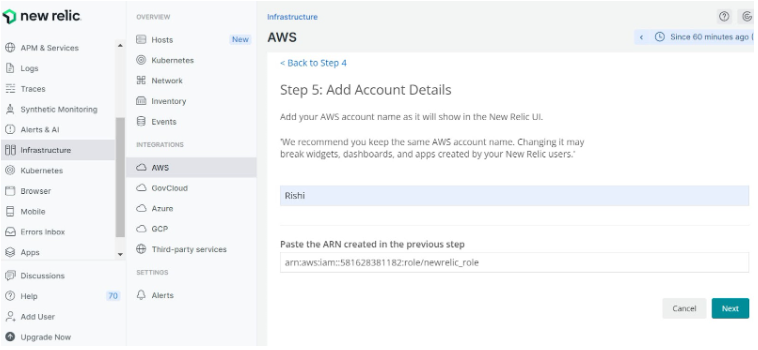
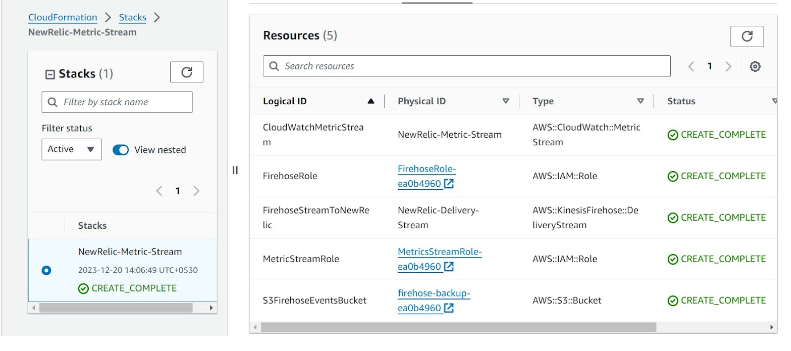
- After filling in mandatory details, click on Next; and then you will be prompted to the next step, which is regarding setting up kinesis and other resources for better data transfer from AWS to NewRelic. Step-04: Create a Cloudformation Stack using the Default Cloudformation Template:
- To smooth the transfer of resources: metrics, data, and logs, we need to set up some other data stream services like kinesis data firehouse/stream.
- Setting up manually takes too long, so we will use Cloudformation the IAC way.
- Check the below GIF, and you are good to go.
- Wait for 10 to 15 minutes till the stack status becomes creation complete, then click on the done option available in the last step of the NewRelic integration page.
Step-04: Monitor Resources in NewRelic UI.
- This is the last step; you just have to log in to your NewRelic login account and go to Infrastructure --> Integration-->AWS.
- And Boom!
Conclusion
In the ever-evolving landscape of technology, NewRelic stands out as a powerful tool for organizations seeking to ensure the optimal performance of their applications. By offering real-time monitoring, end-to-end visibility, and code-level diagnostics, NewRelic empowers teams to deliver exceptional user experiences and respond swiftly to evolving challenges. As businesses continue to rely on digital solutions, NewRelic plays a pivotal role in shaping the future of application performance monitoring. Thanks for reading! For more such informational blogs, visit CloudZenia . Happy Learning!

Ghate Rushikesh Linkedin Jan 04, 2024
Filed under