
Automating your CI/CD pipeline can be tricky sometimes, but not anymore. Here’s a detailed installation of one of the famous automation tools Jenkins to AWS EC2.

Introduction to Jenkins Jenkins is one of the most powerful and famous servers/tools for the automation of CI/CD pipelines. It can be used to create an end-to-end pipeline. From code integration and compilation to testing and deployment, Jenkins can handle it all. Let's understand Jenkins with an example: Suppose you were creating a multi-story building and you want to make sure your building is stable and doesn't fall. Jenkins is like your co-worker who ensures that everything is fine and will also help you add more bricks (CI). Jenkins ensures that everything is working as it should be, all sorts of tests and integrations can be easily handled using Jenkins. There is also support for thousands of plugins that enhance the functionality of Jenkins. It can even generate reports for you and you can send it via email. Jenkins has a lot of features to make a developer's life easy. To get started with Jenkins, let's see how we can install Jenkins on EC2.
How to Install Jenkins on Amazon EC2
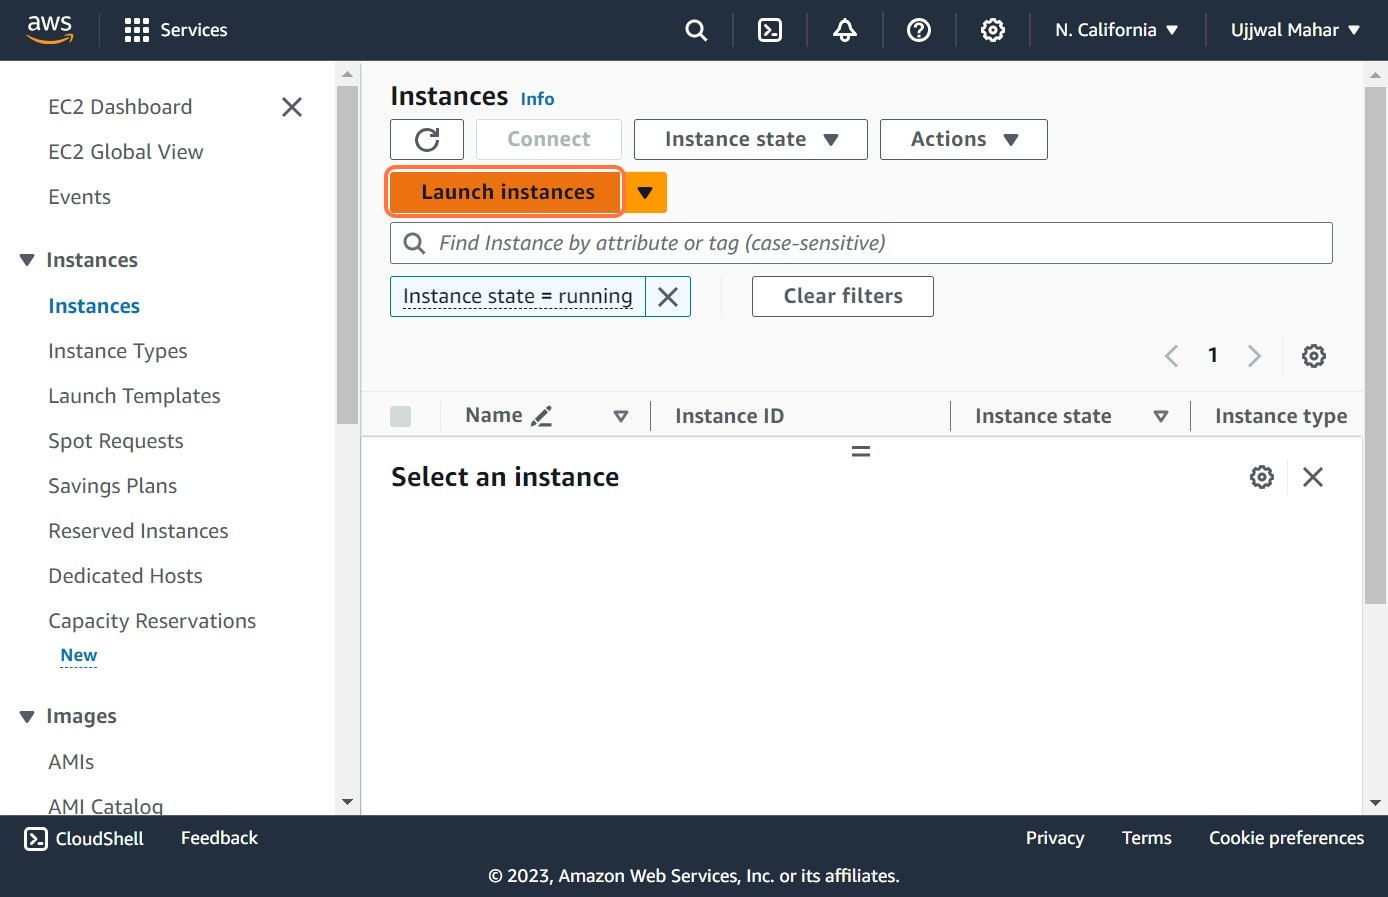
Let’s start by creating our EC2 instance, where we will run our Jenkins Server. Follow the steps to create your EC2 instance : Step 1: Click on Launch Instances.
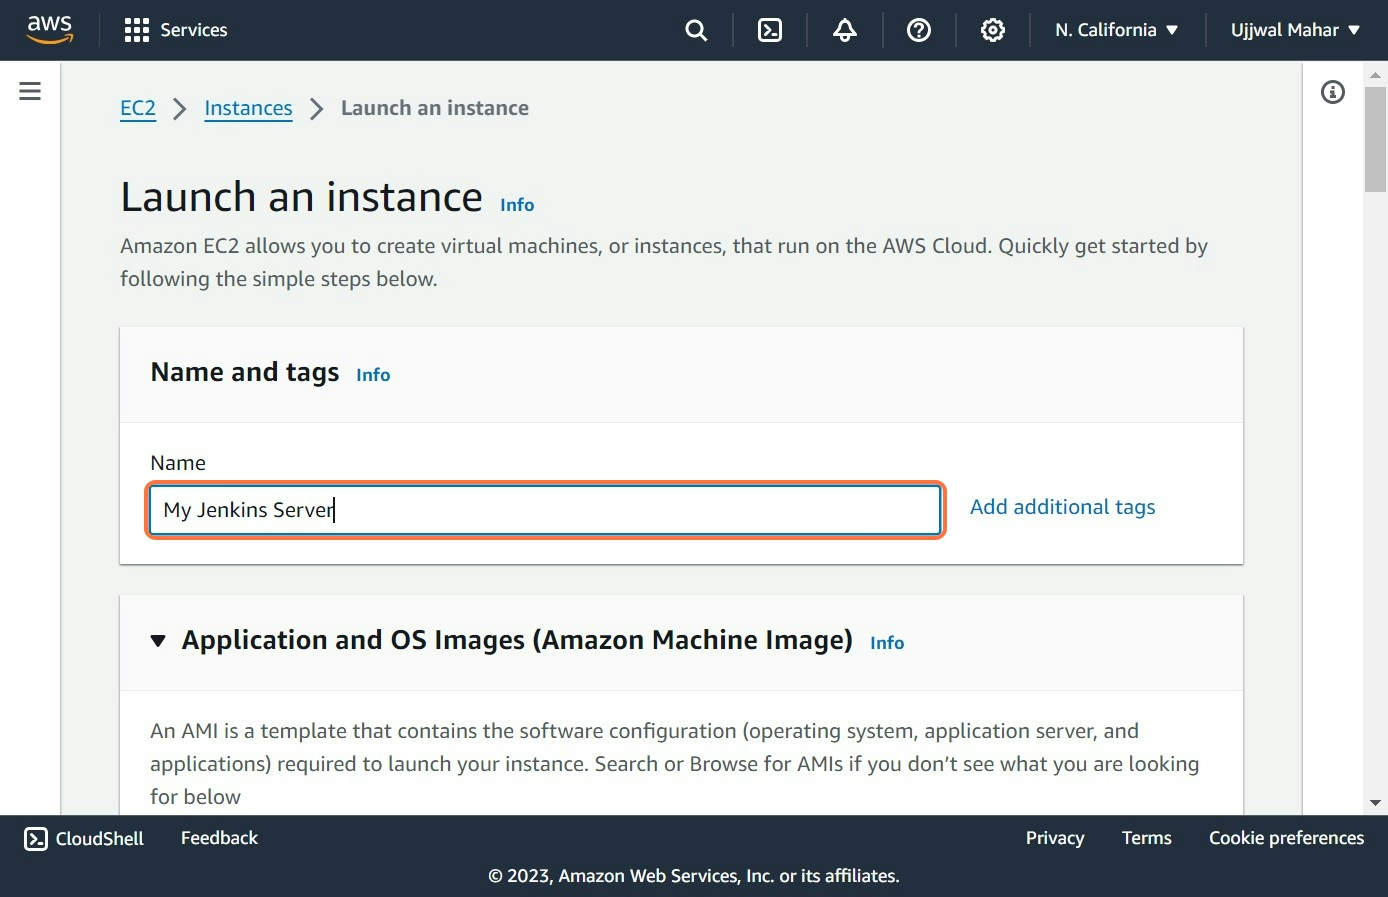
Step 2: Give a name to your instance.
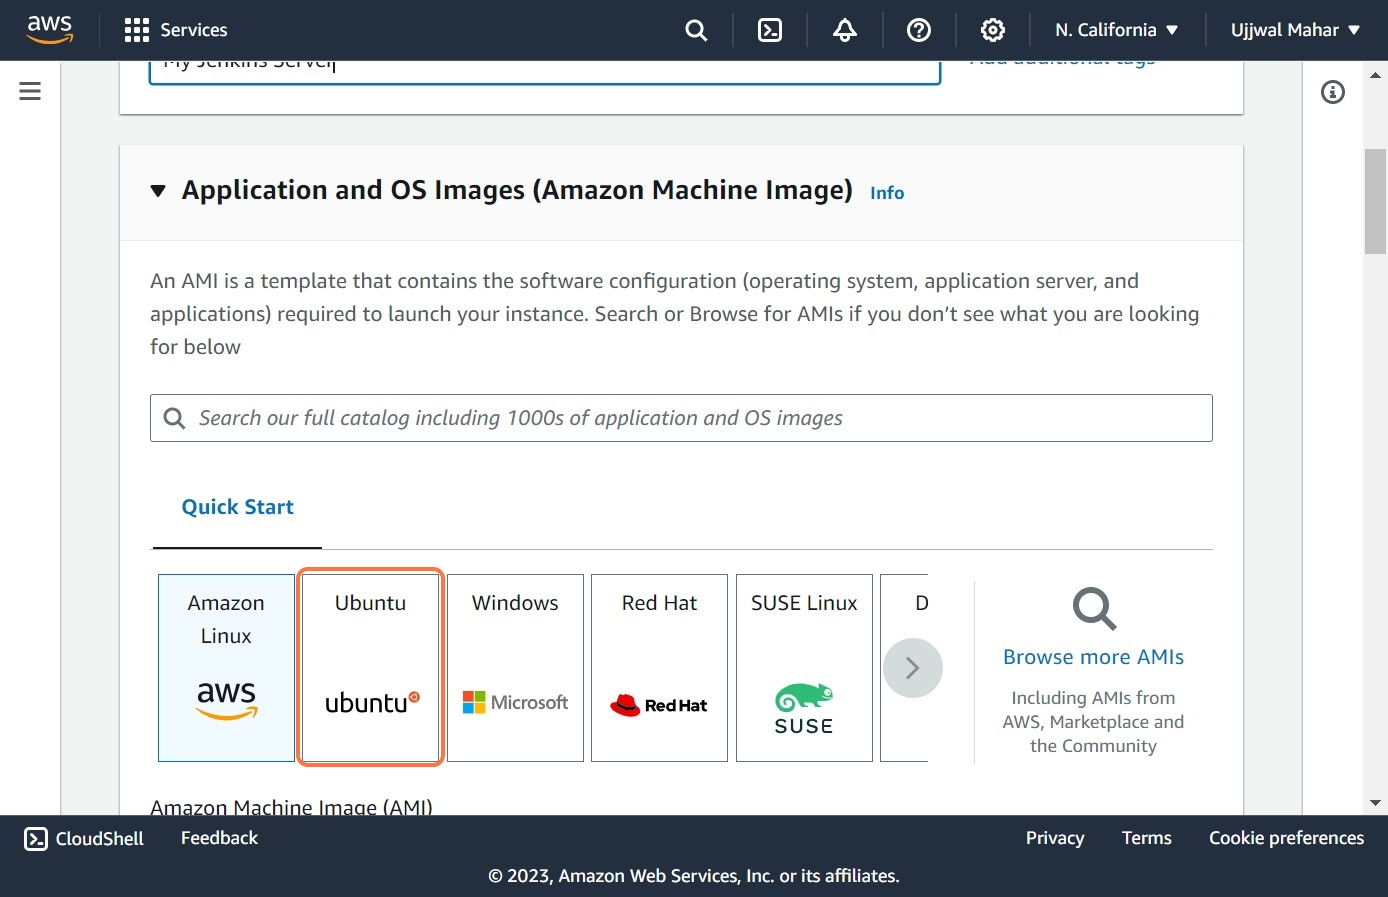
Step 3: Select the machine; we will be using Ubuntu for now.
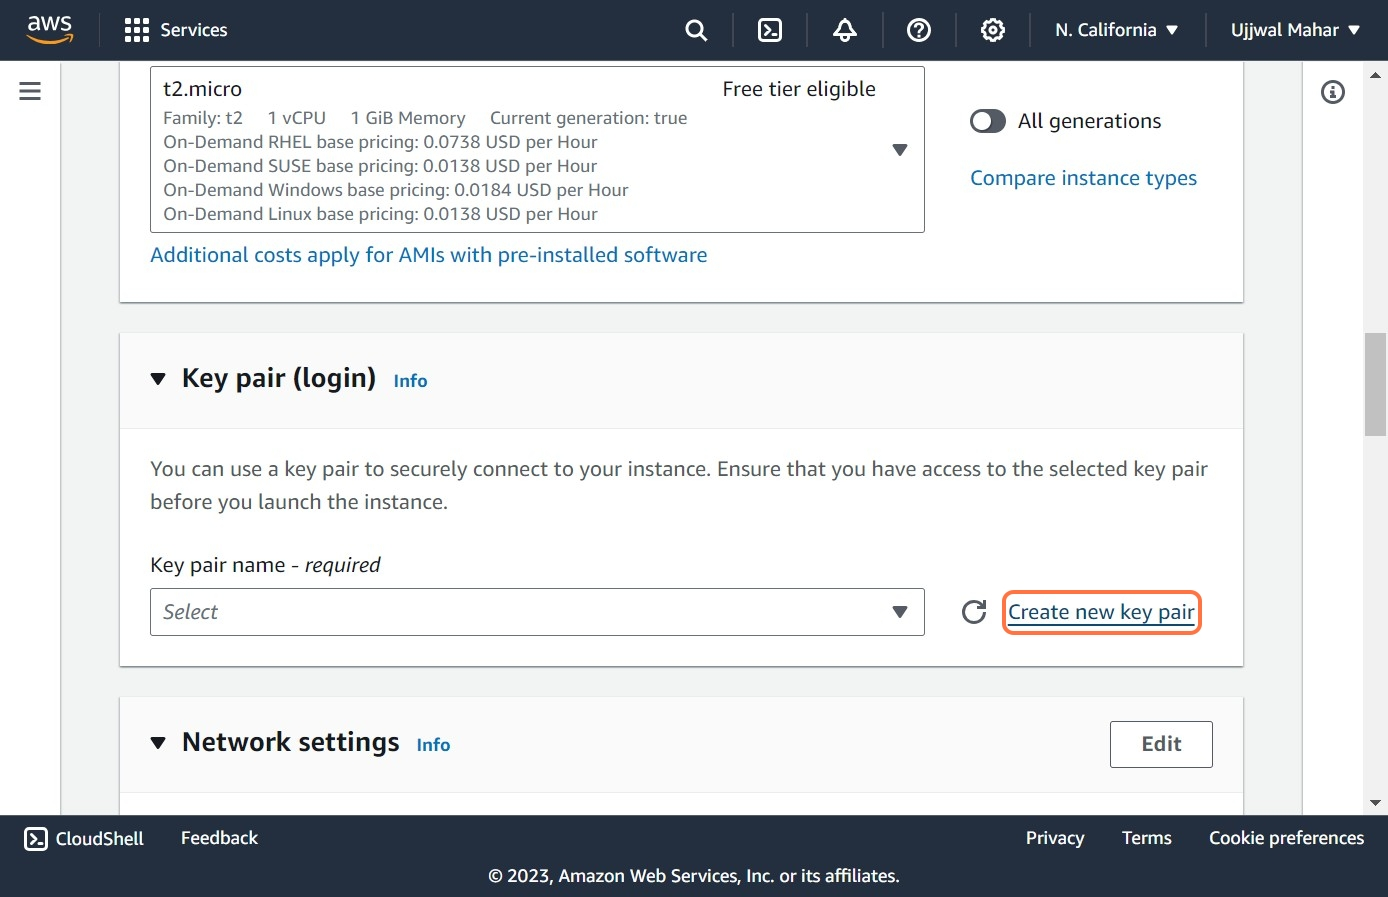
Step 4: Create your Key Pair, or you can also choose the existing one.
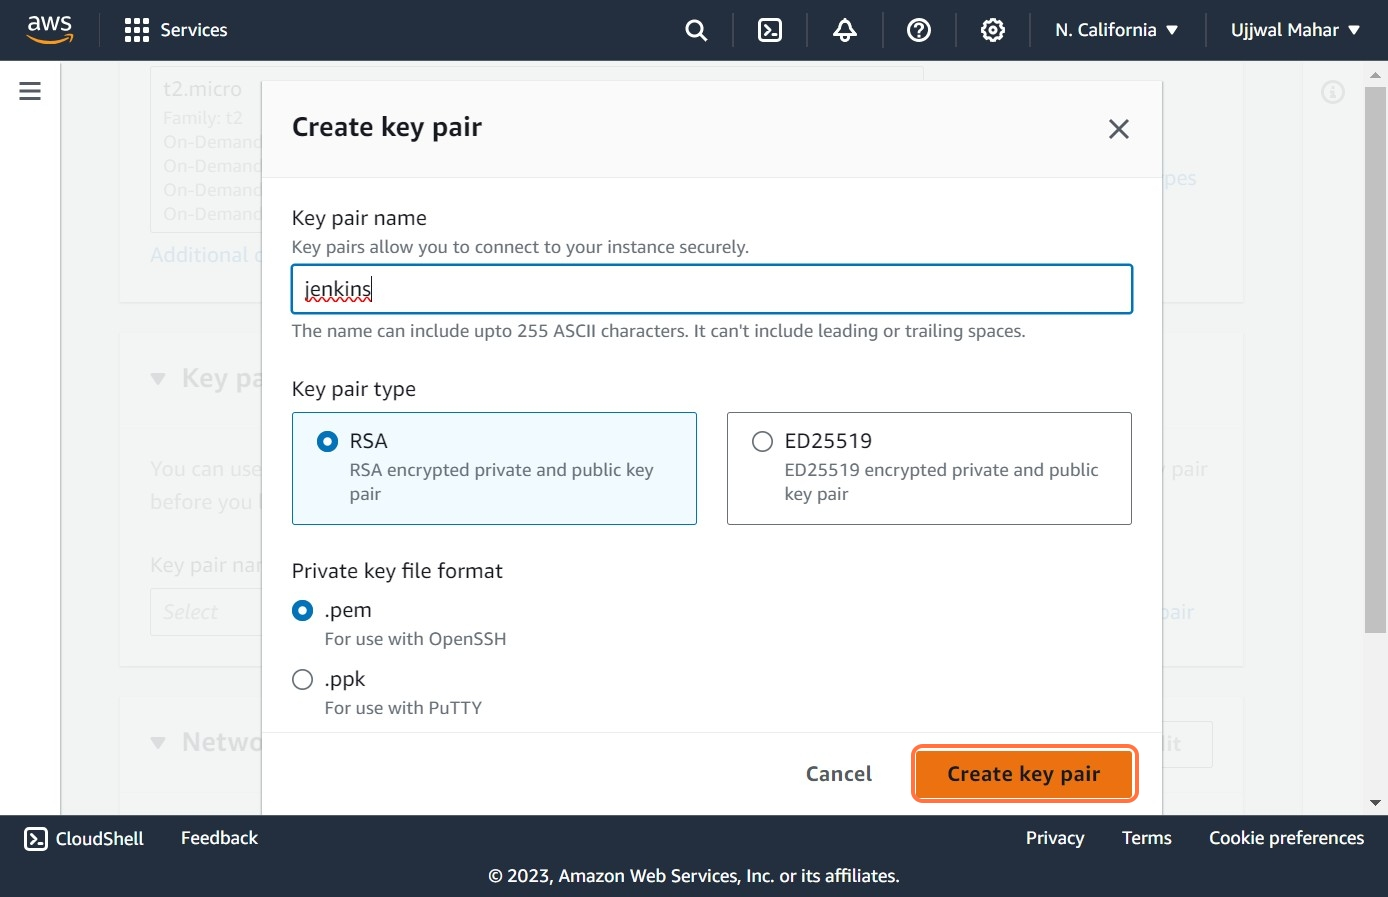
Step 5: Create Key Pair Name, Type and Private Key file format.
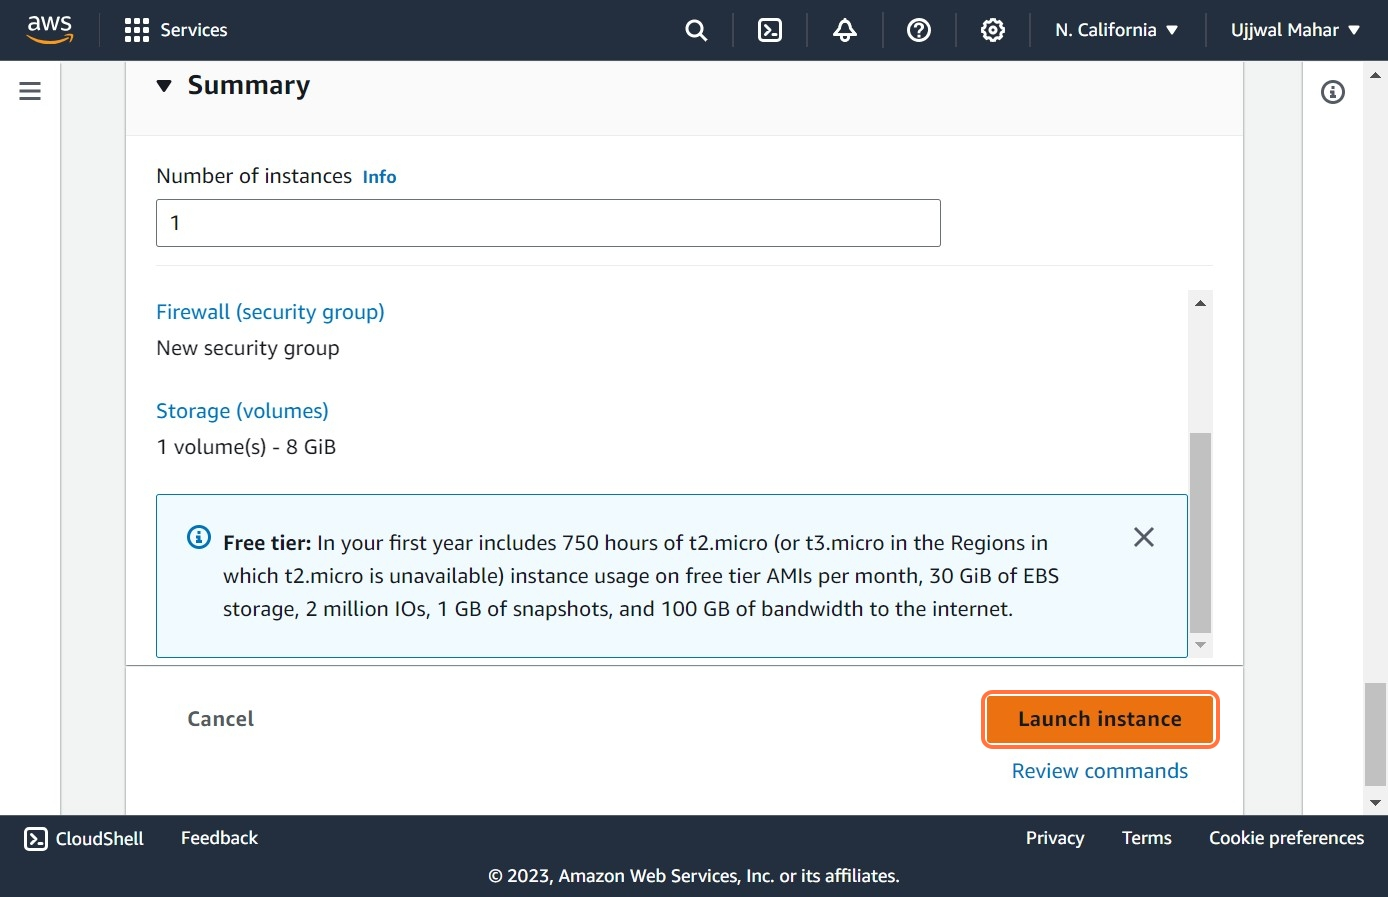
Step 6: Launch the instance.
Once you have created your EC2 instance, we need to change our inbound rules. By default, the port of Jenkins is 8080; we need to set our inbound rule such that the Jenkins server can access port 8080.
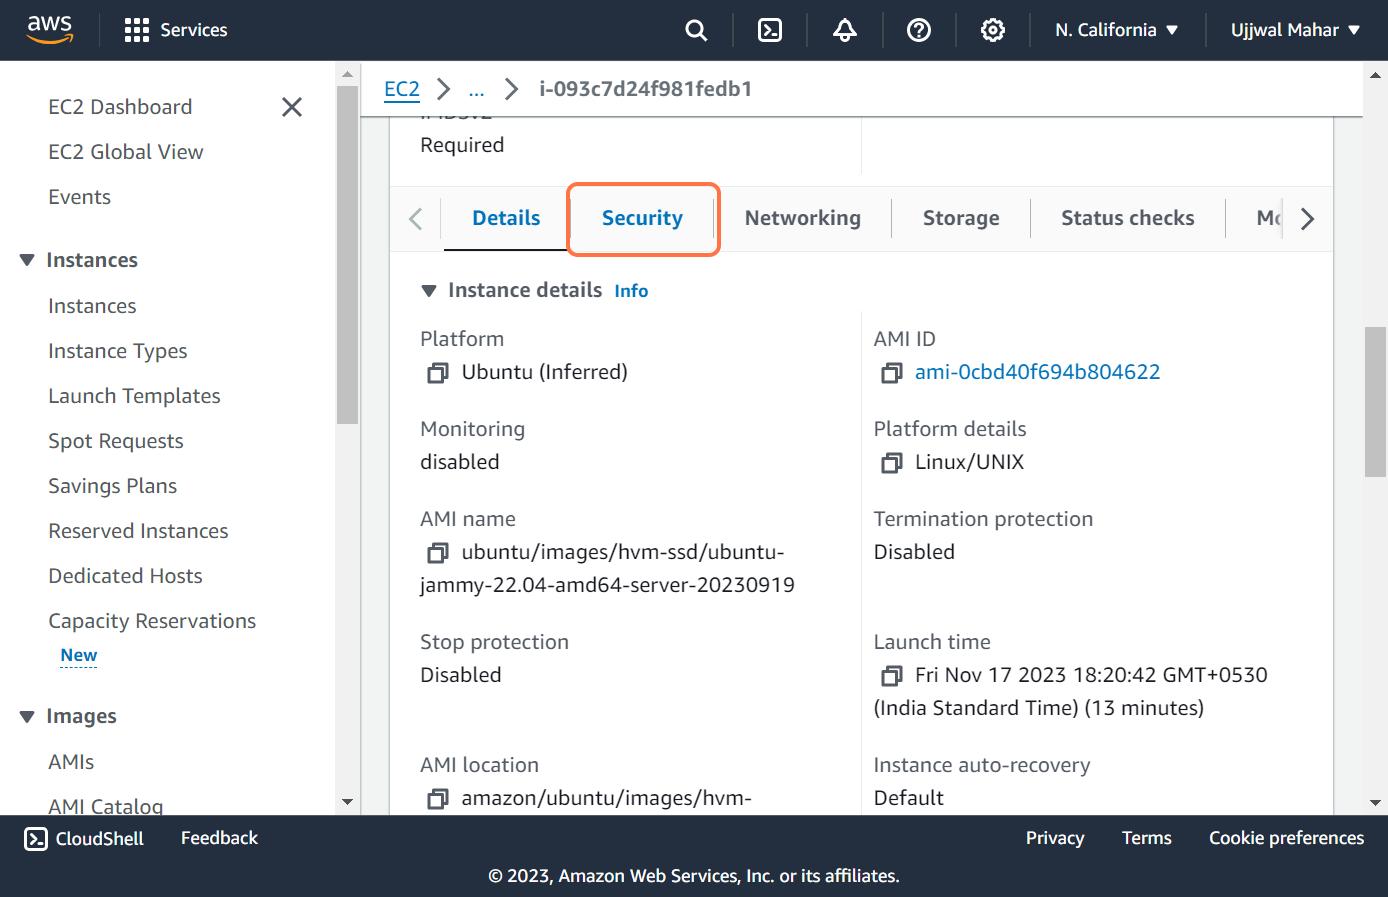
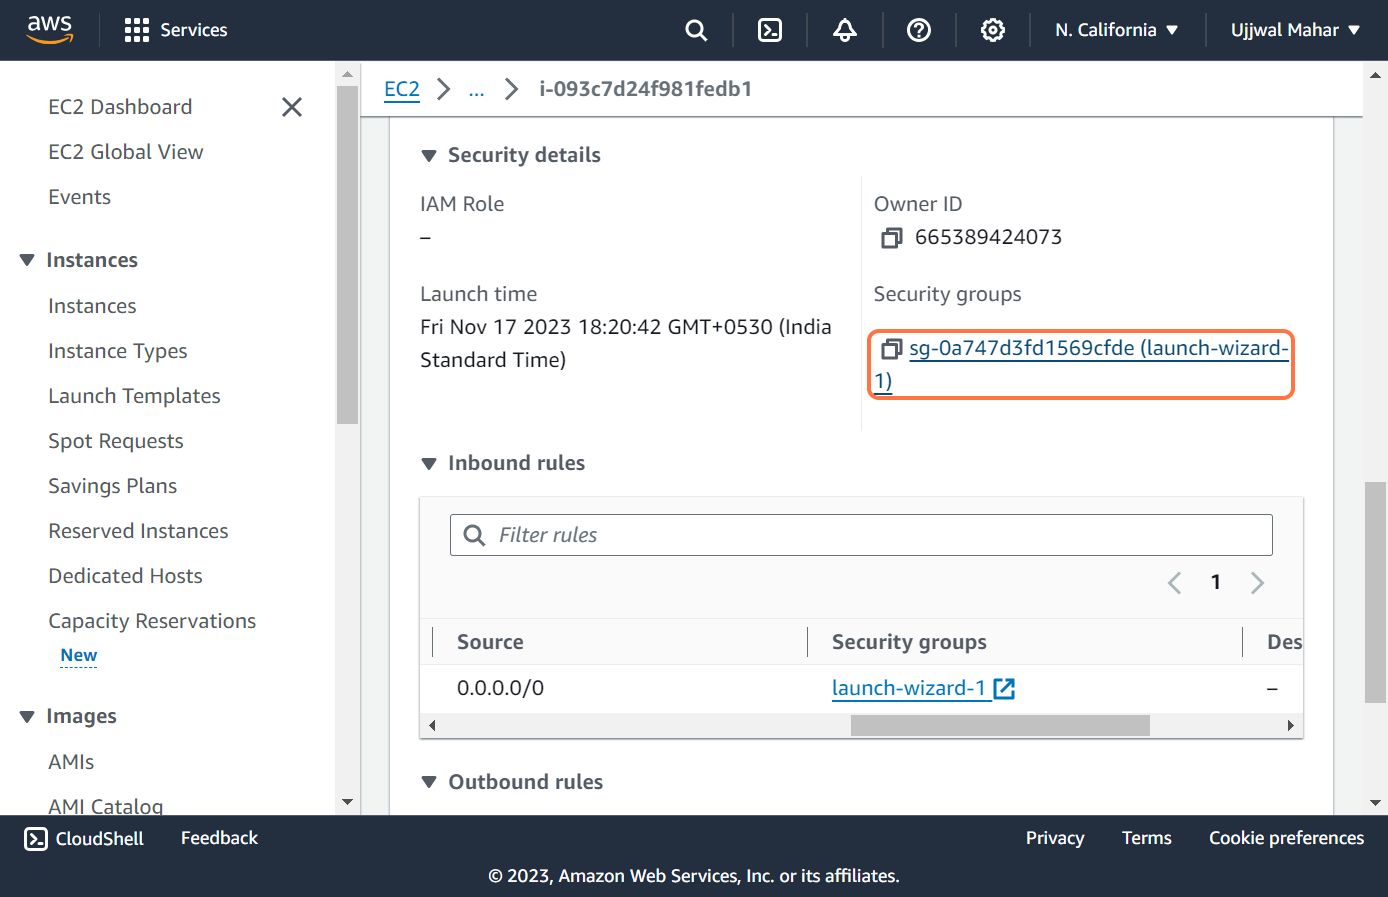
To Configure the inbound rule, follow these steps : Step 1: Go to your EC2 instance, scroll down to where you will find Security and click on Security.
Step 2: Go to the Security Groups Section and click on the security group.
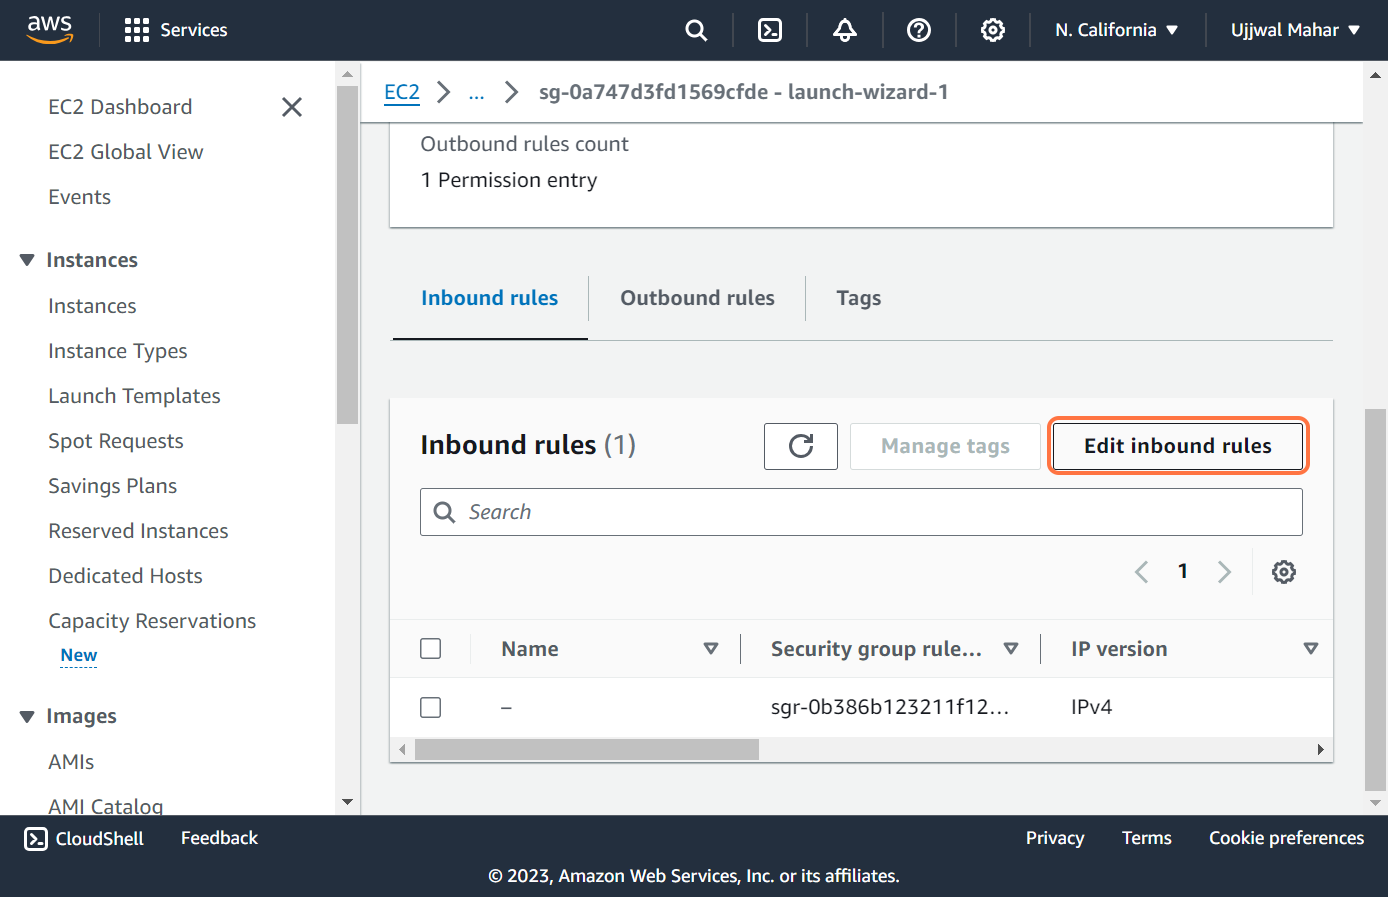
Step 3: You will see the inbound rules, click on Edit inbound rules.
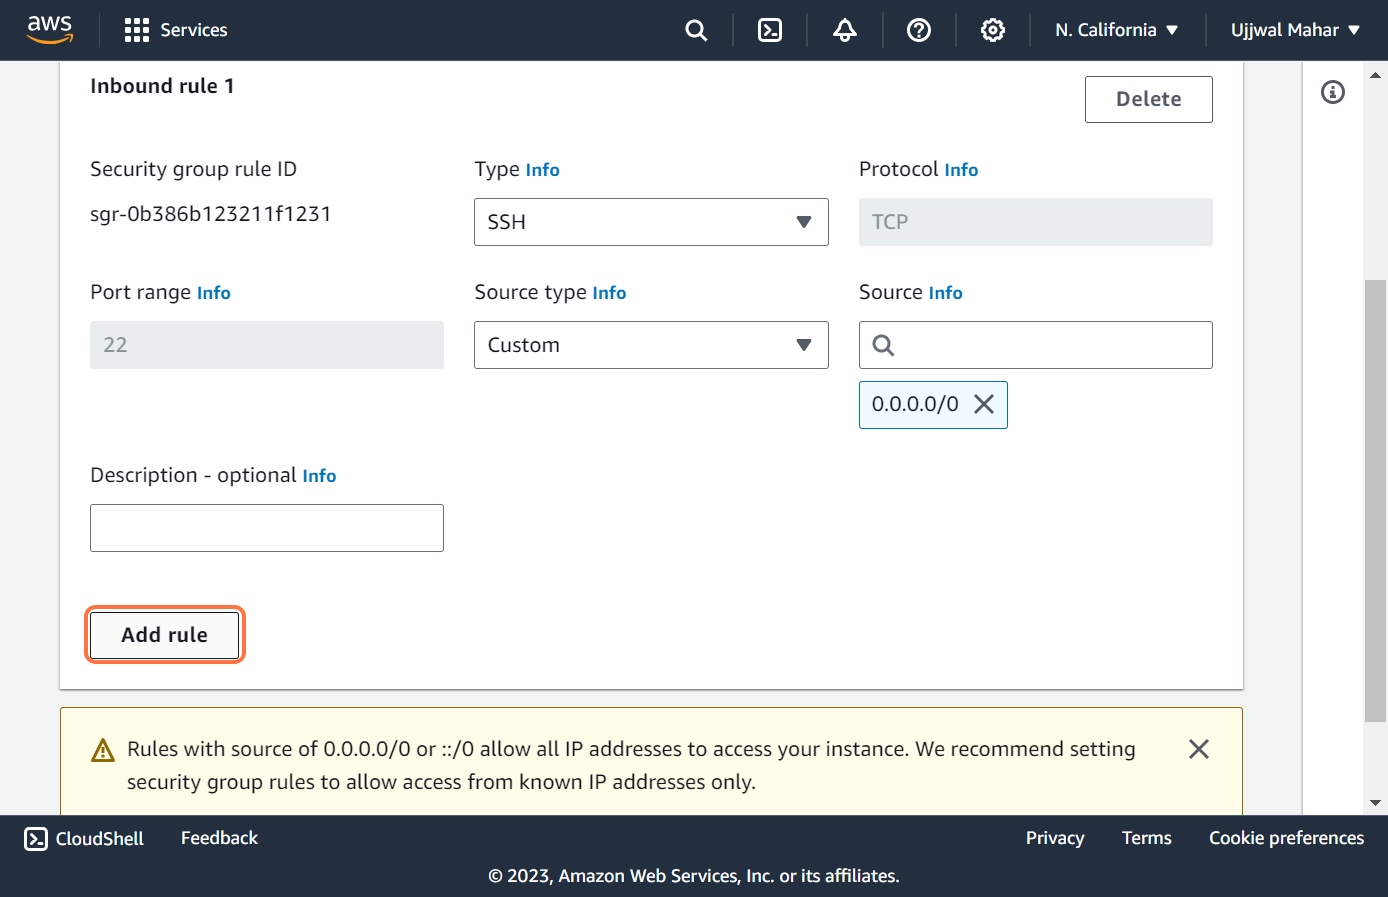
Step 4: We need to Add a rule; click on Add Rule.
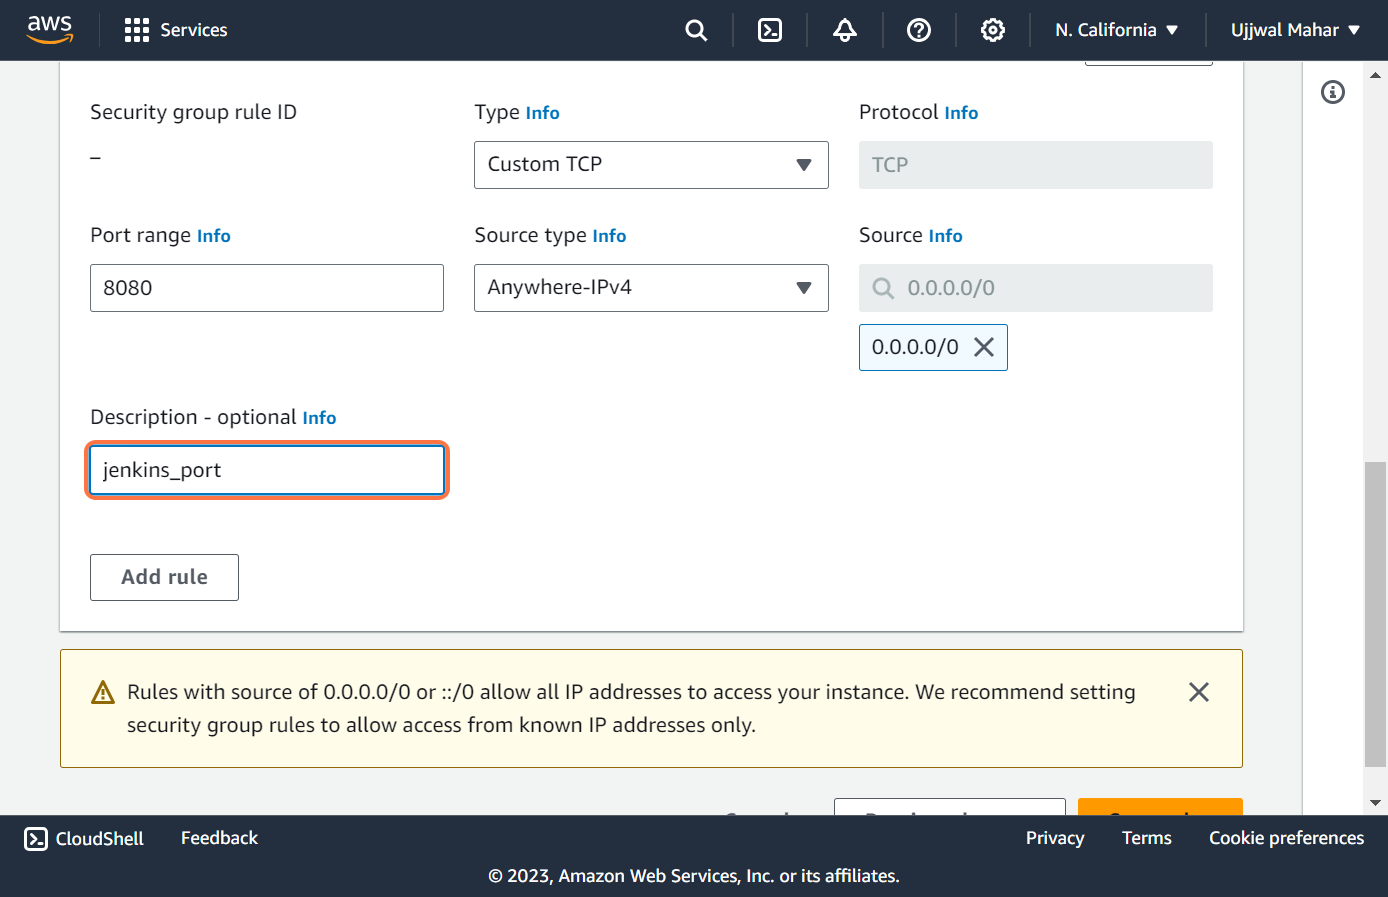
Step 5: Configure your inbound rule to Type Custom TCP, Port range to 8080, Source type to Anywhere-IPv4 and Source to 0.0.0.0/0
Need help with your cloud infrastructure?
Our experts at CloudZenia are ready to help you build, scale, and secure your setup.
Book a Free ConsultationNow, we are all set to install Jenkins to EC2. Connect to your EC2 instance. As Jenkins is written in Java, the only prerequisite is the installation of Java JDK on our EC2. We will be installing Java on EC2 : # First update your ubuntu package sudo apt update -y # Install Java sudo apt install fontconfig openjdk-17-jre # Check if Java is successfully installed java -version Once our Java is successfully installed, we can start the process of installing Jenkins. sudo wget -O /usr/share/keyrings/jenkins-keyring.asc https://pkg.jenkins.io/debian-stable/jenkins.io-2023.key echo deb [signed-by=/usr/share/keyrings/jenkins-keyring.asc] https://pkg.jenkins.io/debian-stable binary/ | sudo tee /etc/apt/sources.list.d/jenkins.list > /dev/null These commands download the Jenkins repository from the official Jenkins website and save it to your system's repository directory. Now, let's install Jenkins on EC2. sudo apt-get install jenkins When the Jenkins installation is done, we need to start the Jenkins server; to start the server, use the following commands. (Make sure you are a root user or use sudo) #This command starts the Jenkins Server sudo systemctl start jenkins # To check the status of Jenkins sudo systemctl status jenkins
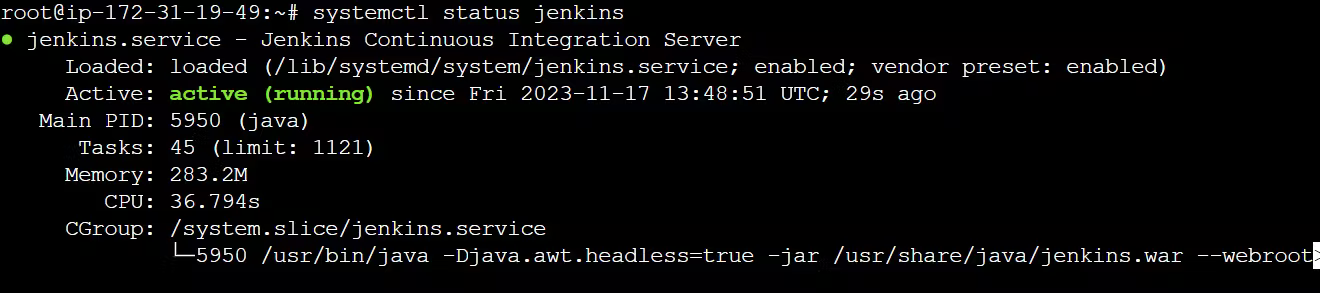
When you see the status as running, that means your Jenkins server is successfully running, and now you can access it. To access Jenkins, use your Public IP with port 8080. public-ip-of-your-instance:8080
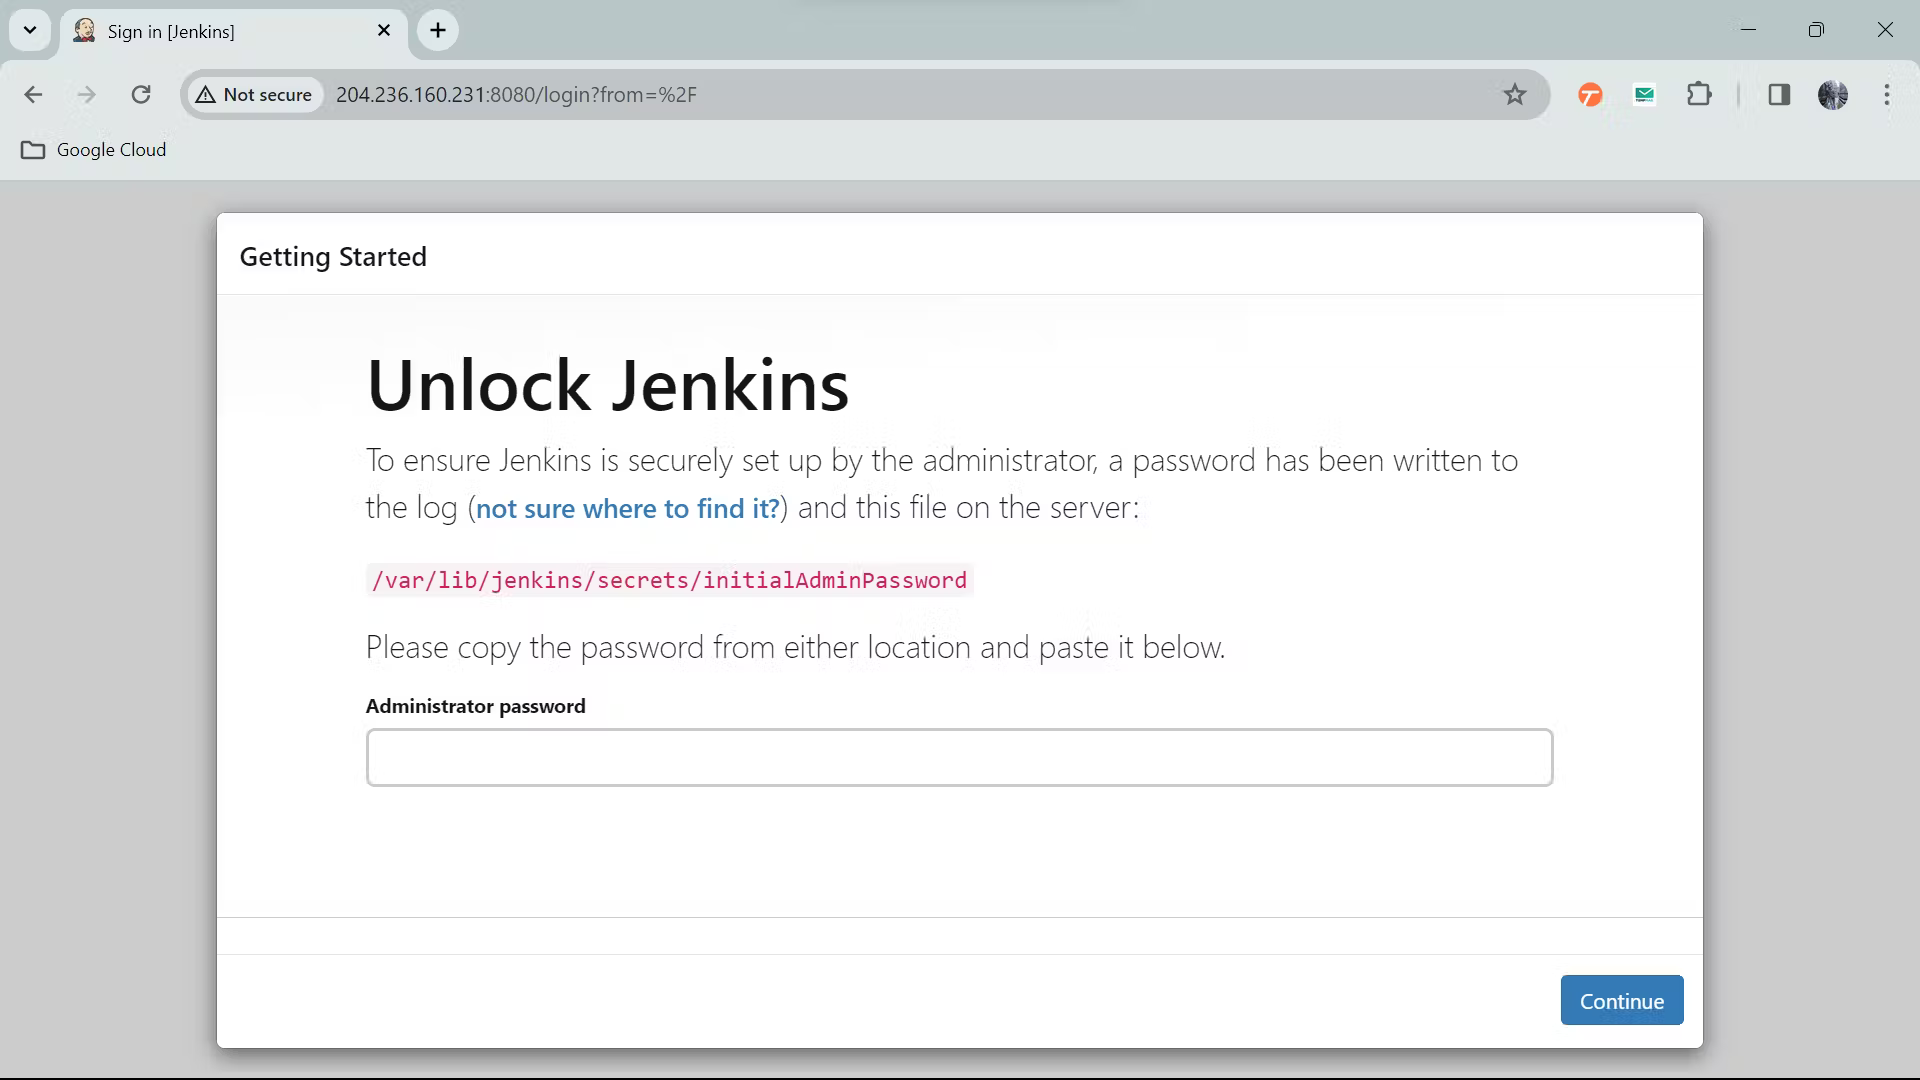
Nice! You have successfully installed Jenkins and accessed its server right from your instance. The next step is to get into Jenkins. If you are on the same page as shown above, then you have to enter your administrator password, and you will find it on the path that is highlighted in red. # Make sure you are root user cat /var/lib/jenkins/secrets/initialAdminPassword

Using this command will give you your Administrator Password. You need to copy and paste it on the Jenkins server.
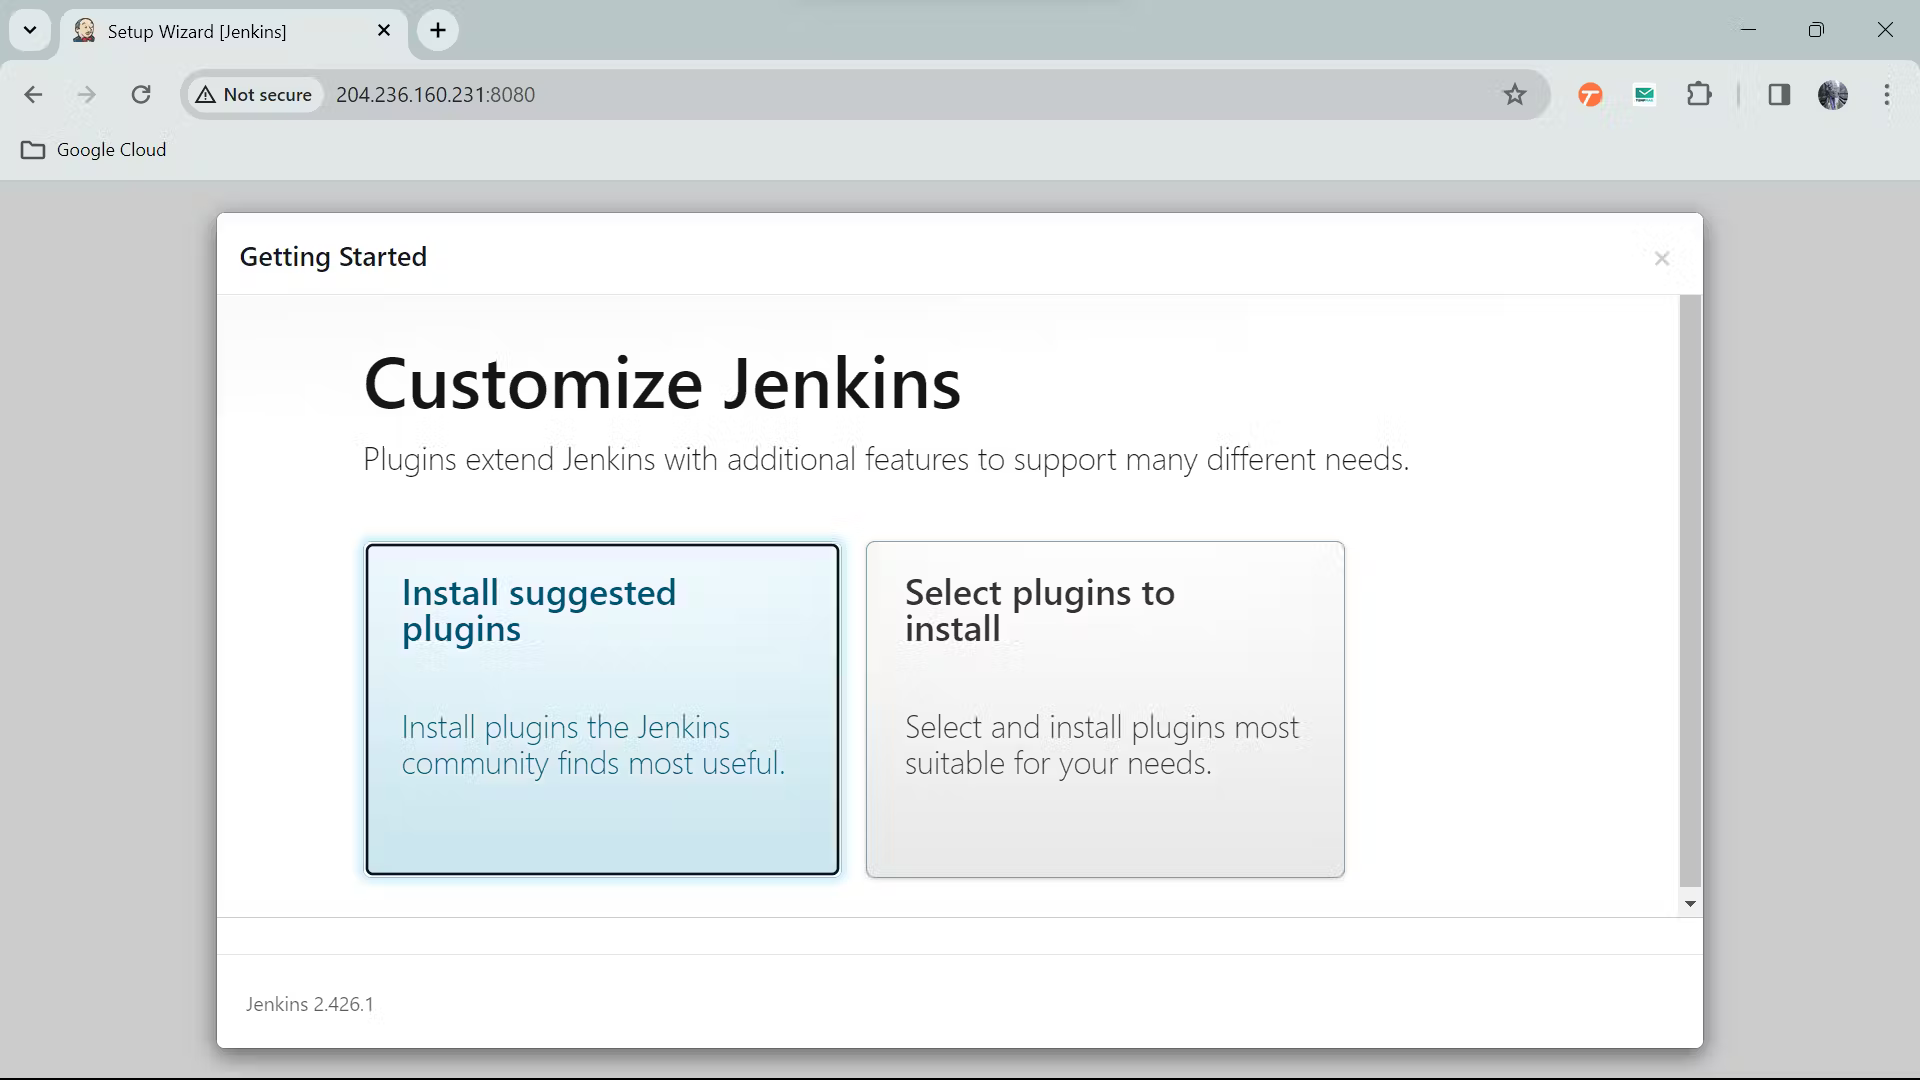
Once you see the above page, it is clear that you have successfully logged in to Jenkins; now you can install the suggested plugins or select plugins to install. When all the plugins are installed, Jenkins will tell you to create the first admin user, or you can skip this part and continue as admin.
Click on “Start using Jenkins”.
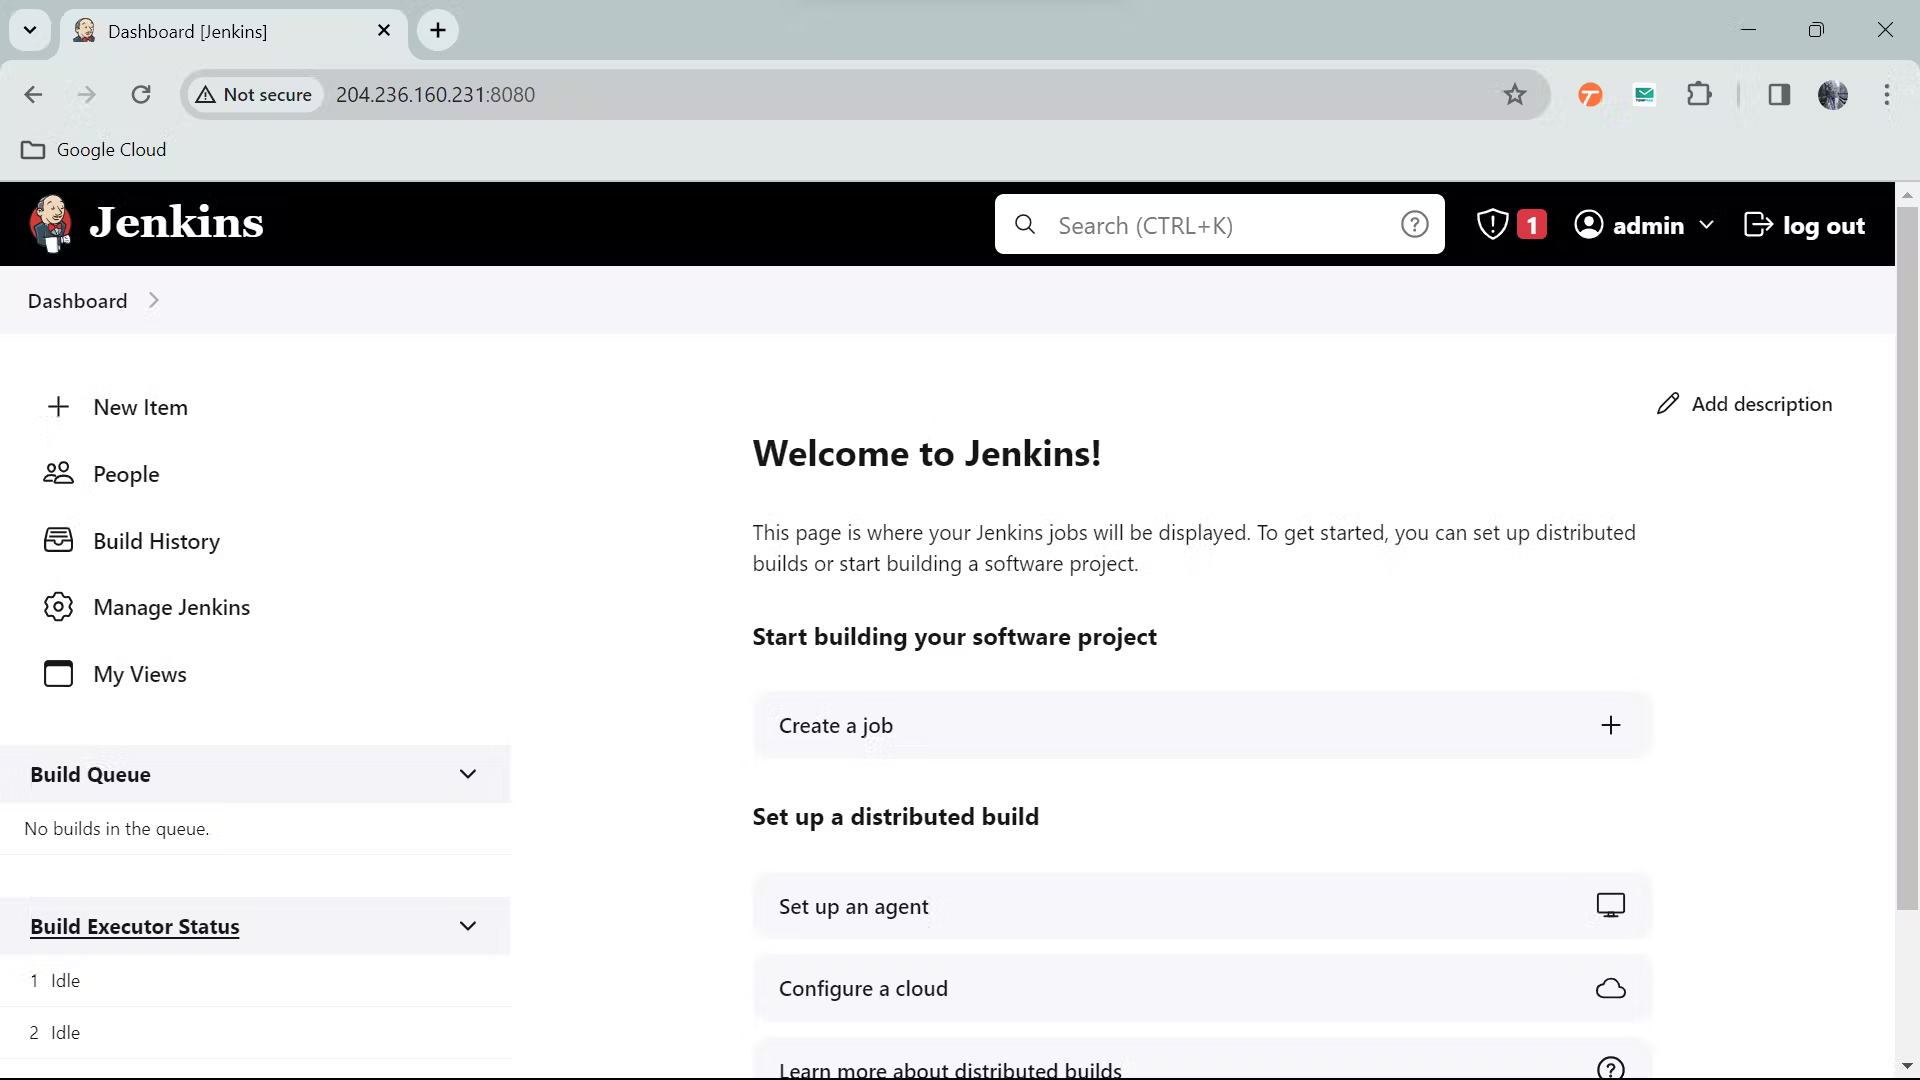
Great! You made it. You are now ready to automate.
Bonus: Blue Ocean Here comes the bonus part. Jenkins has plugins with which we can add different features to our Jenkins, according to our requirements; one such plugin is Blue Ocean. Sometimes, Jenkins dedicated GUI becomes hard for the user when working with sophisticated CI/CD pipelines . Blue Ocean helps to resolve this problem and makes the visualisation of hard-to-understand pipelines easy to understand. Let's see how we can install the Blue Ocean Plugin to our Jenkins Server. Follow these steps to install:
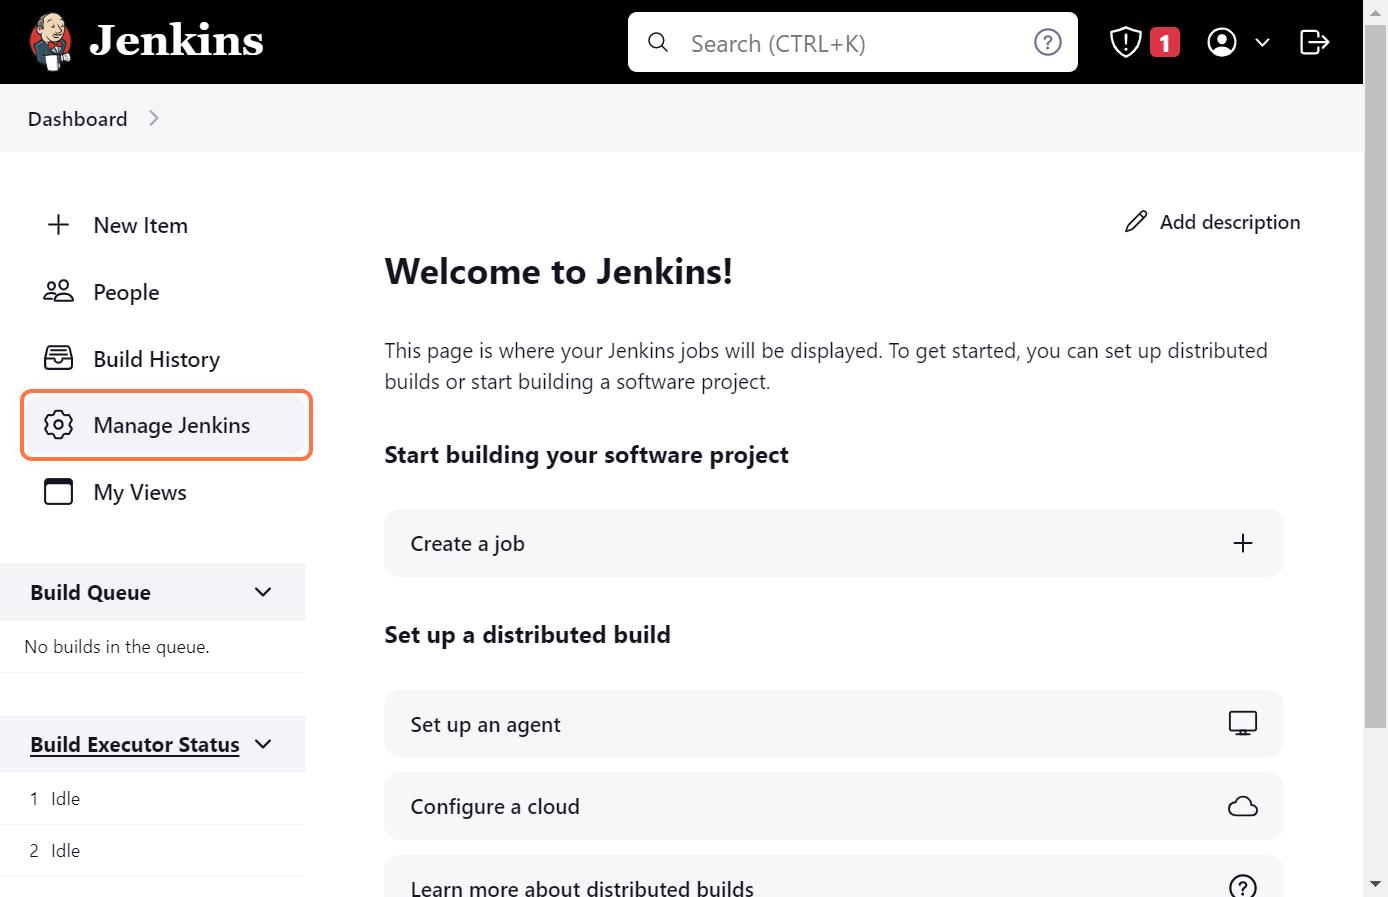
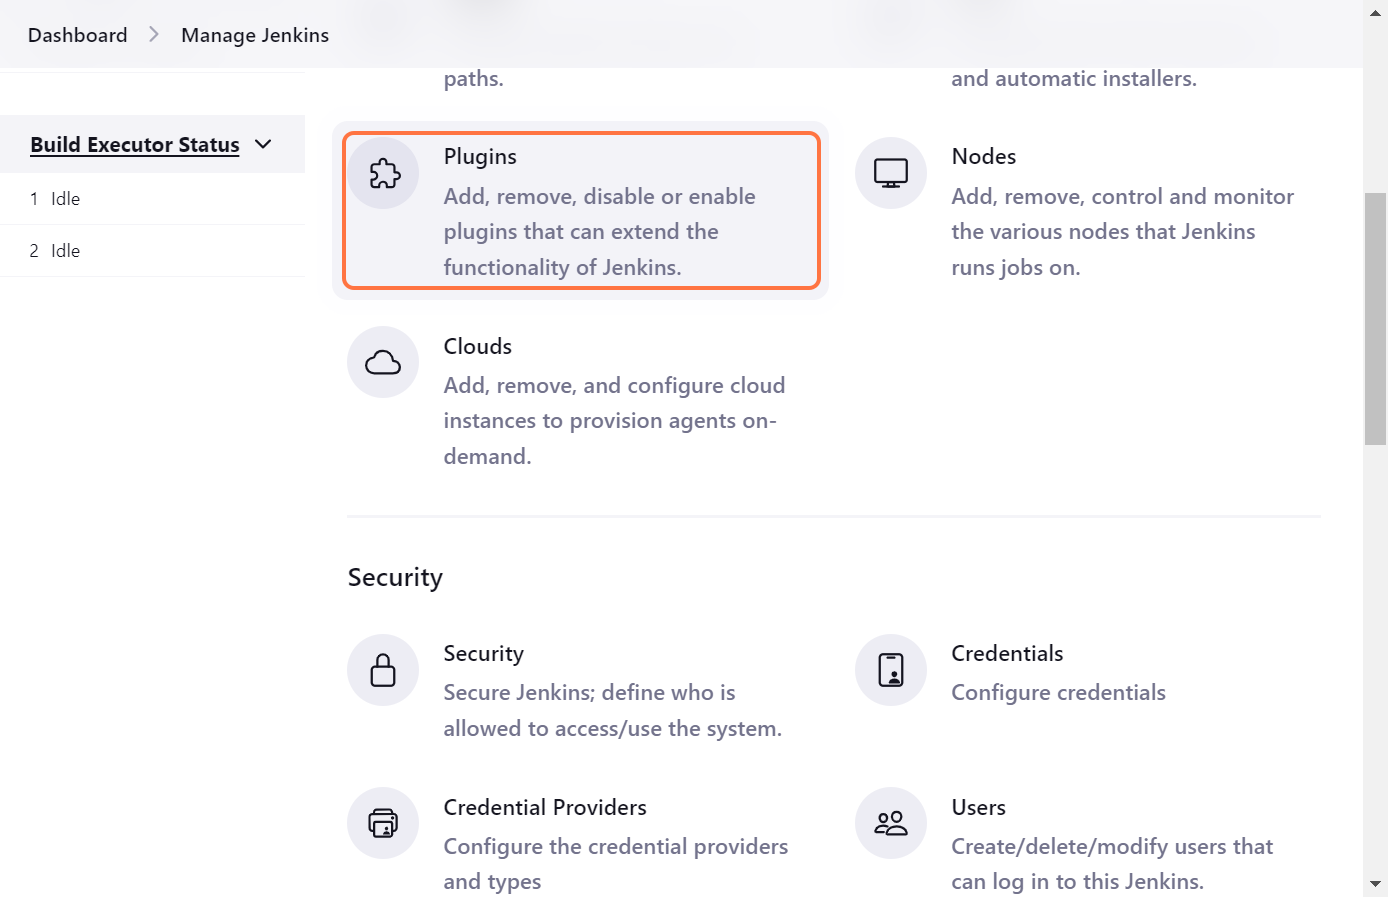
Click on the Plugins, here you will find thousands of Plugins available for Jenkins.
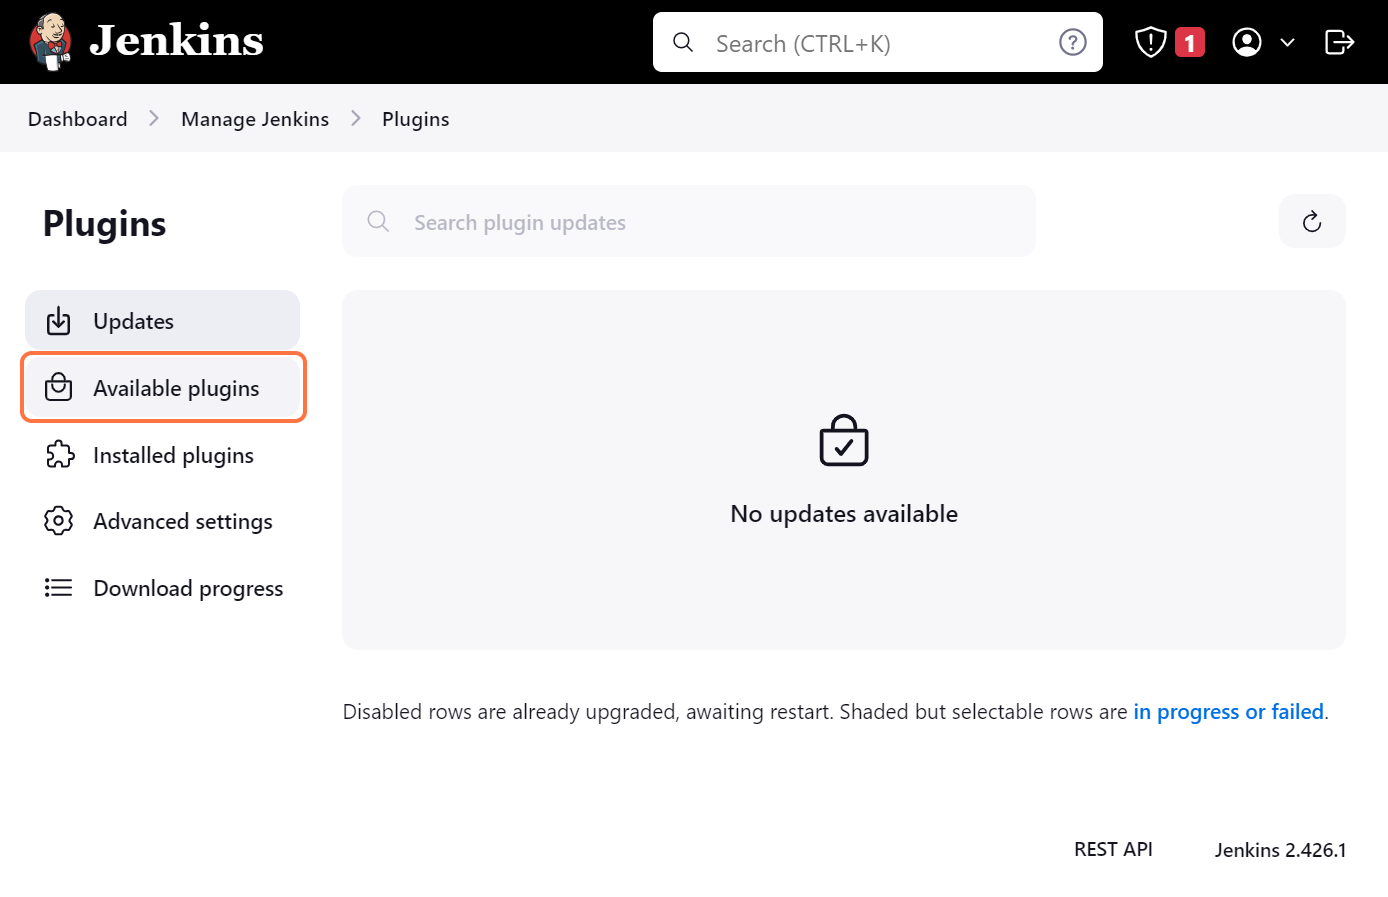
Click on Available Plugin; you can also modify the installed plugins by going to the Installed Plugin Section.
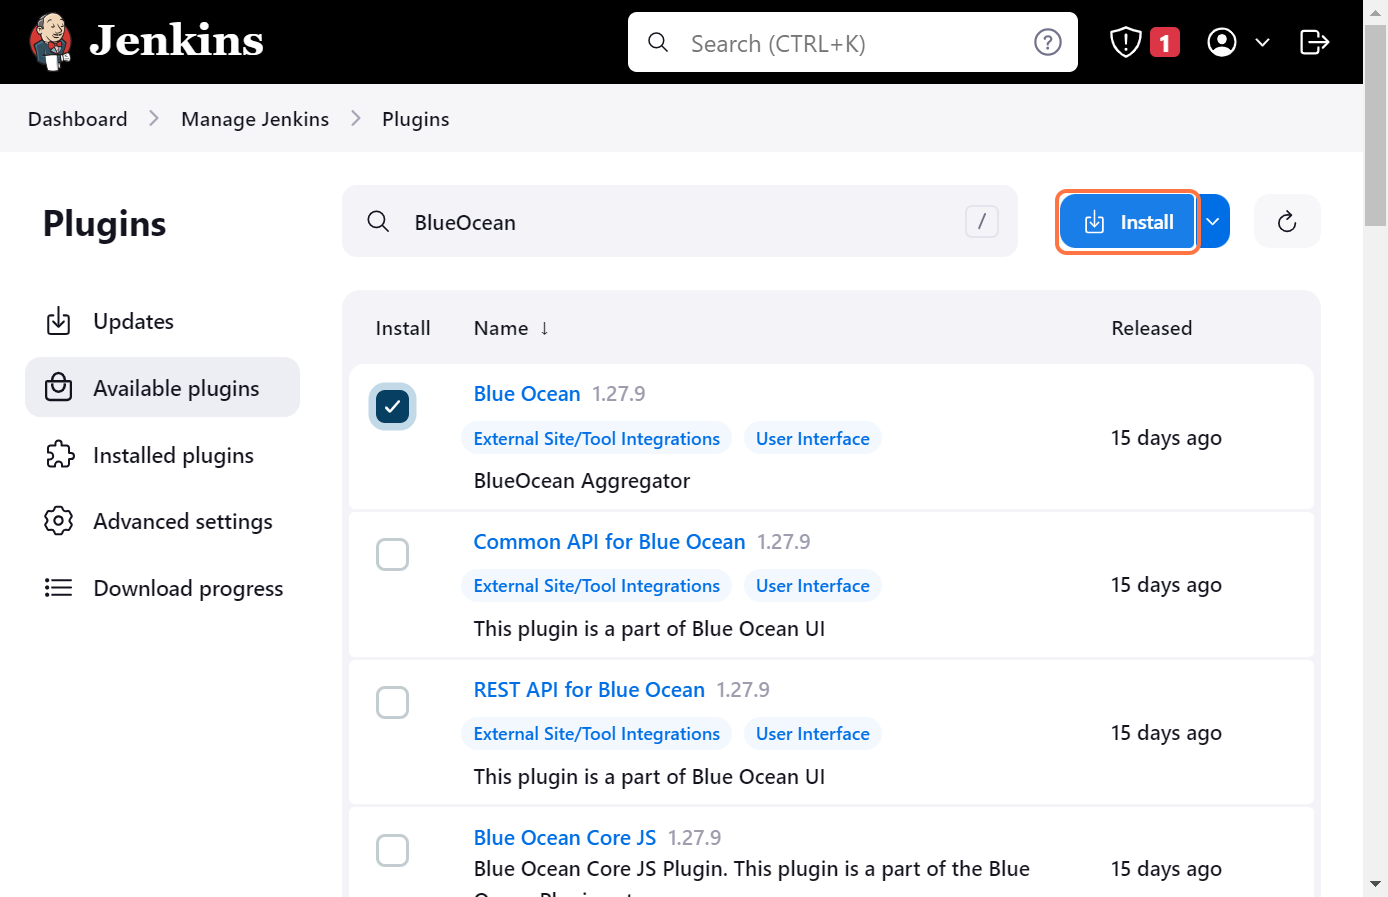
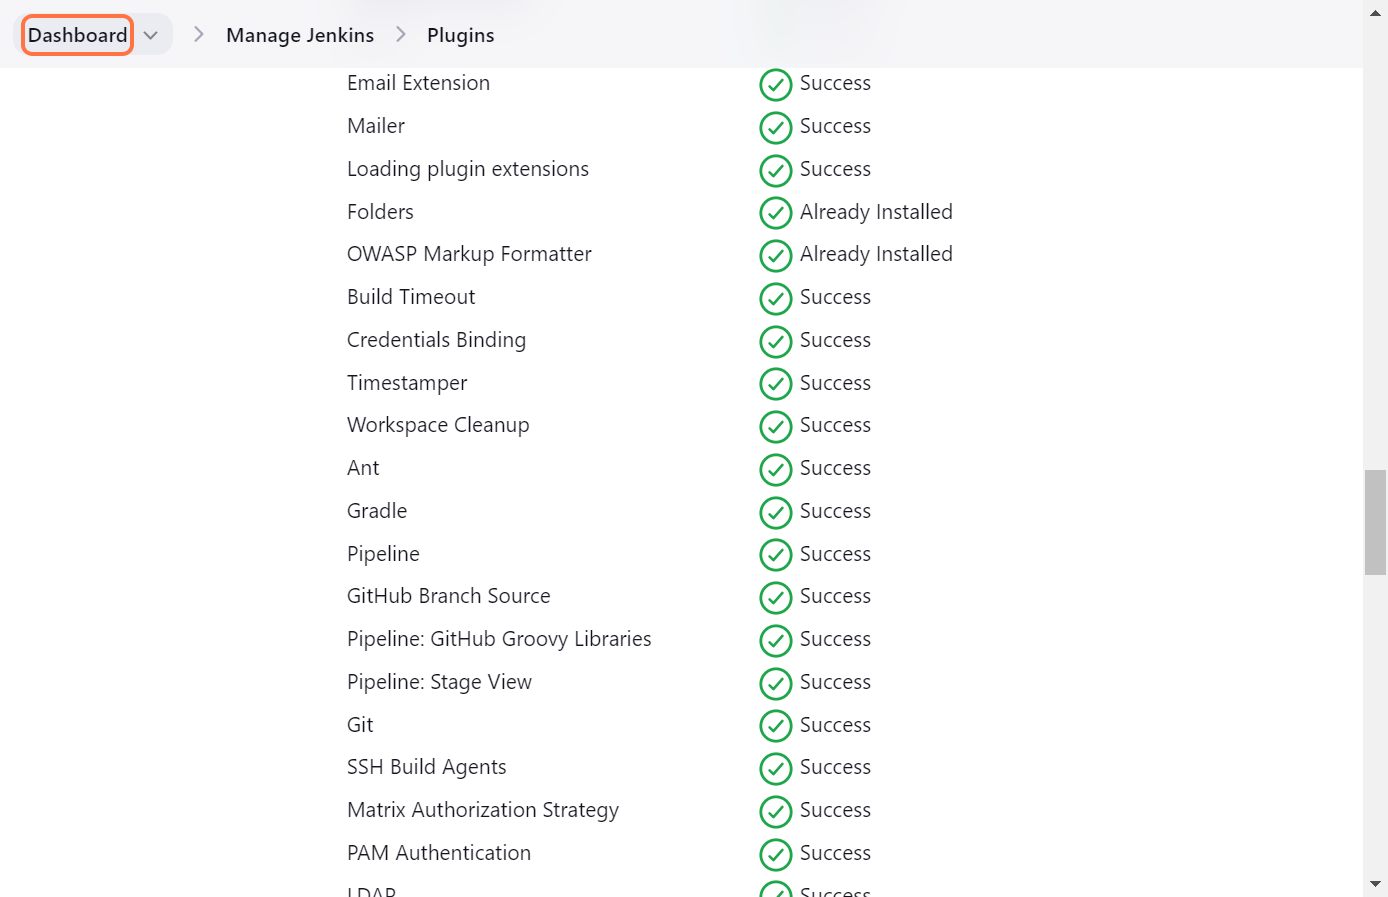
Search for the Blue Ocean. Select the first Blue Ocean that appears and click on Install.
Once the installation of the plugin is completed, go back to your dashboard.
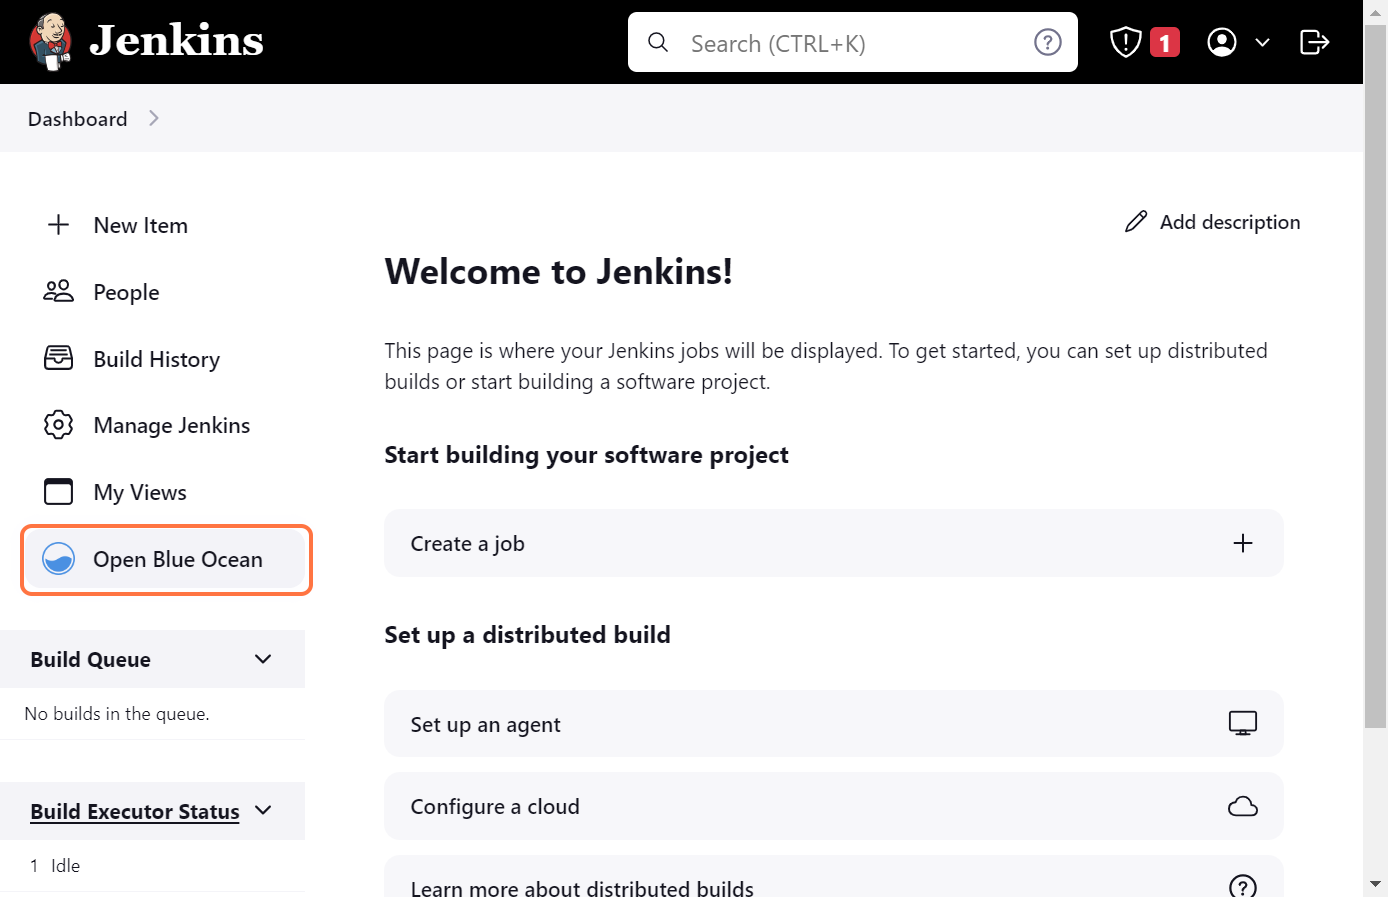
Here, you will find your plugin, Blue Ocean. Click on Open Blue Ocean; it should redirect you to Blue Ocean, giving you a new interface where you can create your pipelines with ease.
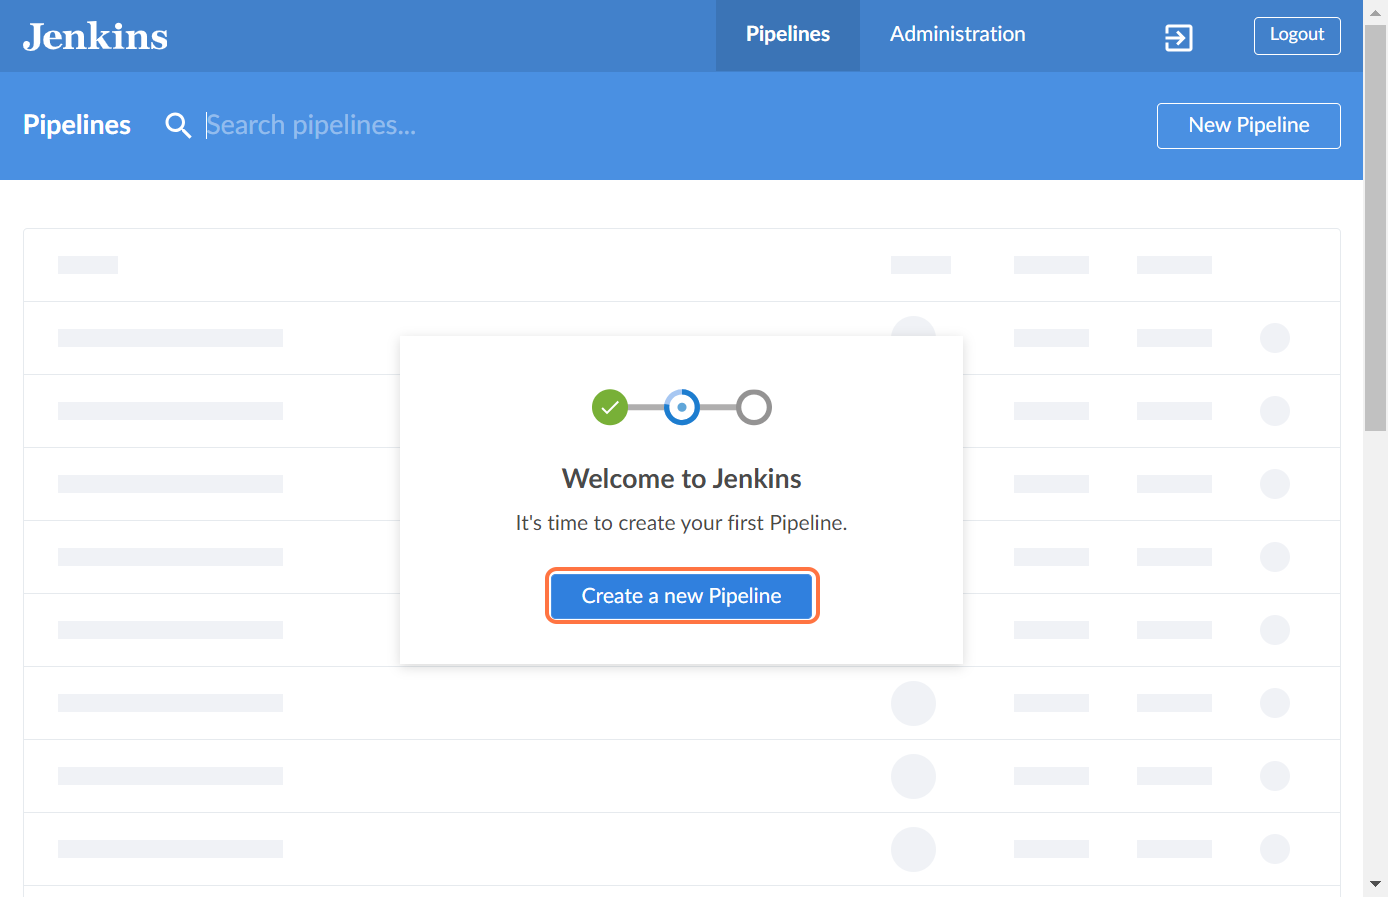
Well done! You are inside the Blue Ocean! See how good the interface is. Blue Ocean is an amazing project that makes the creation of a pipeline more approachable.
Conclusion In this blog, we understood what Jenkins is and were successfully able to install Jenkins on the EC2 instance. We hope you have understood how to install Jenkins on an EC2 instance and set up Jenkins on EC2 with Blue Ocean, which is one of the Jenkins plugins. Thank you for reading this blog! We hope it has helped you go through each step to reduce any errors. Keep visiting CloudZenia for more such blogs and even services for professional help. Happy Learning!

Ujjwal Mahar Linkedin Nov 29, 2023
Filed under