Introduction
Currently, there are numerous tools and methods available to automate the software delivery process. This enables the organizations to establish smooth and sustainable Continuous Integration and Continuous Delivery (CI/CD) pipelines. Widely used tools in this domain, mainly include Jenkins, GitLab CI/CD, CircleCI, and others. Most of these tools operate on a similar principle. They establish a connection with source code management platforms like GitHub or Bitbucket. Upon detecting any new commit, these tools initiate a workflow, which encompasses processes such as testing, building, and deploying to specific servers.
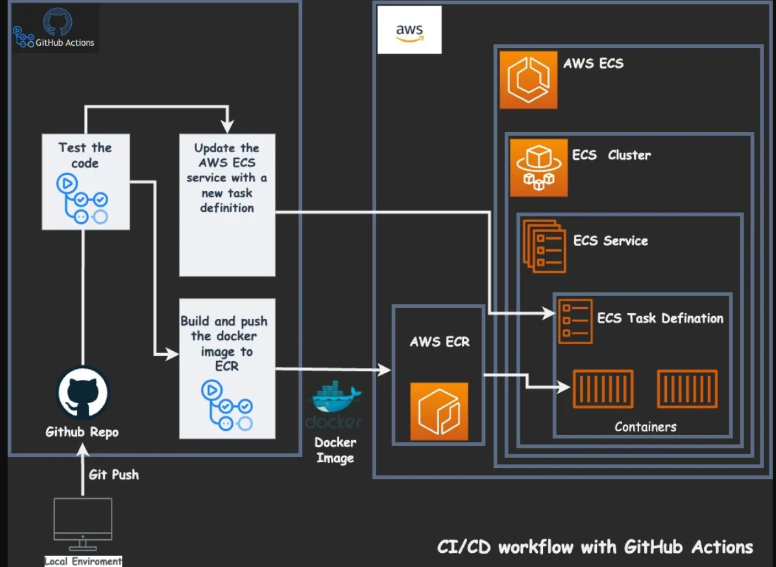
In this blog, we will talk about AWS ECS microservices in CICD. We will demonstrate how to set up an AWS CI/CD pipeline using GitHub Actions workflows. Hence, the process of deploying microservices in AWS ECS will happen.
Prerequisite
- Basic understanding of Amazon Elastic Container Service (ECS): What is Amazon Elastic Container Service? - Amazon Elastic Container Service
- Understanding about GitHub Actions: GitHub Actions documentation
- Docker Basics: Overview of Get Started | Docker Docs
Create an Infrastructure on AWS Cloud
- Login into your AWS account and create the below resources: a. ECR Repository b. ECS Cluster c. ECS Task Definition d. ECS Service 2. Create one security group called ECS-SG and allow HTTPS traffic from anywhere. Also, open TCP port 3000 and attach this SG to your Amazon ECS service.
Key Point To Know About This Blog
For demonstration purposes, we are deploying the app in a public subnet without associating a load balancer with our ECS service. It's important to note that this setup is intended for a demo scenario. For enhanced security and adherence to production-grade practices, please refer to the link below. If you encounter any issues while creating the required ECS for production-grade applications infrastructure, the below blog provides assistance and guidance. Related blog: Optimizing Amazon ECS: Configuring AWS ECS with Security Best Practices
Heading Towards GitHub Repo
- Visit the linked URL and understand the repo structure. It contains a simple frontend of the shoe store application; after successful deployment, you will see the login page.
- Now, open the .github/workflows folder, you will see the aws.yml file, open it and try to understand the code.
- In this file, we are performing different tasks/jobs, the sequence is listed below: a. Set up the jobs. b. Check out the repo. c. Configure your AWS account credentials. d. Login into the ECR repository (Similar to Docker Hub). e. Build a Docker image and push/store it into the ECR repo. f. Update the task definition and register with the new image. g. Register that image into the ECS service.
Things You Have To Consider To Perform This Demo
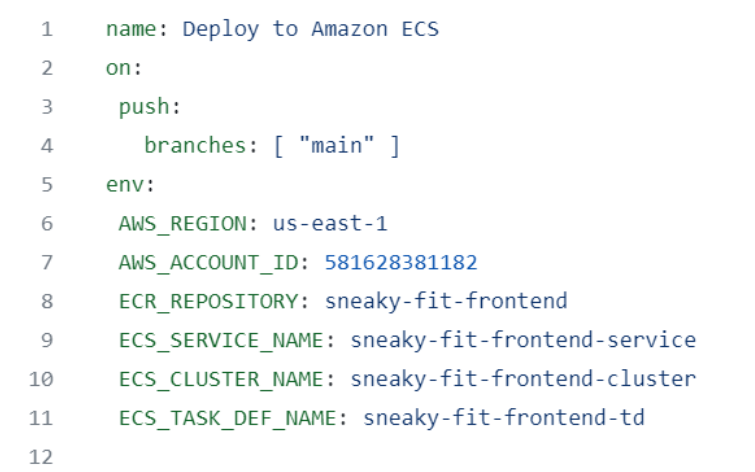
- After creating all the resources in AWS, note down their identifiers/names.
- Put that name in the env variables section of the aws.yml file.
Need help with your cloud infrastructure?
Our experts at CloudZenia are ready to help you build, scale, and secure your setup.
Book a Free Consultation- We suggest using the latest version of action plugins in the code.
- Above the repo home page, you can see the settings option. Click on it, go to secrets, and add your AWS credentials there as a secret. This will ensure your account security. You need to have GitHub admin access to do this.
1st Phase: Before Committing
- Our whole infrastructure is ready on AWS. That means that we have created ECS Cluster & Services, ECR, and Task Definition.
- Check the below gif for the result of the 1st Phase.
- If you are new to AWS and don't know how to create resources, visit our previous blog to learn more about it.
- We already committed the small changes for the demo, which triggered the GitHub Action workflow, and started performing jobs. To check if the app deployment is successful or not, go to the Amazon ECS service and copy the public IP of the task, paste it into the browser, and you can see the Homepage there.
2nd Phase: Committing Simple Change
- Go to the repo, open src/component/LoginUser.jsx, and edit the HTML section mentioned at the end of the file. Make any changes that you want to. We are just trying to show that the pipeline runs when someone changes the code.
- Commit the changes and then go to the action tab present above the repo.
- Check the logs/output of the action.
- It will take around 10 min to deploy the app successfully on Amazon ECS.
3rd Phase: Validate the Changes
- After successfully completing the action, validate your changes.
- Go to the AWS console and go to the ECR repo. Note that the latest image ID was pushed by GitHub Action.
- Now, go to the ECS and check your new task definition. You can see it is automatically created.
- Again, go to the ECS service, and you can find that your task-definition revision is registered with the service.
- Now, go to ECS service configuration details. Click on the running task ID and copy the public URL.
- Paste it into the browser and boom! Your changes are there.
Conclusion
In this blog, we have explained how to set up a GitHub Action pipeline to deploy on AWS ECS. To keep things simple, we have used ECS service in a public subnet and without any load balancer. Having ECS without a load balancer is not recommended for production, but the focus was to show the deployment from GitHub Action to ECS. For more such informational blogs, visit our CloudZenia website.
Filed under