
In the realm of modern cloud computing, Kubernetes has emerged as a game-changer, revolutionizing the way we deploy, manage, and scale containerized applications. Its robust features and scalability make it a top choice for orchestrating containerized workloads. In this guide, we'll walk you through the process of deploying a Kubernetes cluster on Amazon EC2 instances using Kubeadm, a popular tool for bootstrapping Kubernetes clusters.
Why EC2 and Kubeadm? Amazon EC2 (Elastic Compute Cloud) is a web service that provides resizable compute capacity in the cloud. It's an ideal choice for Kubernetes cluster setup and deployment due to its flexibility, scalability, and reliability. Kubeadm, on the other hand, is a tool built to provide Kubernetes administrators a simplified way to bootstrap Kubernetes clusters. It automates many of the manual processes involved in the setup of a Kubernetes cluster on AWS EC2, making it a popular choice for beginners and experts alike.
Prerequisites Before diving into the deployment process, ensure you have the following prerequisites in place:
- An AWS account with appropriate permissions to create EC2 instances.
- AWS CLI installed and configured on your local machine.
- Basic knowledge of Kubernetes concepts and terminology.
Create Deployment of Kubernetes Cluster
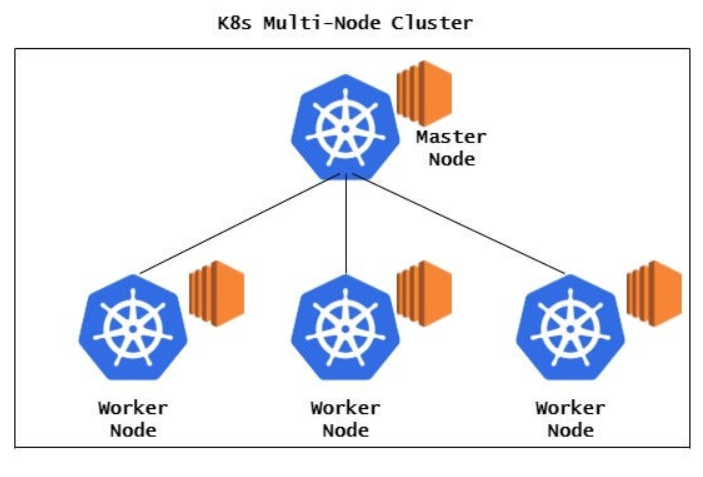
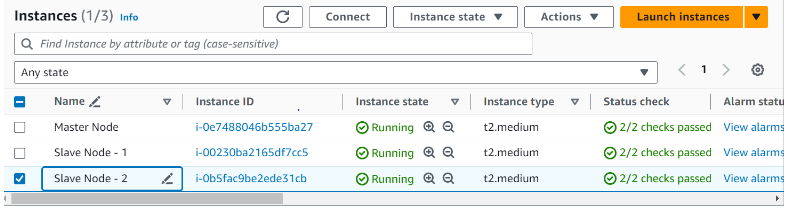
Step 1: Set Up EC2 Instances Using the AWS Management Console or AWS CLI, launch three EC2 instances: one for the master node and two for the worker nodes. Ensure that the AWS EC2 instances meet the minimum requirements for running Kubernetes, including sufficient CPU, memory, and network connectivity. Some general guidelines for minimum requirements of an Amazon EC2 instance to run a Kubernetes cluster : Master Node: (t2.medium recommended) CPU: 2 vCPUs or more RAM: 4 GB or more Disk: 20 GB or more (for system and application binaries) Network: Sufficient bandwidth for communication between nodes and with external services Worker Nodes: CPU: 1 vCPU or more (depending on workload) RAM: 2 GB or more Disk: 20 GB or more (for system and application binaries) Network: Sufficient bandwidth for communication between nodes and with external services
Step 2: Install Docker and Kubeadm SSH into each Amazon EC2 instance and install Docker and Kubeadm. You can use the following commands to install Docker : sudo su apt-get update apt-get install apt-transport-https apt install docker.io -y docker --version systemctl start docker systemctl enable docker Now Install kubeadm, kubelet, and kubectl : curl -s https://packages.cloud.google.com/apt/doc/apt-key.gpg | sudo apt-key add - echo "deb https://apt.kubernetes.io/ kubernetes-xenial main" | sudo tee /etc/apt/sources.list.d/kubernetes.list sudo apt-get update sudo apt-get install -y kubelet kubeadm kubectl kubernetes-cni
Need help with your cloud infrastructure?
Our experts at CloudZenia are ready to help you build, scale, and secure your setup.
Book a Free ConsultationStep 3: Initialize the Kubernetes Cluster On the master node, initialize the Kubernetes cluster using Kubeadm. Run the following command: sudo kubeadm init This command will initialize the Kubernetes control plane and generate a join token for adding worker nodes to the cluster.
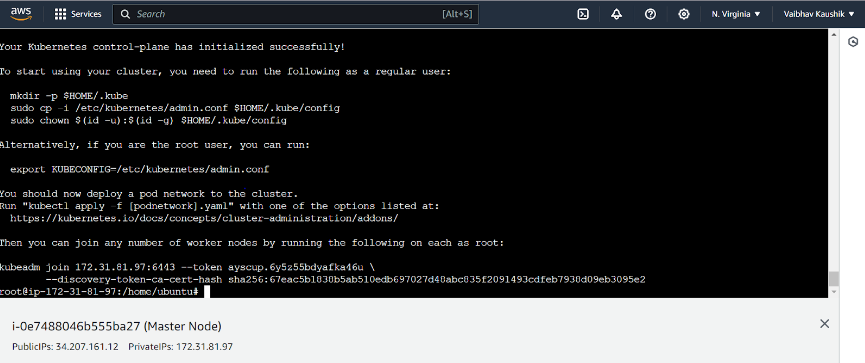
Next up on the master node is to copy the kube/config file over to your $Home so you can execute kubectl commands: mkdir -p $HOME/.kube cp -i /etc/kubernetes/admin.conf $HOME/.kube/config chown $(id -u):$(id -g) $HOME/.kube/config apply -f kubectl apply -f https://raw.githubusercontent.com/coreos/flannel/master/Documentation/kube-flannel.yml kubectl apply -f https://raw.githubusercontent.com/flannel-io/flannel/v0.22.2/Documentation/k8s-old-manifests/kube-flannel-rbac.yml
Step 4: Set Up Networking To enable pod networking within the cluster, you need to install a CNI (Container Network Interface) plugin. Here, we have installed kubernetes-cni in step 2.
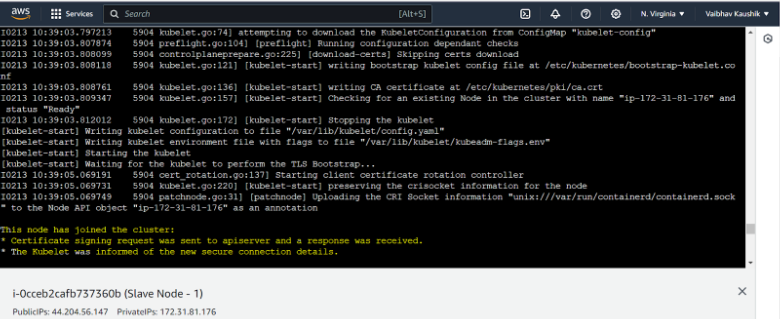
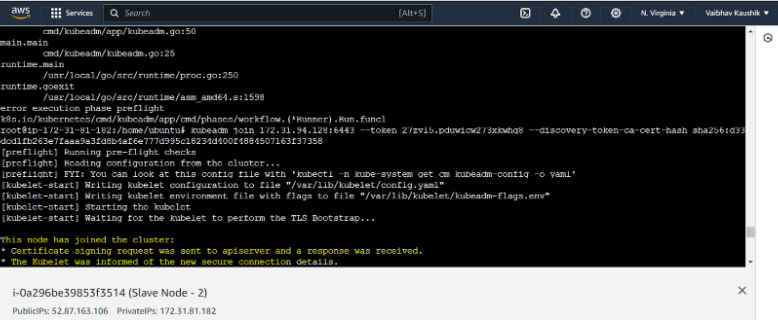
Step 5: Join “Worker Nodes” to the Cluster Once the master node initialization is complete, you'll receive a kubeadm join command with a token. SSH into each worker node and run the kubeadm join command to join them to the cluster. Eg : kubeadm join 172.31.94.128:6443 --token 27zvl5.pduwicw273xkwhq8 --discovery-token-ca-cert-hash sha256:d33dcd1fb263e7faaa9a3fd8b4af6e777d995c18234d400f4884507163f37358
Step 6: Verify the Cluster To verify that the cluster is up and running, SSH into the master node and run the following command: kubectl get nodes This command should display all the nodes in the cluster, including the master and worker nodes.

Conclusion Congratulations! You've successfully deployed a Kubernetes cluster on Amazon EC2 instances using Kubeadm. You now have a robust platform for deploying and managing containerized applications at scale. As you continue your Kubernetes journey, explore advanced topics such as workload deployment, service discovery, scaling, and monitoring with CloudZenia to unlock the full potential of your Kubernetes cluster. Happy containerizing!

Vaibhav Kaushik Linkedin Feb 20, 2024
Filed under