Still confused about what CI/CD + CD is? Not anymore; this blog covers it all with an example of GitHub Actions and Node.js. In the world of software development, it is important to have efficiency and automate stuff when needed. Let's understand the practices that have revolutionised the industry: "CI/CD". Wait, but what does it mean?

We will be answering a few of the common questions that you might have, like - "What is CI/CD?" "Are there two CDs?" "What is the difference between the CI and CD?" "Difference between CI and CD?" "What sorcery can I do with CICD?" Don't worry, we will explain each part in detail with a fun example!
What is Continuous Integration (CI)?
Let's start by understanding what CI means with an example: Imagine you were creating a really cool drawing and wanted to show it to your friends and get their feedback. You have decided to show your drawing to your friends each time you complete a part of it or add a new detail. You don't wait until the end to show them, instead you show them each step along the way. By doing this, you can fix your drawing every time you get feedback you want to consider. Erasing a small part would be much easier than redoing the whole drawing.

This means you are continuously integrating your new updates and testing/analysing your drawing. Now let's relate this to our actual scenario; suppose you are developing an app and want to test the application each time you have completed developing a feature; if adding that feature does not disturb the overall app, you want to keep it. Defining what Continuous Integration is: CI is a practice where developers frequently merge their code into a central repository. This process is automated, which means for each integration the code is automatically tested and built. The teams can easily detect the problems in less time. For example, you are building a Node.js application, and you pushed your code to a version control like GitHub. How cool it would be if your code gets automatically built, run, and tested, and you get the feedback of your application. This can be achieved with a practice of Continuous Integration. Later in this blog, we will see how we can achieve that with the help of continuous integration tools and principles.
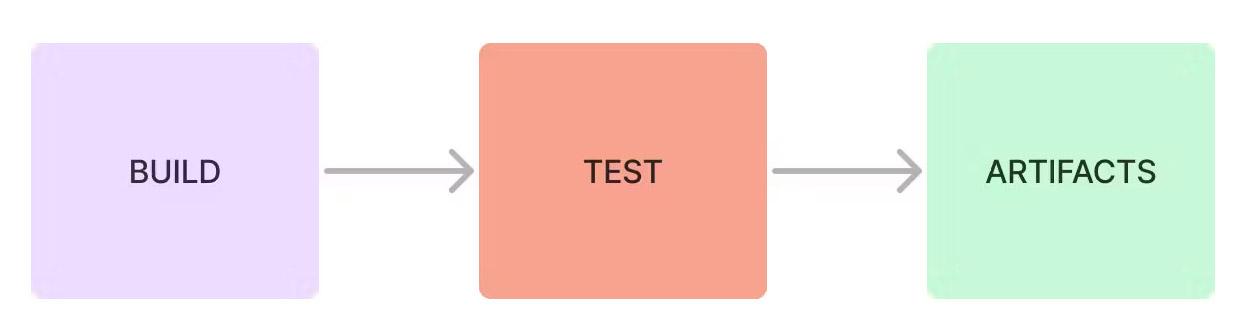
What is Continuous Delivery (the first CD)? Continuing our example, now that you have completed your drawing, you decide to put your painting in an art gallery (i.e. your repo)! Continuous Delivery works as it will automatically take your drawing and put it in the art gallery. ( You don't have to do anything! ) Continuous Delivery in DevOps usually means when the developer has successfully built and tested their code, the code is automatically released into the repository from where that code can easily be deployed.
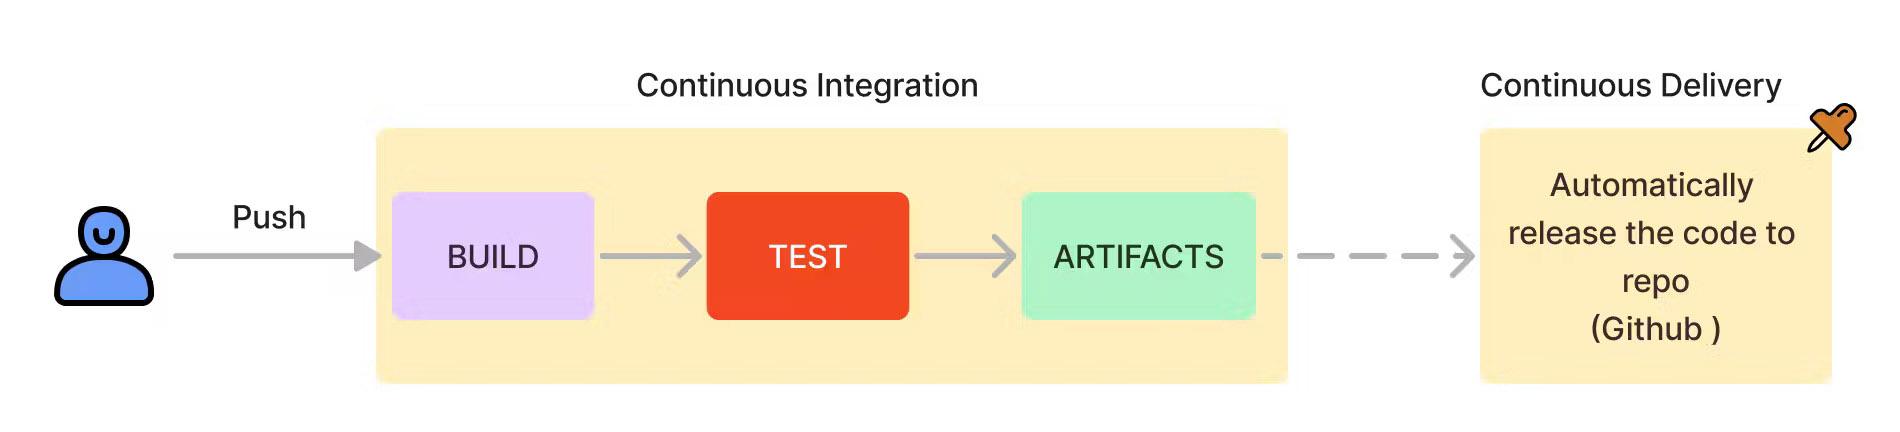
Continuous Delivery also helps the developing team to ensure every time the code is pushed and reaches the repository, it is already deployable. This CD doesn't mean that code is deployed but it is ready to be deployed, which is stored in our repository like GitHub or any Container registry. The diagram you see above shows you how everything has been working till now. The code is being pushed by the developer, it goes through our CI which automatically builds tests and the artifacts are then stored in the repository. Now things are getting much clearer, right? You can now easily think about what is next. Yes, it is the deployment of the code. When we talk about CICD, we more often talk about Continuous Delivery.
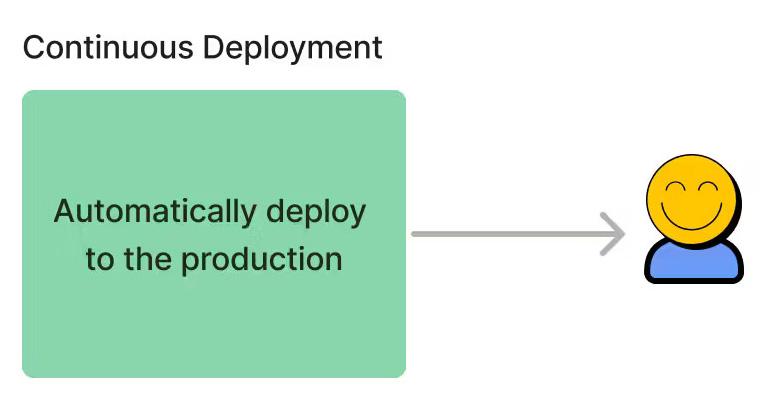
What is Continuous Deployment (the other CD)? Yes, we have two CDs!
It is the next step to Continuous Delivery/CD. The pipeline we have created till now automates the process till the code reaches the repository, the work left is to deploy our code. Again, let's continue with our example, your drawing has reached the art gallery, and now the only work left is to have someone buy it. You meet with an agent who will sell it for you ( feels like selling your drawing is now automated ), and you do nothing. In the real world, with the help of continuous deployment tools, every time the programmer makes any changes to their code, and those changes pass all the tests and get perfectly pushed to our repository, then the changes are automatically updated in our live application immediately. It is like having an art agent with some superpowers that makes your drawing available to everyone immediately. The code you pushed is directly available to the customers. How cool is that, right?
Now that we have completed knowing about Continuous Integration, Continuous Delivery, and Continuous Deployment that make up our CICD, let's see what we get once we combine all the components.
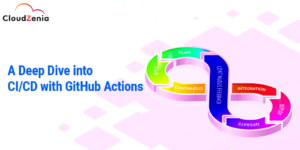
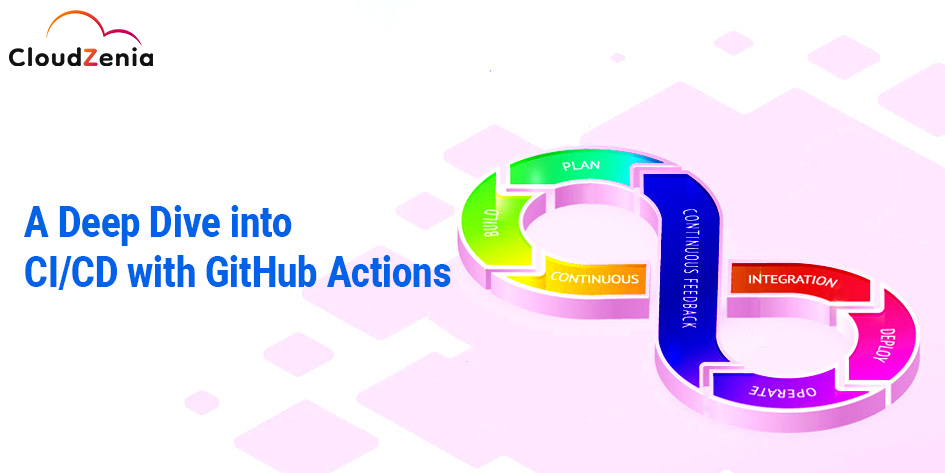
Demystifying The CI/CD Here comes the CI/CD, for which we have been preparing so far.
So, whether you're an artist or a coder, CI/CD is all about making your workflow smoother, faster, and more efficient.
Deep Dive into CI/CD Pipelines All these steps make up the CI/CD Pipeline - you slide your code from one end (releasing of code), and it gets delivered on the other end after going through all the stages like building, testing, and deploying. You need to make sure that your pipeline has no holes (breaking of the pipeline) and is good at every stage for a smooth flow.

If you found this cool, there is something even cooler than this; we also have CI CD pipeline tools that help the DevOps team make CI/CD pipeline work. We have certain tools that are used for creating CI/CD pipelines to help you understand how CI CD pipeline works, for example: GitHub CI CD pipeline, Jenkins, etc.
GitHub Actions GitHub Actions is a platform for CI/CD that allows developers to automate their software development workflow right within their repository. GitHub Actions is a cloud-based platform where you can build, test, and deploy your code from GitHub. GitHub Actions is a powerful tool offered by GitHub, you can make code reviews, have branch management, and support many features for better code quality.
How do GitHub Actions work? GitHub Actions uses workflow files written in YAML, the workflow files are stored inside your repository. Folder Structure inside your repository --> .gitignore/workflow/cicd.yml Workflows are triggered by events in your repository, events can be such as push-pull requests, or scheduled times. When a workflow is triggered, GitHub Actions creates a runner to execute the workflow. These runners are the virtual machines hosted by GitHub with pre-installed software like Node.js, Python, etc. Once the runner is set up, GitHub Actions checks the code from the repository and executes the steps written in the GitHub Actions workflow. These steps are defined in a YAML file, the steps can be any command that you can run on a terminal, such as building your code, running a test, or deploying your code to production. You can also create your custom runner for the specific task. GitHub Actions provides a variety of actions that you can use with your workflows. These actions are pre-built scripts that perform tasks such as building testing, deploying code to productions, or sending notifications. These actions, with a proper understanding of how GitHub works, can be custom-made as well.
“ Automate, customize and execute your software development workflows right in your repository with GitHub Actions . You can discover, create, and share actions to perform any job you'd like, including CI/CD, and combine actions in a completely customized workflow. ”
Benefits of CI/CD
- Automation - CI/CD is all about automating the process of integration of code changes, testing them, and deploying them to a production environment.
- Transparency - If a build fails, developers can quickly understand what is wrong with the pipeline. This transparency is achieved through logs, visual workflows, etc.
- Speed - The overall process of integrating from delivery to deployment is much faster with CI/CD pipelines. And this speed can be measured using metrics like lead time for changes and deployment frequency.
- Resilience : CI/CD makes software more resistant to errors by using approaches like test coverage, observability tooling, and feature flags.
- Security : Automation in CI/CD also includes security checks for code and permissions and provides a virtual paper trail for auditing failures, security breaches, and non-compliance events.
- Scalability : A robust CI/CD setup should be able to handle increased workloads as your software development efforts grow, maintaining productivity and efficiency.
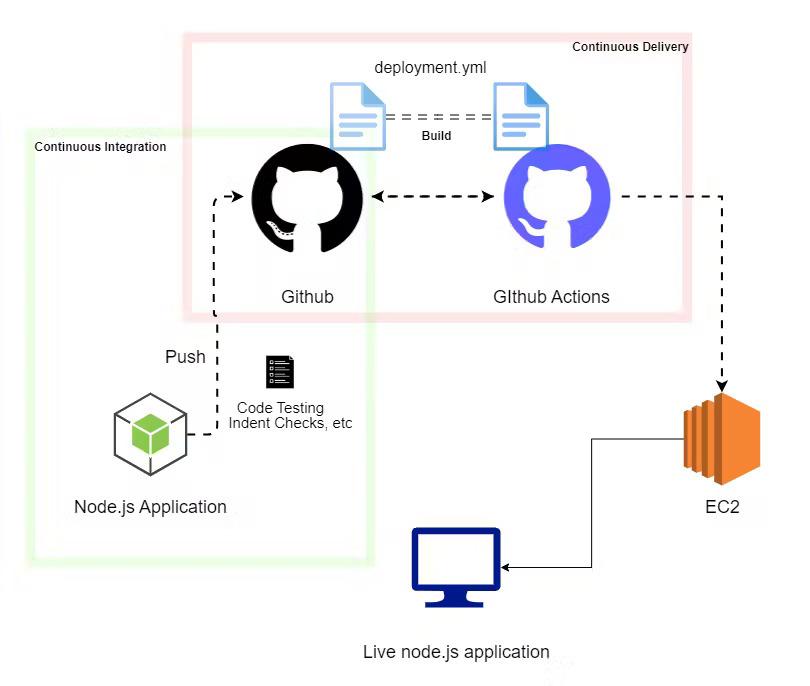
GitHub Actions and Node.js: Learn by Doing Now that we know everything we need for a pipeline to run, let's create our own CI/CD pipeline using GitHub Actions and Node.js. We will be deploying our Node.js Application to the AWS EC2 instance with a proper workflow using GitHub Actions. Below is the architectural diagram of making Node.js in action on GitHub.
Node.js Application Readiness: The Key to Smooth Deployment We will be creating a simple Node.js server with a test file.Create a repository to store our Node.js application, then start by initialising the Node.js application using this command. It will initialise our application and make the package.json file . npm init -y Create a new file "app.js". This will contain our application logic. :const http = require('http'); const port = 3000; const server = http.createServer((req, res) => { res.statusCode = 200; res.setHeader('Content-Type', 'text/plain'); res.end('wELCOME TO THE WORLD OF CI/CD !!!n'); }); server.listen(port, () => { console.log(`Server running on port ${port}/`); }); module.exports = server; Next, let's write some tests for our application. We will be using Mocha and Chai, these are javascript test frameworks. To install them follow these commands: npm install --save-dev mocha chai npm install chai-http It will create a node_modules directory and package-lock.json file for us. Create a new directory inside your root directory called test. Inside the test directory, create an app.test.js file. app.test.js will contain the test for your application. const chai = require('chai'); const chaiHttp = require('chai-http'); const server = require('../app'); const expect = chai.expect; chai.use(chaiHttp); describe('Server', () => { it('responds with status 200', done => { chai.request(server) .get('/') .end((err, res) => { expect(res.status).to.equal(200); done(); }); }); }); Create a .gitignore file as we don't want to push the node_modules file to GitHub. .gitignore --> node_module/ Go to your package.json file and change the scripts to: "scripts": { "start": "node app.js", "test": "mocha" }, To run our server, check using the following command: npm start It should be something like this:
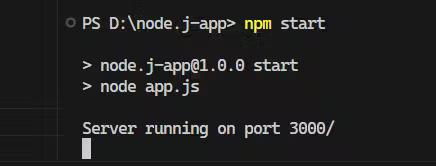
This means your app is up and running on port 3000. You can check by going to http://localhost:3000/
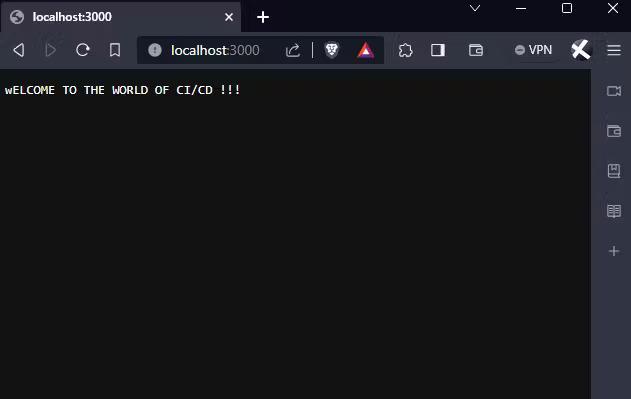
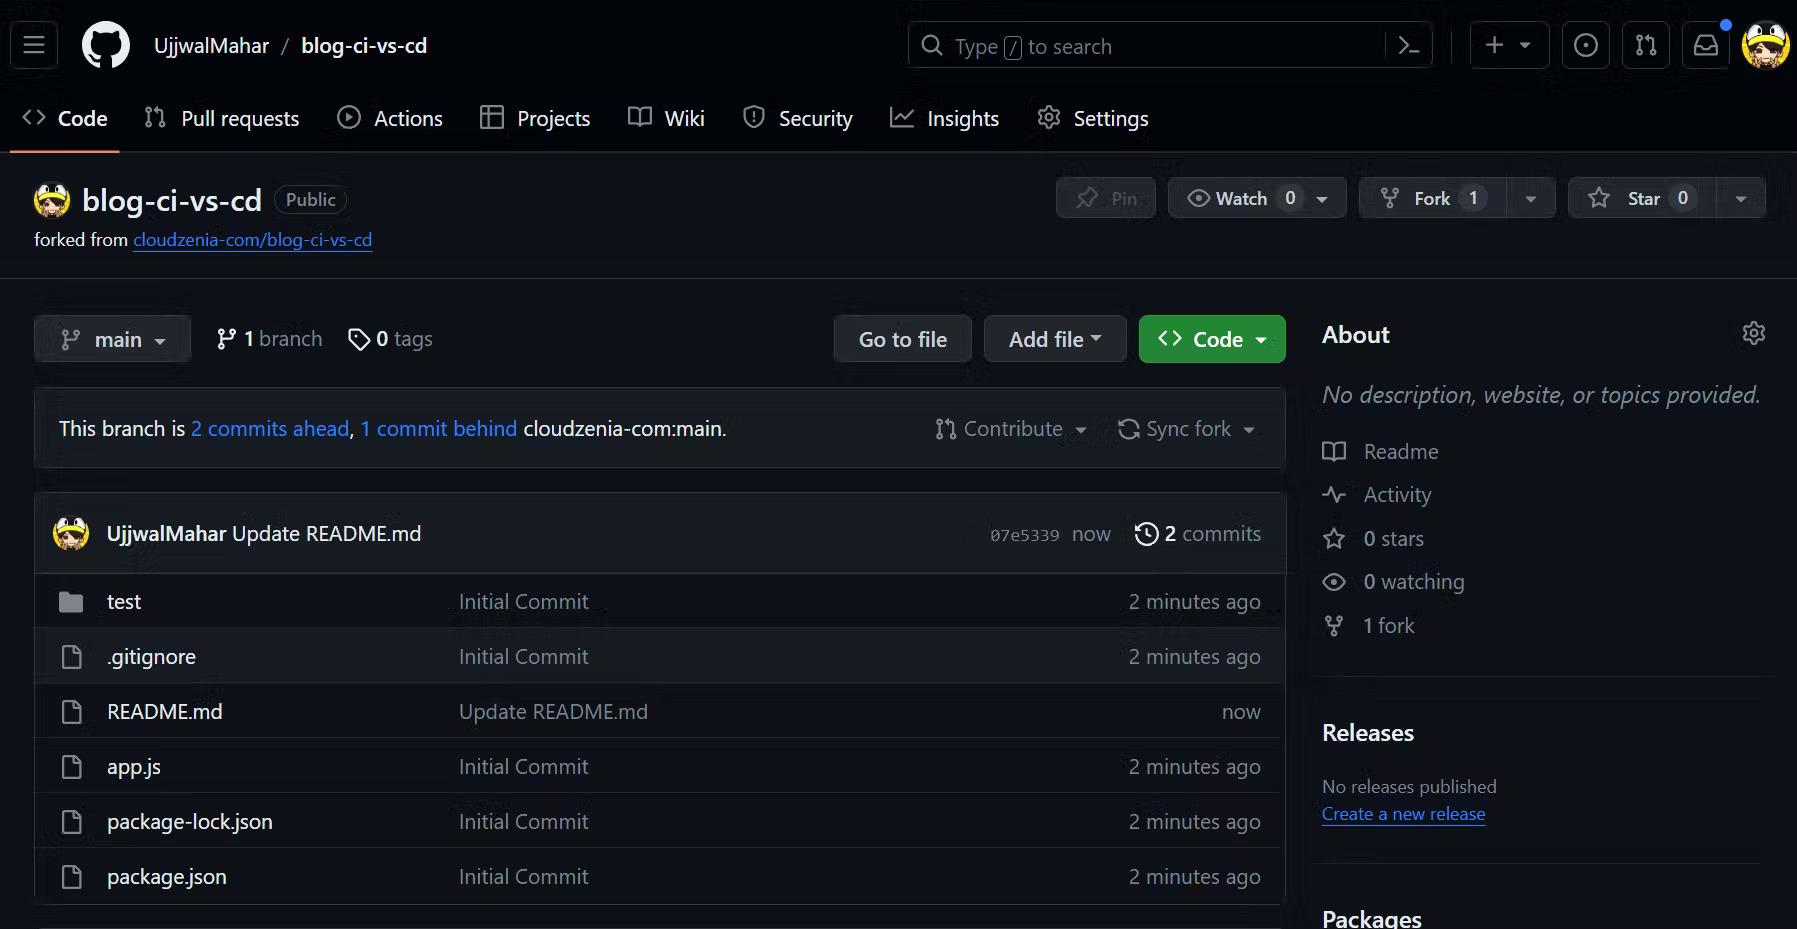
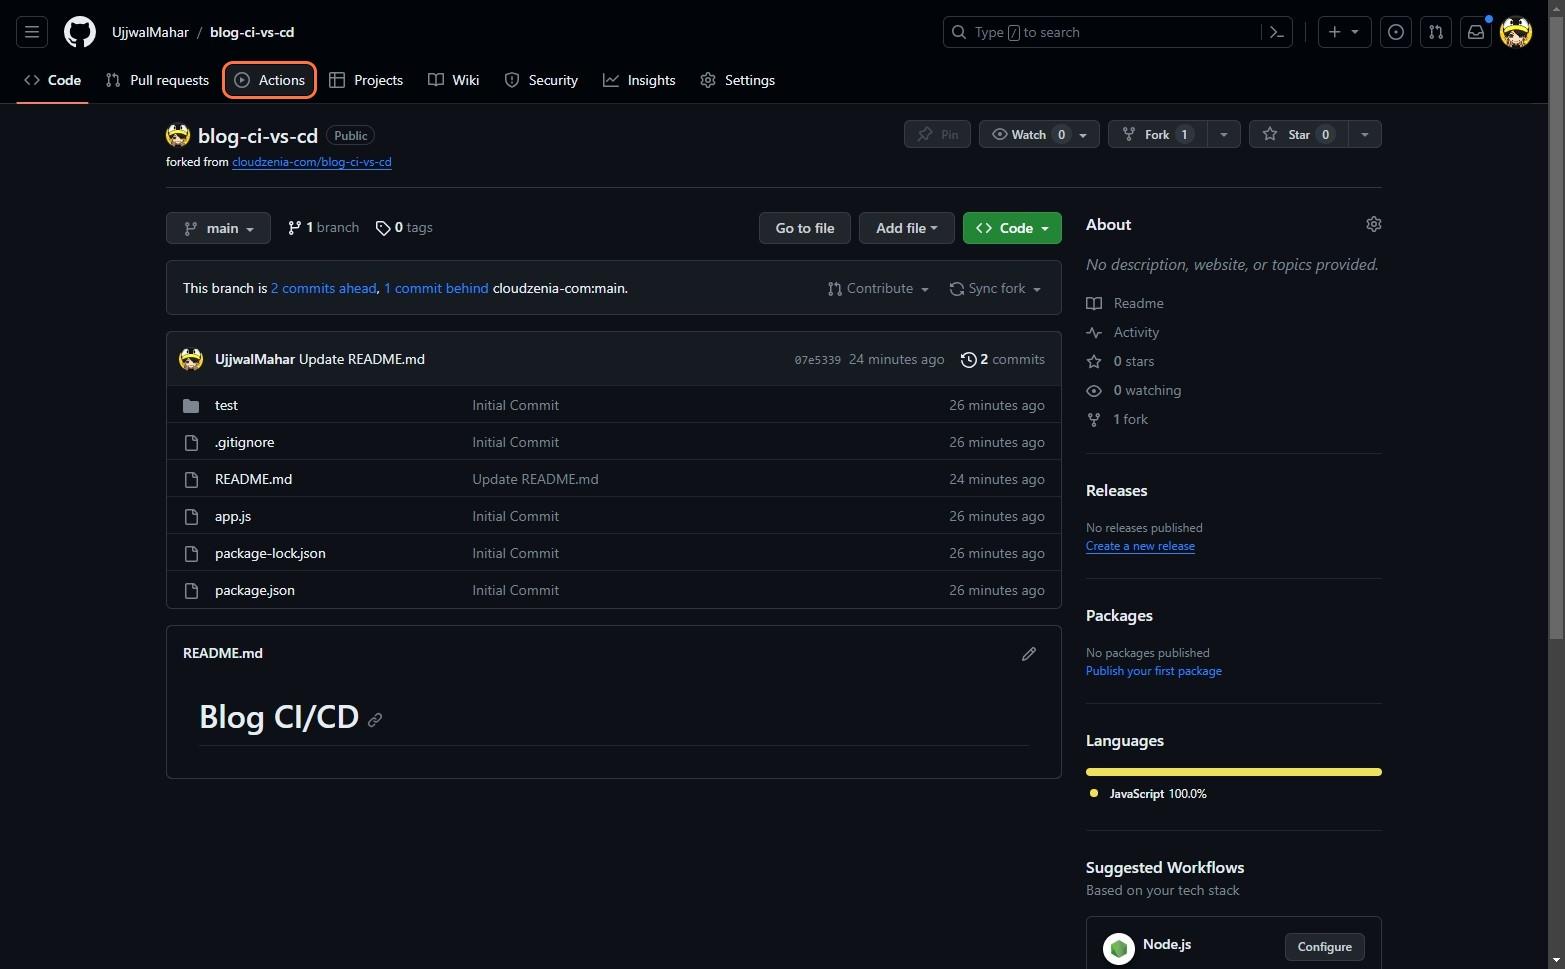
So, our application works great on localhost. Let's push it to GitHub. Push your code to GitHub, your created repository should look something like this:
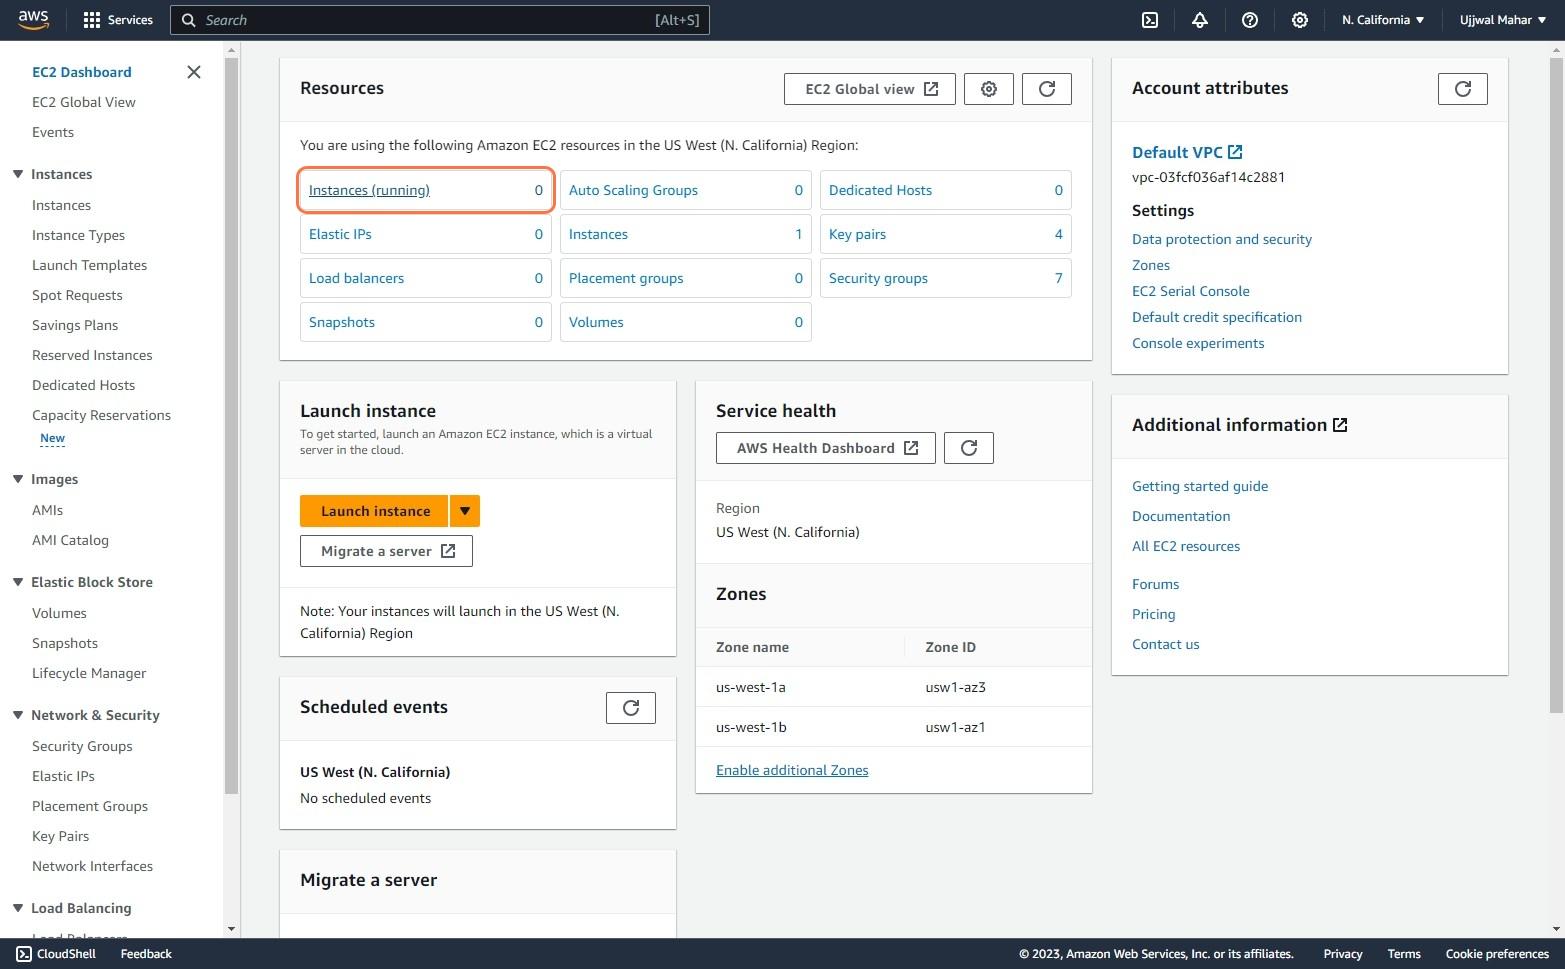
Creating our AWS EC2 Instance Go to your AWS console and go to your EC2 dashboard.
- Click on Instance (Running).
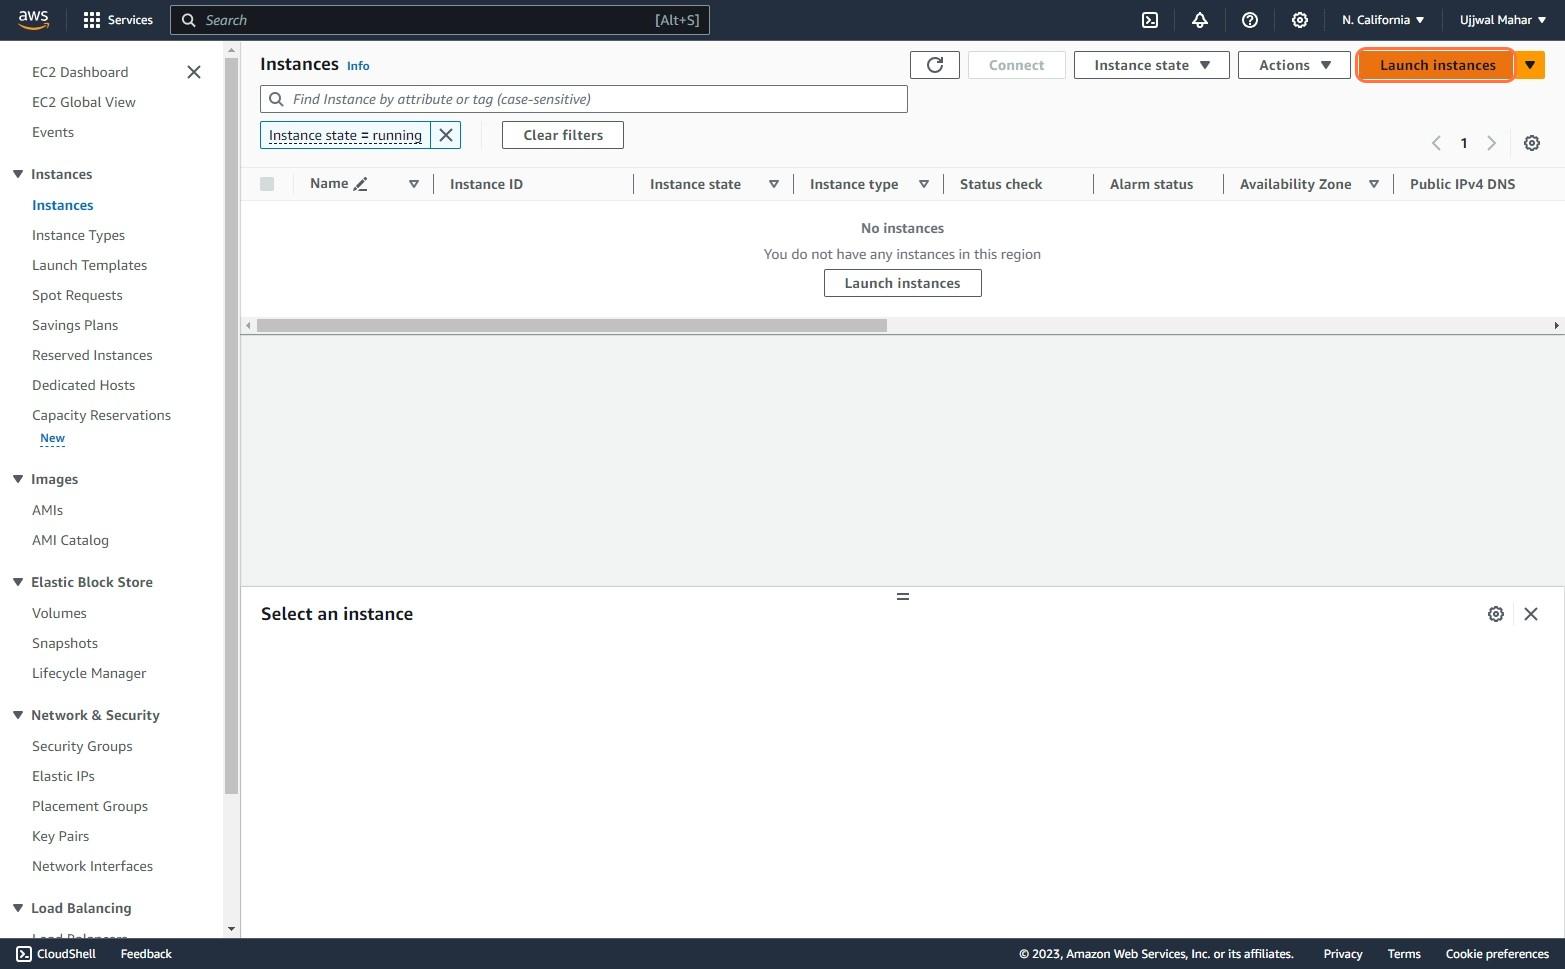
2. Click on Launch Instances.
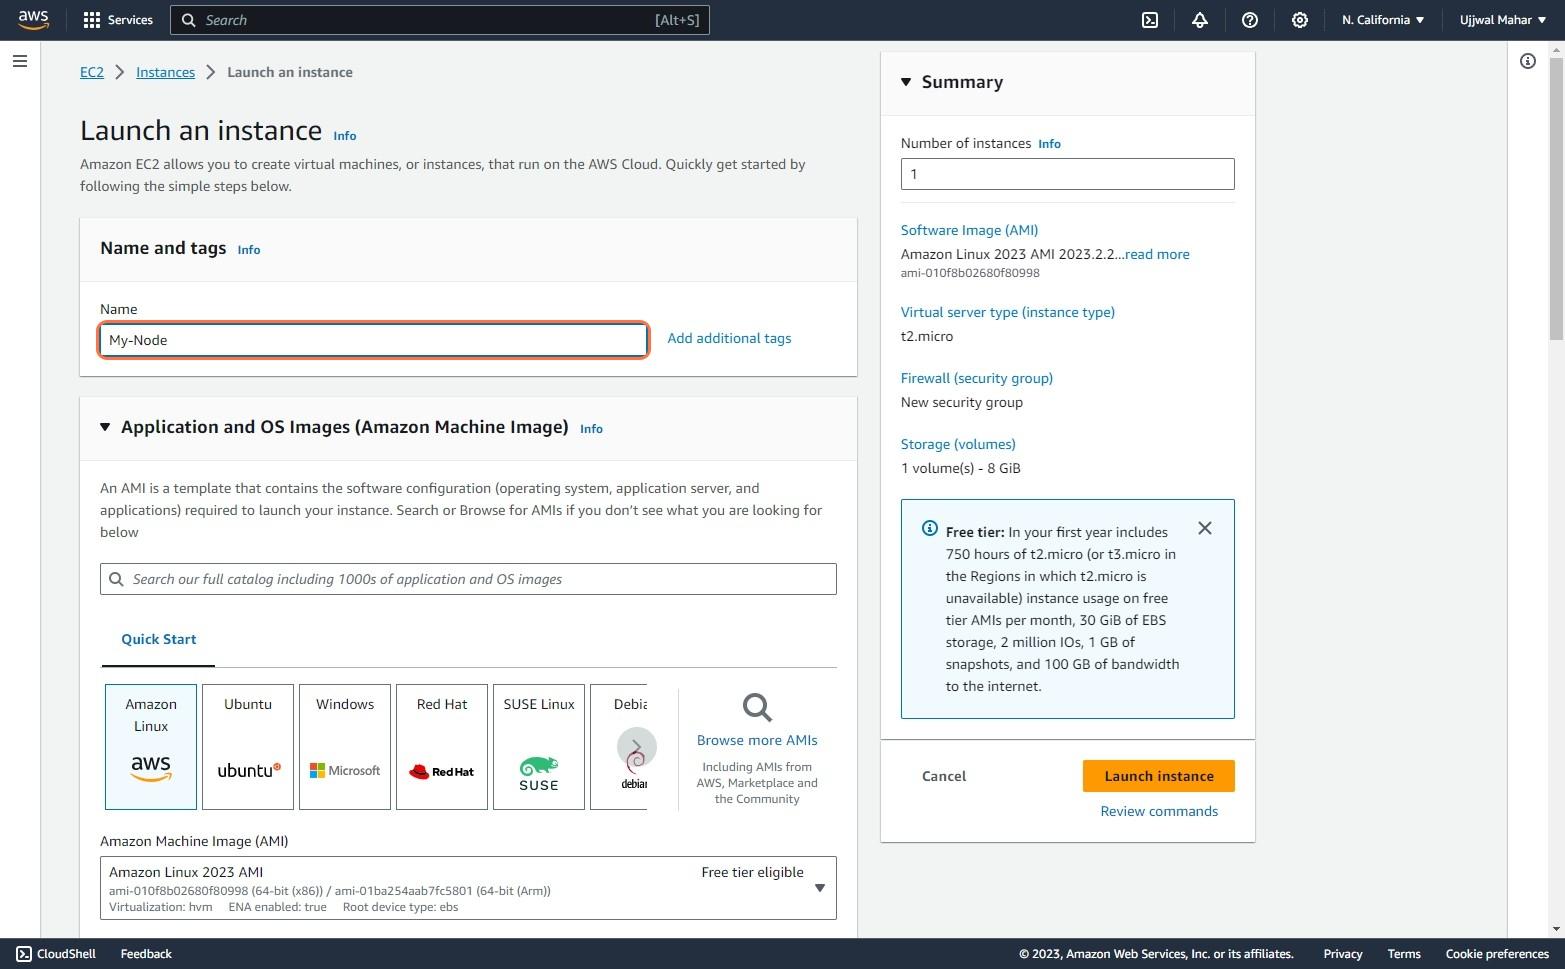
3. Give a name to your machine, we have named it My-Node.
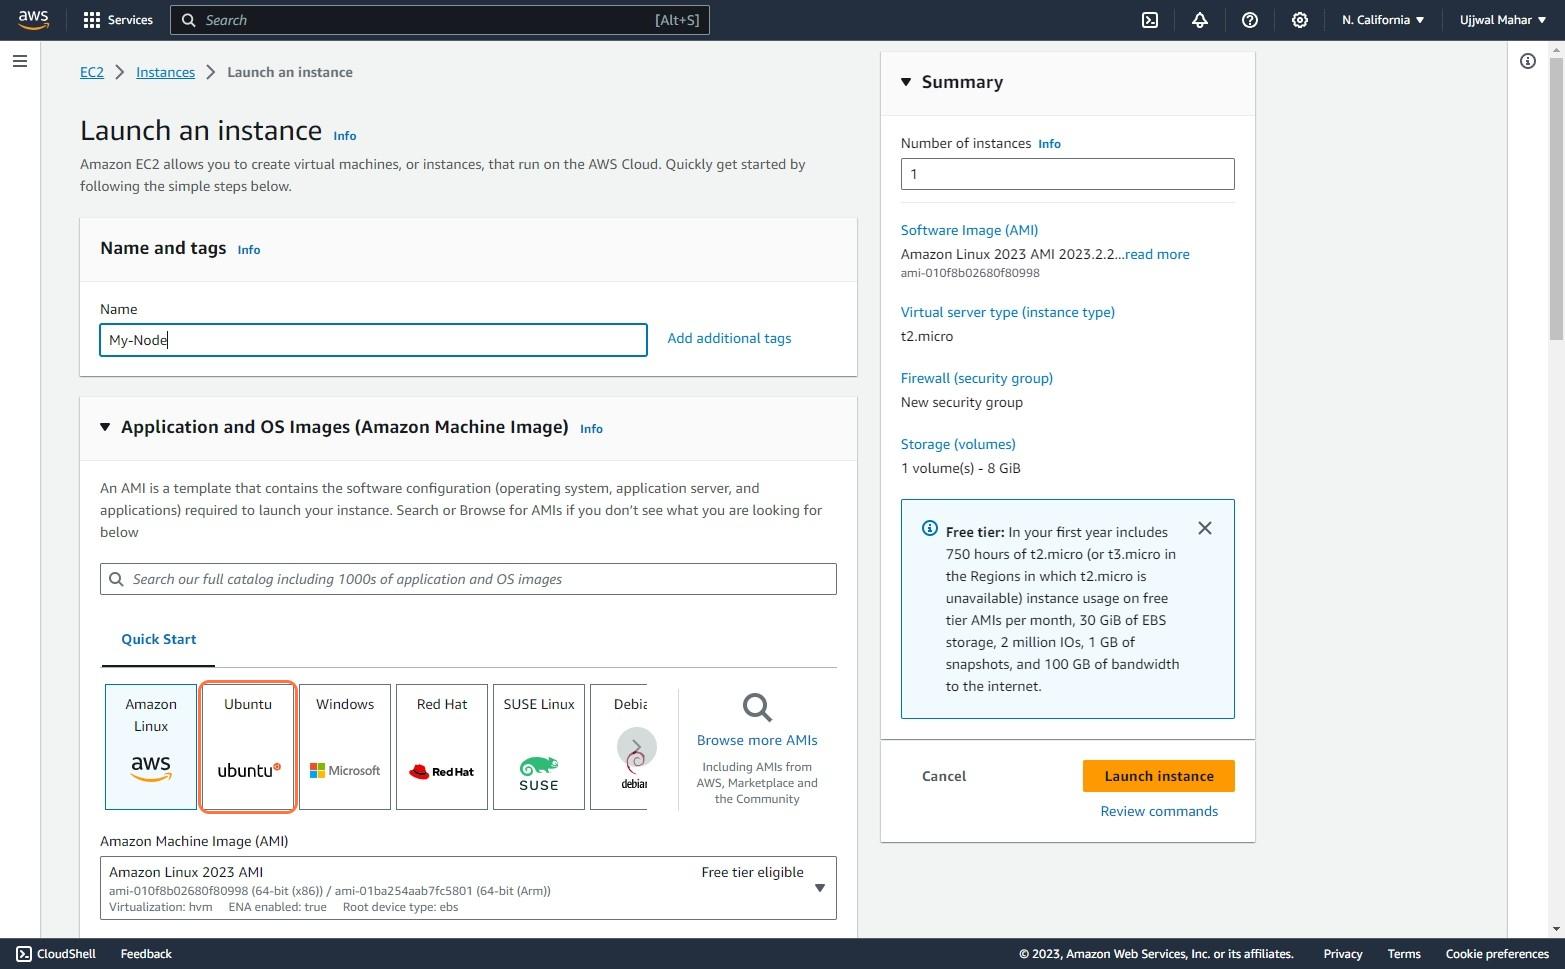
4. Select the machine you want to use, for now, we will be using Ubuntu as our machine.
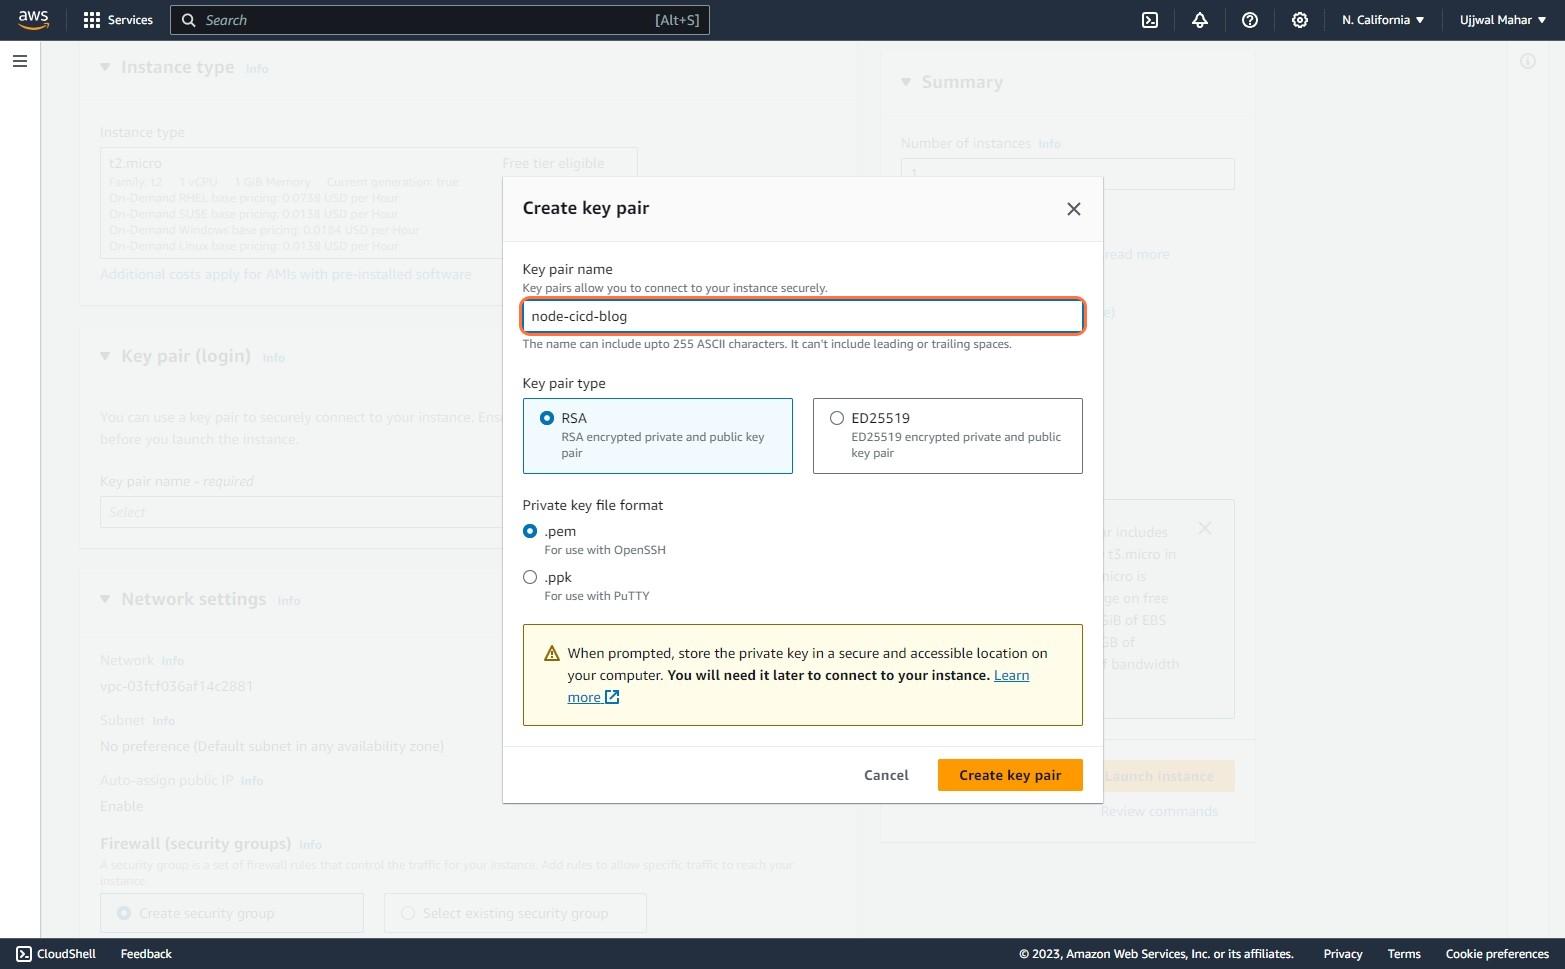
5. Next is to generate our access key. Click on Create a new key pair.
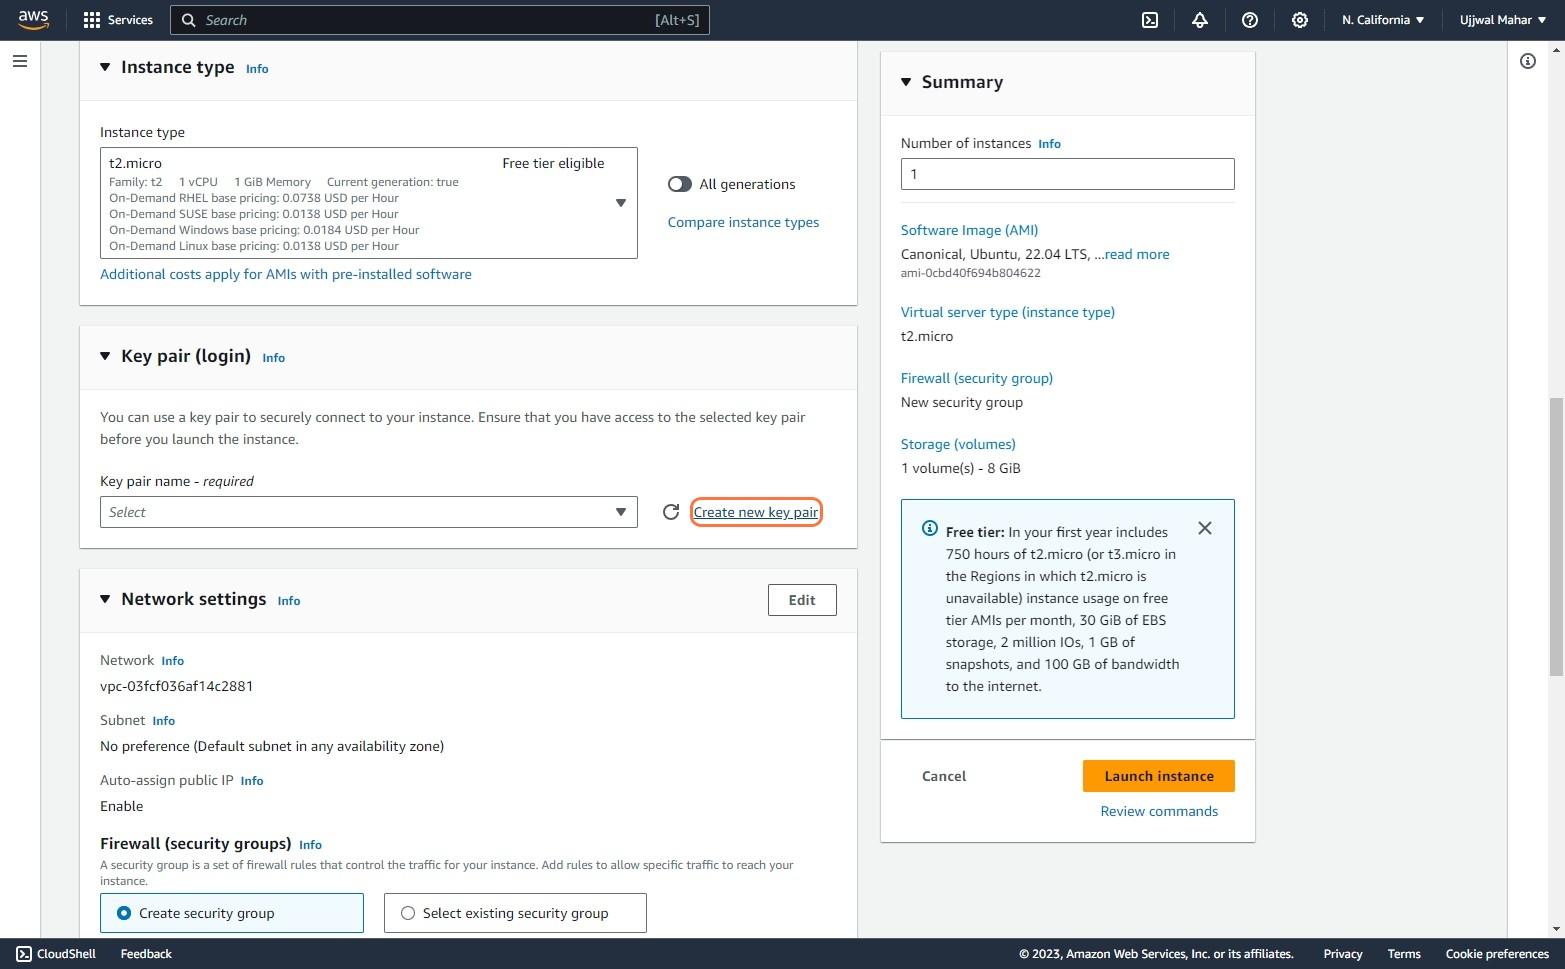
6. Give a name to your key and create a new key pair.
7. Lastly, Click on Launch instance.
Need help with your cloud infrastructure?
Our experts at CloudZenia are ready to help you build, scale, and secure your setup.
Book a Free Consultation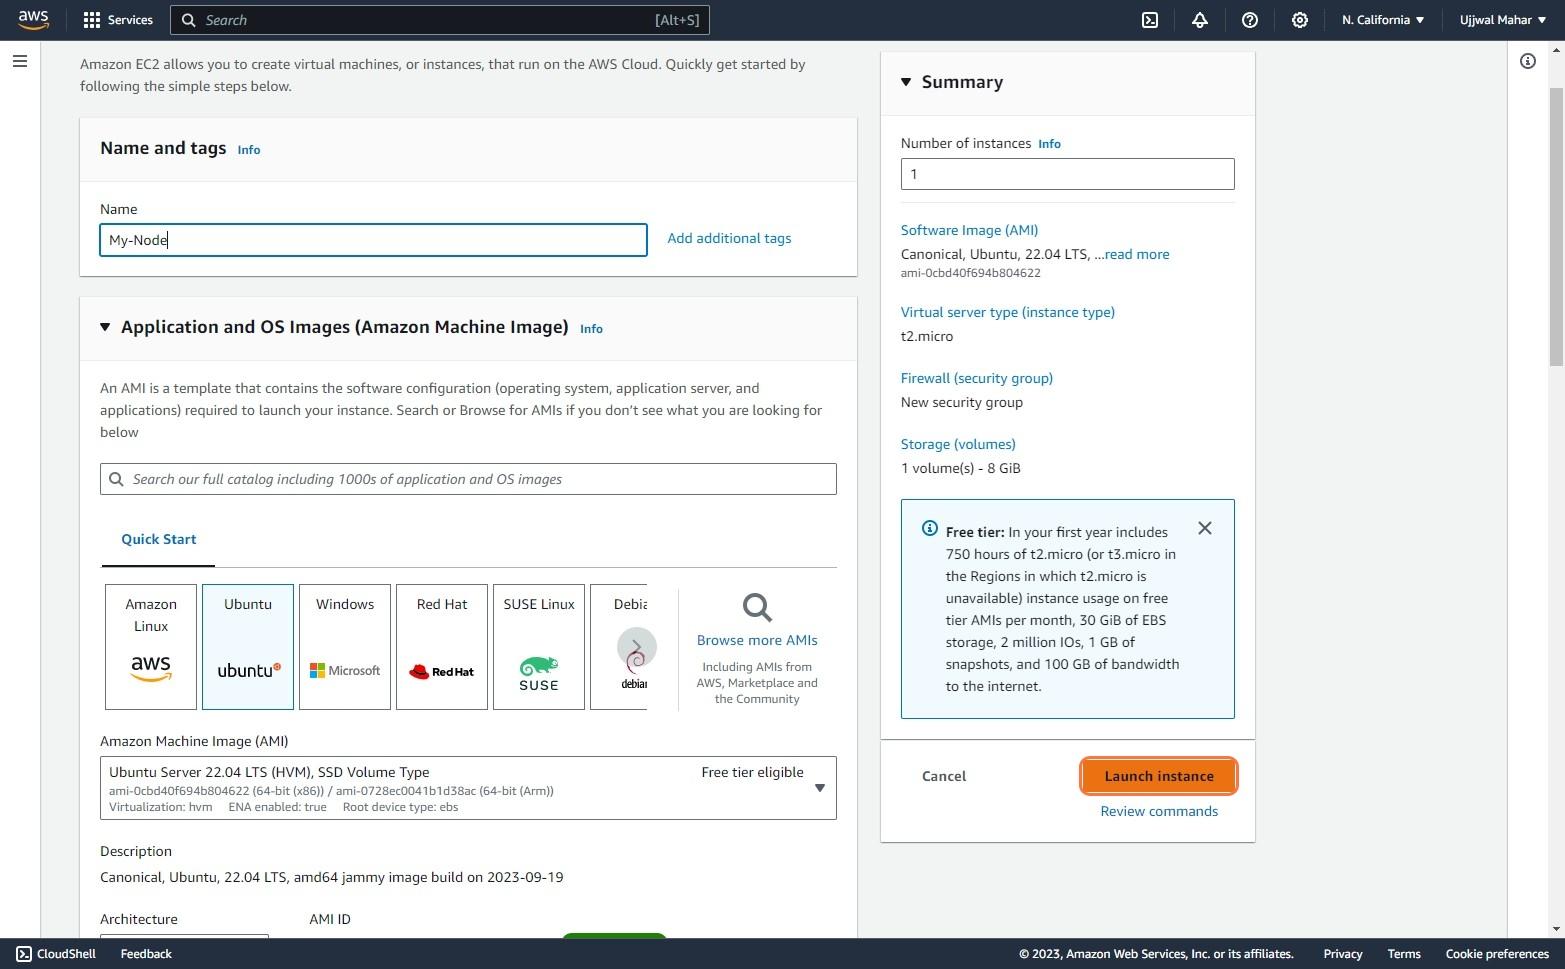
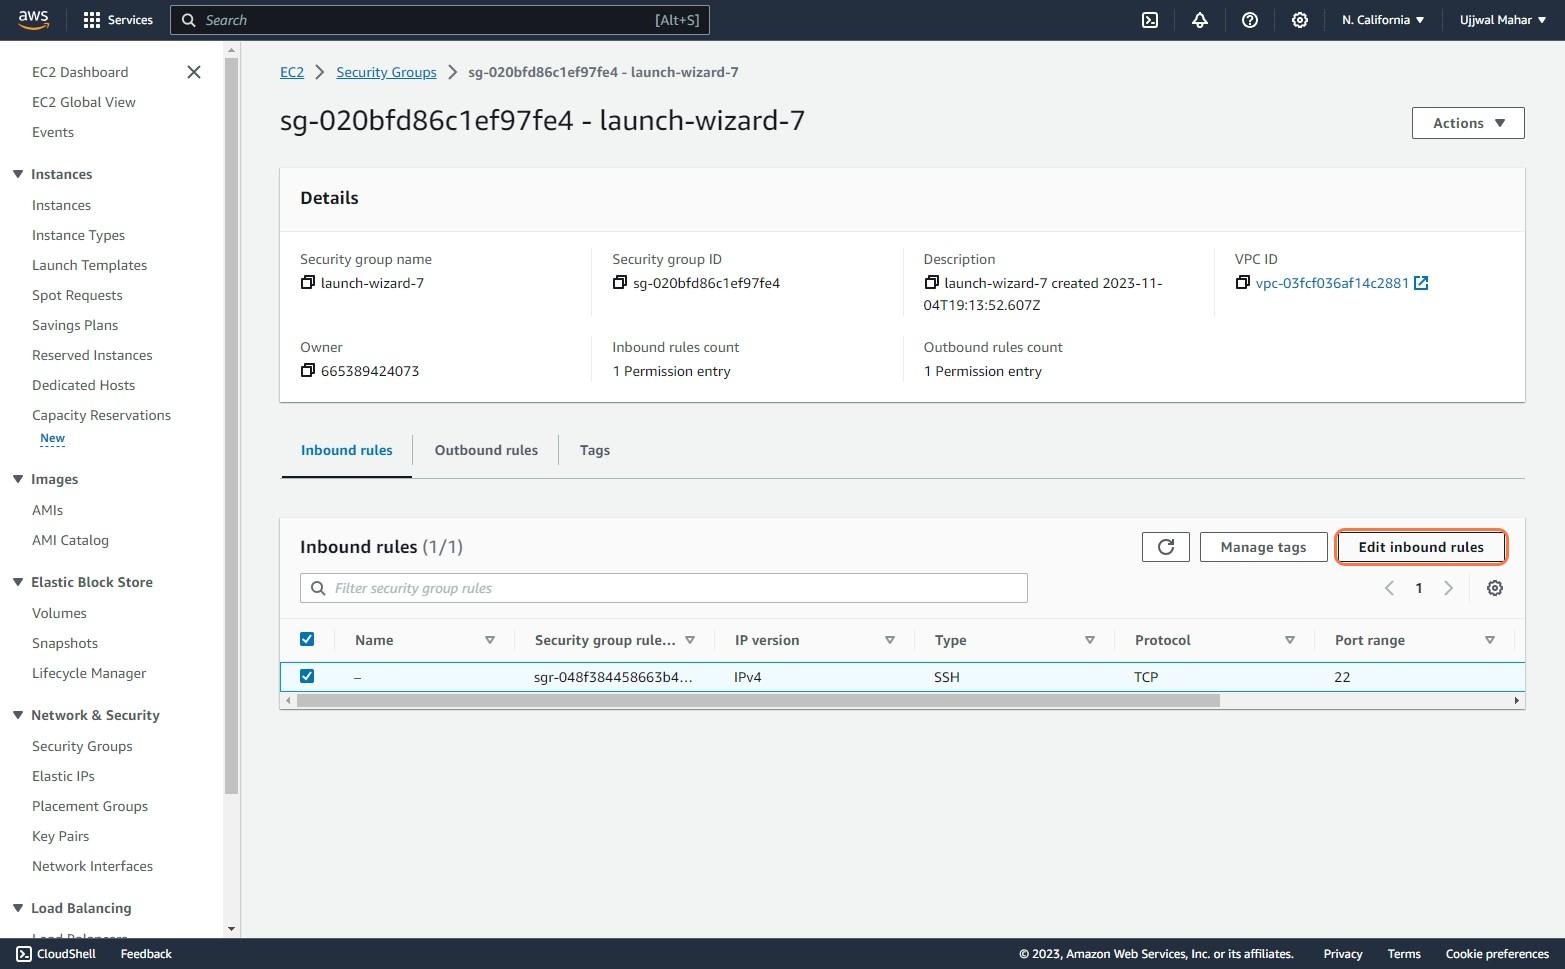
Wait for some time so that your machine becomes running. After that, it’s time to configure Inbound Rules for EC2 Instance so that our machine can listen on a specific port.
- Go to Security and click on Security Groups.
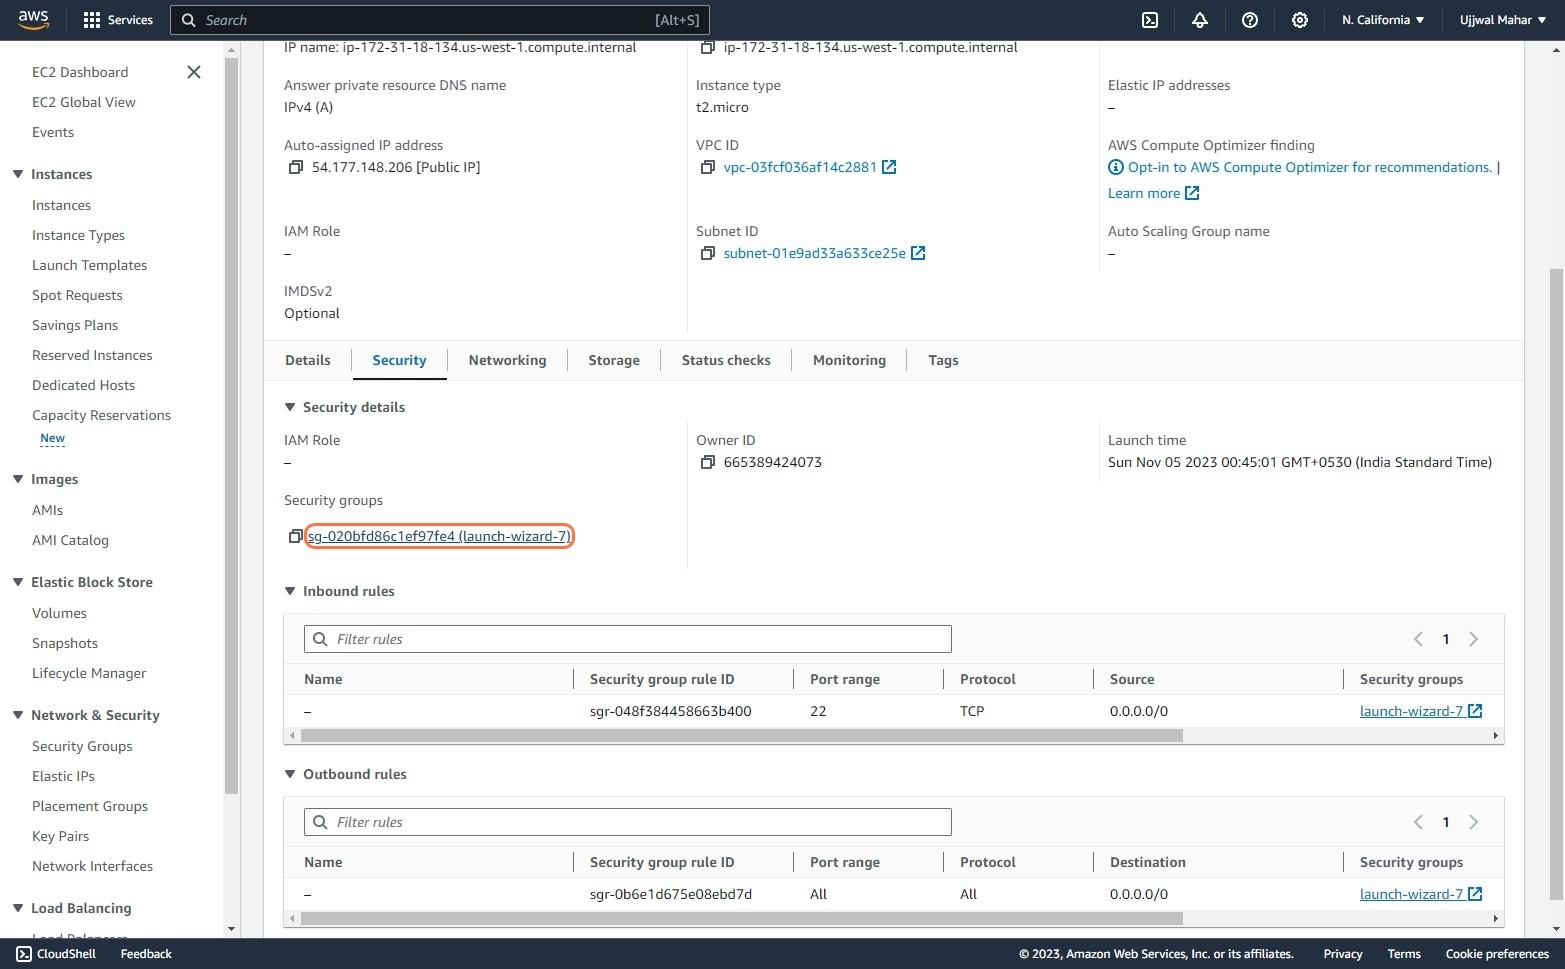
2. Click on Edit Inbound rules.
3. Click on Add rule, and select Type as Custom TCP and Port range to 3000 and Source as Anywhere-IPv4.
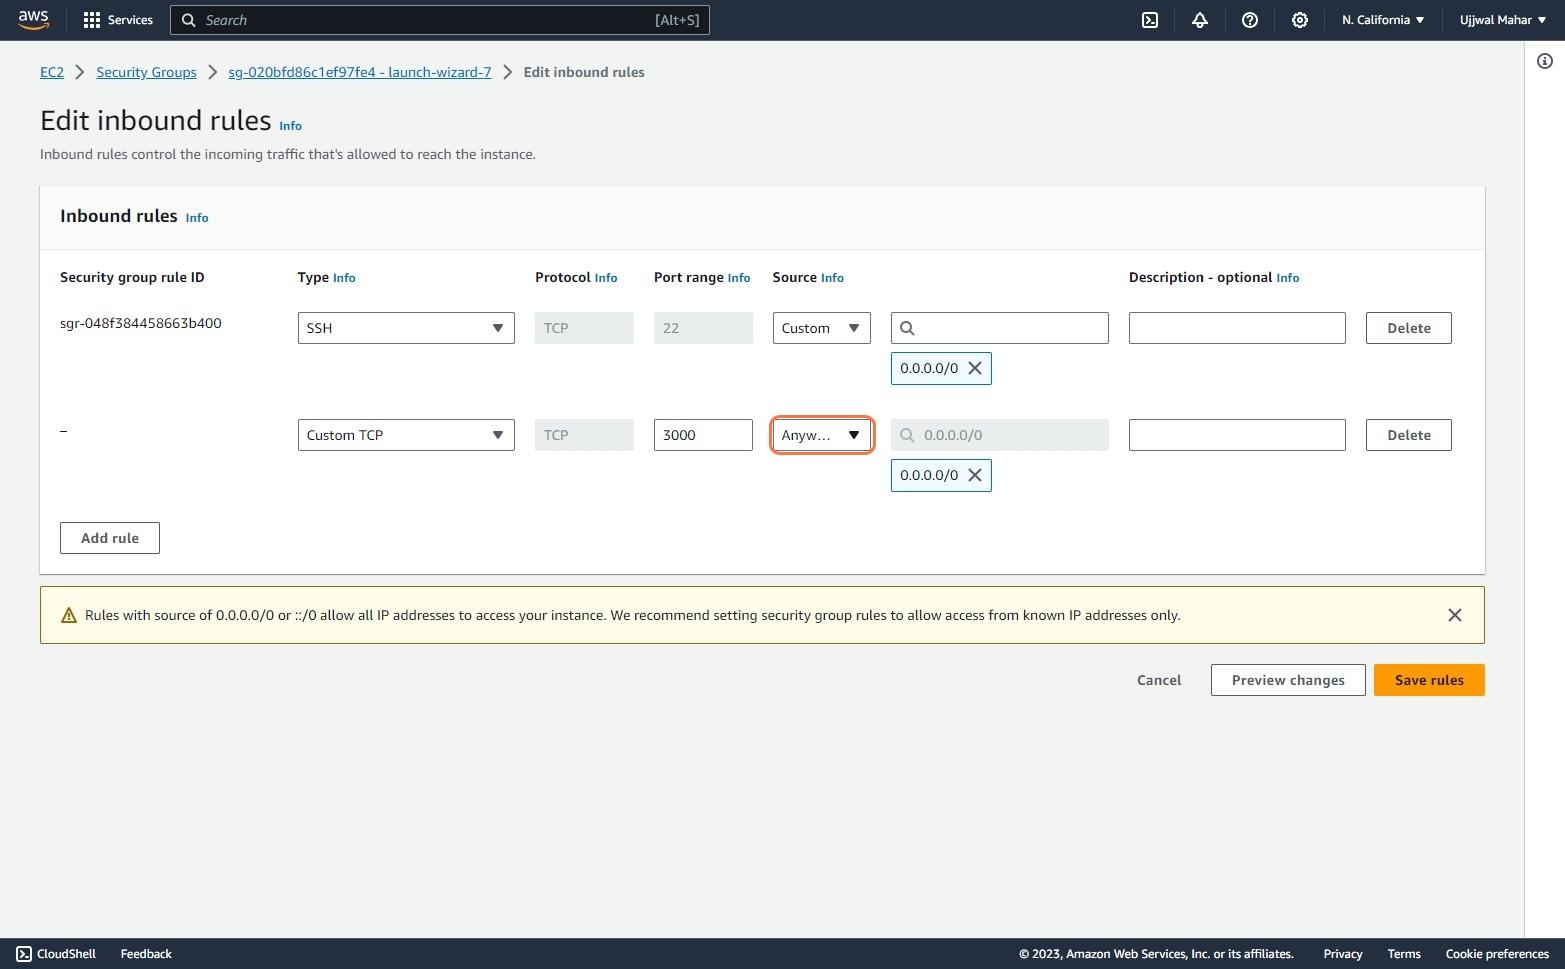
And we are all set to listen to the specific port on our machine. The only thing left is to make our workflow file.
Creating our GitHub Actions Workflow for Node.js Application
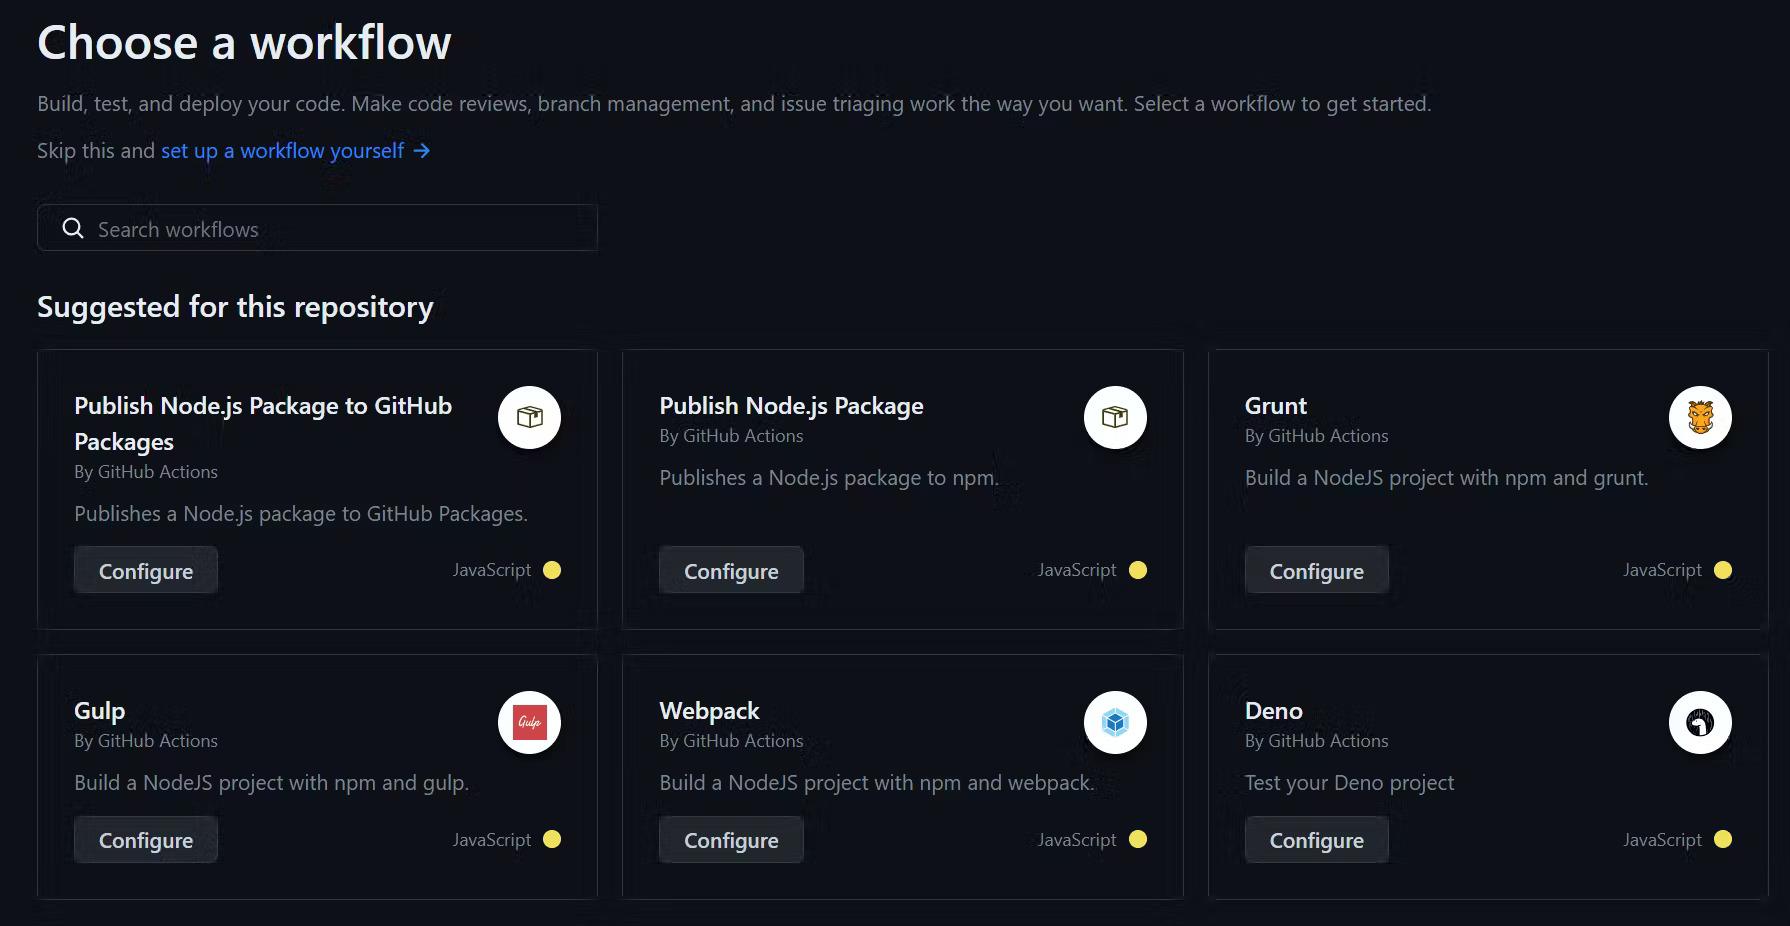
- Go to your GitHub repository and click on Actions.
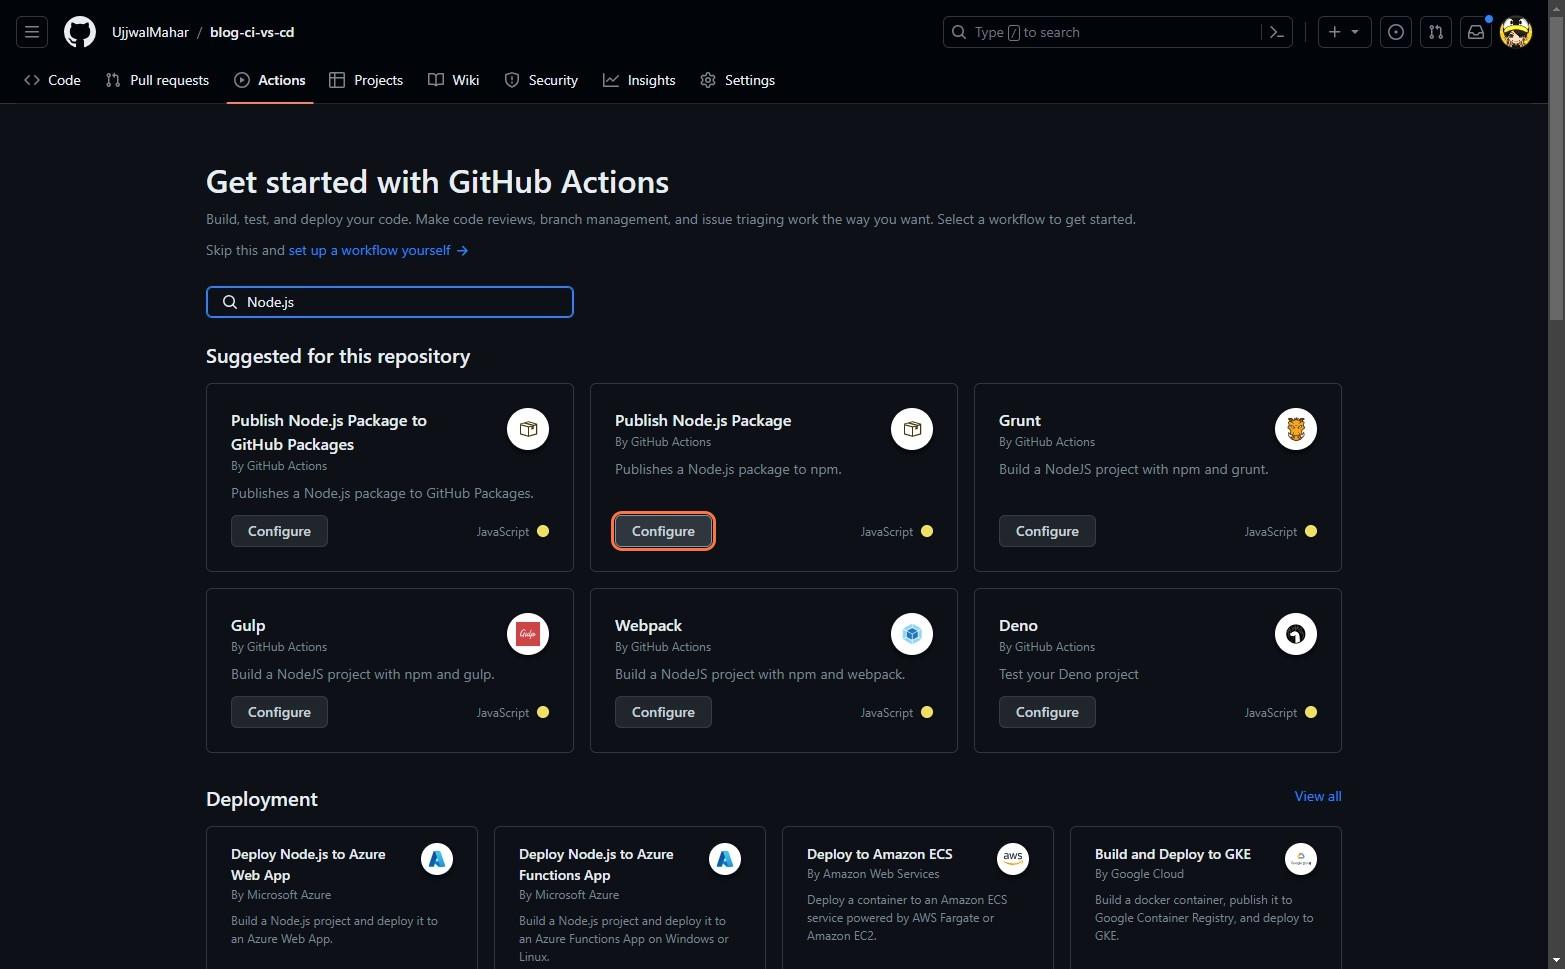
2. Search for Node.js, in our case, it was on the current screen already. On the screen, you will see Publish Node.js Package, click on configure.
You will see a pre-made npm-publish.yml file. Check for the folder GitHub has already created for us, .github/workflows/npm-publish.yml Make sure to always create your workflow in such a manner. We can define our workflow configurations here. As this file is in .yml, make sure to cross-check your indentations.
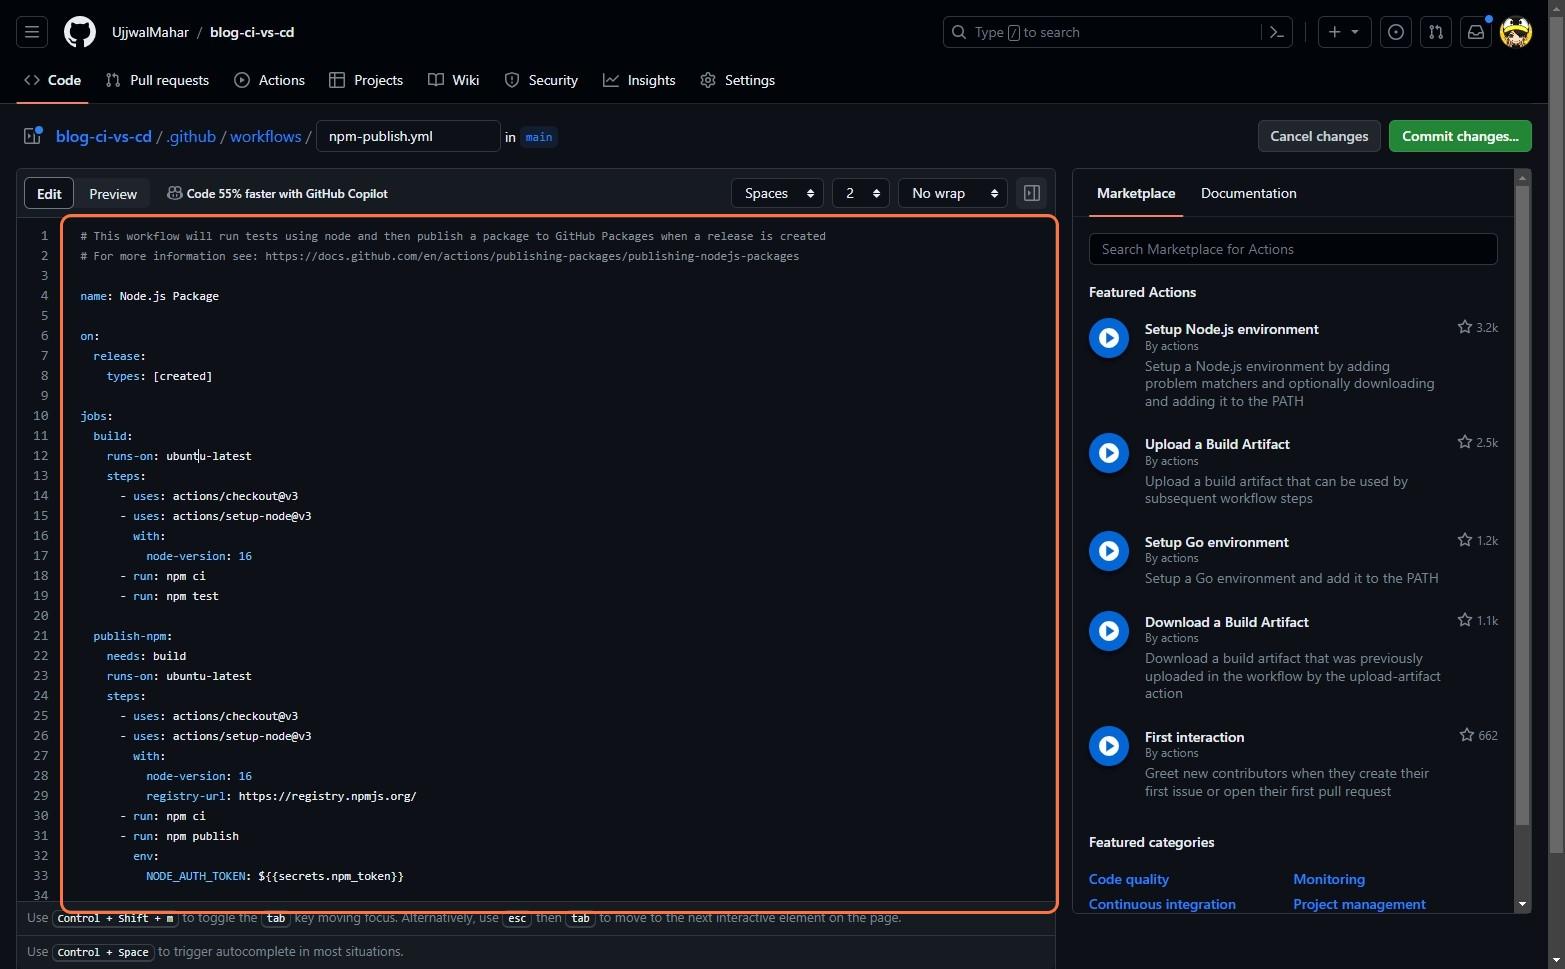
4. We now have to modify this pre-made workflow according to our requirements. name: CI/CD Node.js Blog on: push: branches: [ "main" ] jobs: build: runs-on: self-hosted strategy: matrix: node-version: [18.x] steps: - uses: actions/checkout@v3 - name: Node.js Version ${{ matrix.node-version }} uses: actions/setup-node@v3 with: node-version: ${{ matrix.node-version }} cache: 'npm' - run: npm ci - run: npm test - run: pm2 restart server Let’s break down each line of this GitHub Actions workflow file for a Node.js application:
- name: CI/CD Node.js Blog : This line sets the name of the workflow. In this case, the workflow is named “CI/CD Node.js Blog”.
- on: push: branches: [ "main" ] : This specifies that the workflow should be triggered whenever you push to the main branch.
- jobs: build: : This line starts the definition of a job named build . In GitHub Actions, a workflow run is composed of one or more jobs. Jobs can run parallelly, but you can also configure them to depend on each other.
- runs-on: self-hosted : This line specifies that the job should run on a self-hosted runner (we will see more about this in the later section). A runner is a machine with the GiHub Actions runner application installed, it runs one job at a time.
- strategy: matrix: node-version: [18.x] : This sets up a matrix of environment variables for the job. In this case, it specifies that the job should be run with Node.js version 18.x.
- steps: : This begins the definition of the steps that make up the job. Each step can either run a command or an action.
- - uses: actions/checkout@v3 : This step checks out your repository so the workflow can access it. The checkout action is provided by GitHub.
- - name: Node.js Version ${{ matrix.node-version }} : This step sets up the specified version of Node.js. The setup-node action is provided by GitHub.
- uses: actions/setup-node@v3 : This line specifies the action to use in this step. In this case, it’s the setup-node action at version 3.
- with: node-version: ${{ matrix.node-version }} cache: 'npm' : This sets the inputs for the setup-node action. It specifies the Node.js version to use and enables caching for npm dependencies.
- - run: npm ci : This step installs the dependencies defined in your package.json file.
- - run: npm test : This step runs your tests.
- - run: pm2 restart server : This step restarts your backend server using PM2. Replace server with the actual name of your PM2 process. Once you have finished creating your workflow, commit the changes.
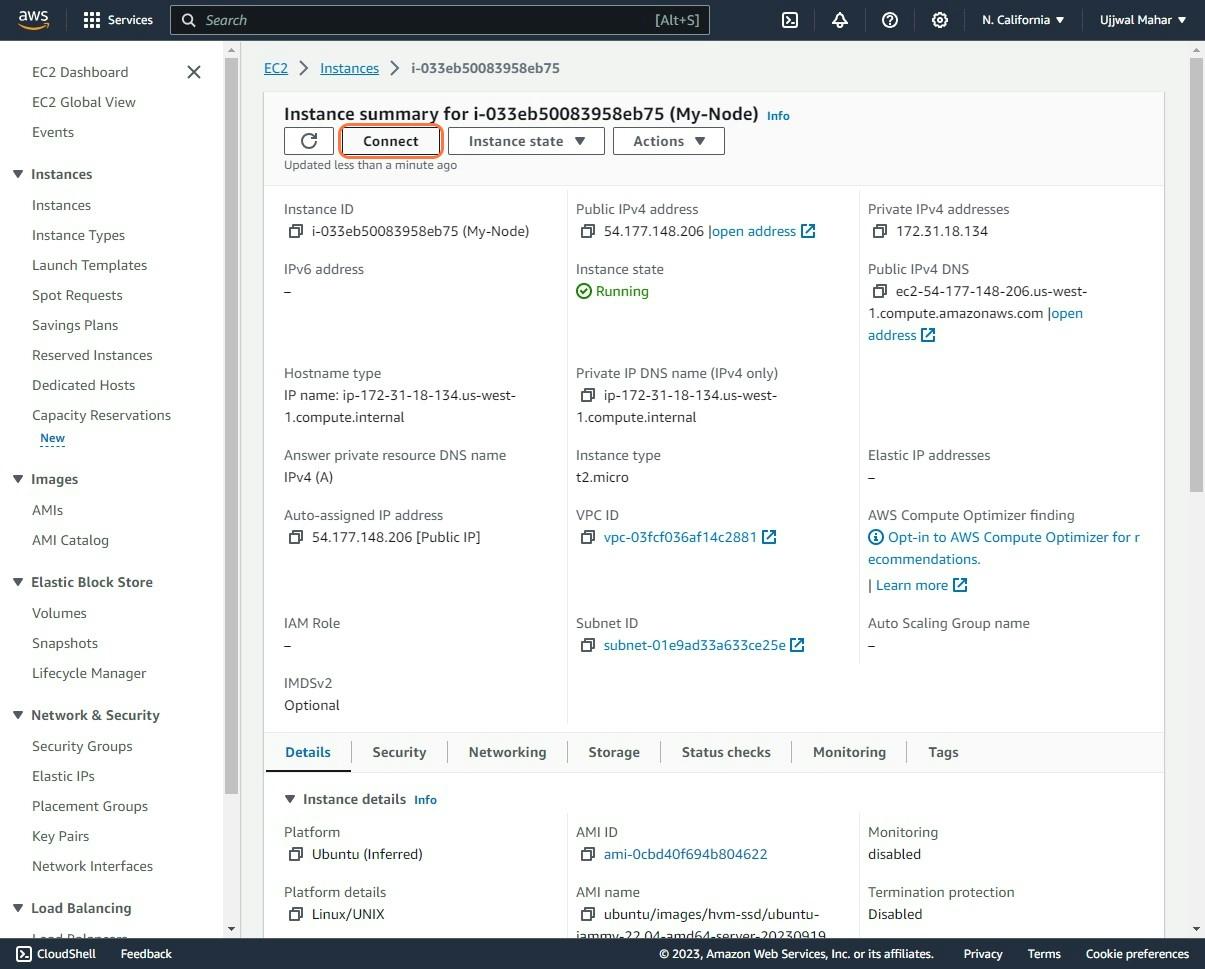
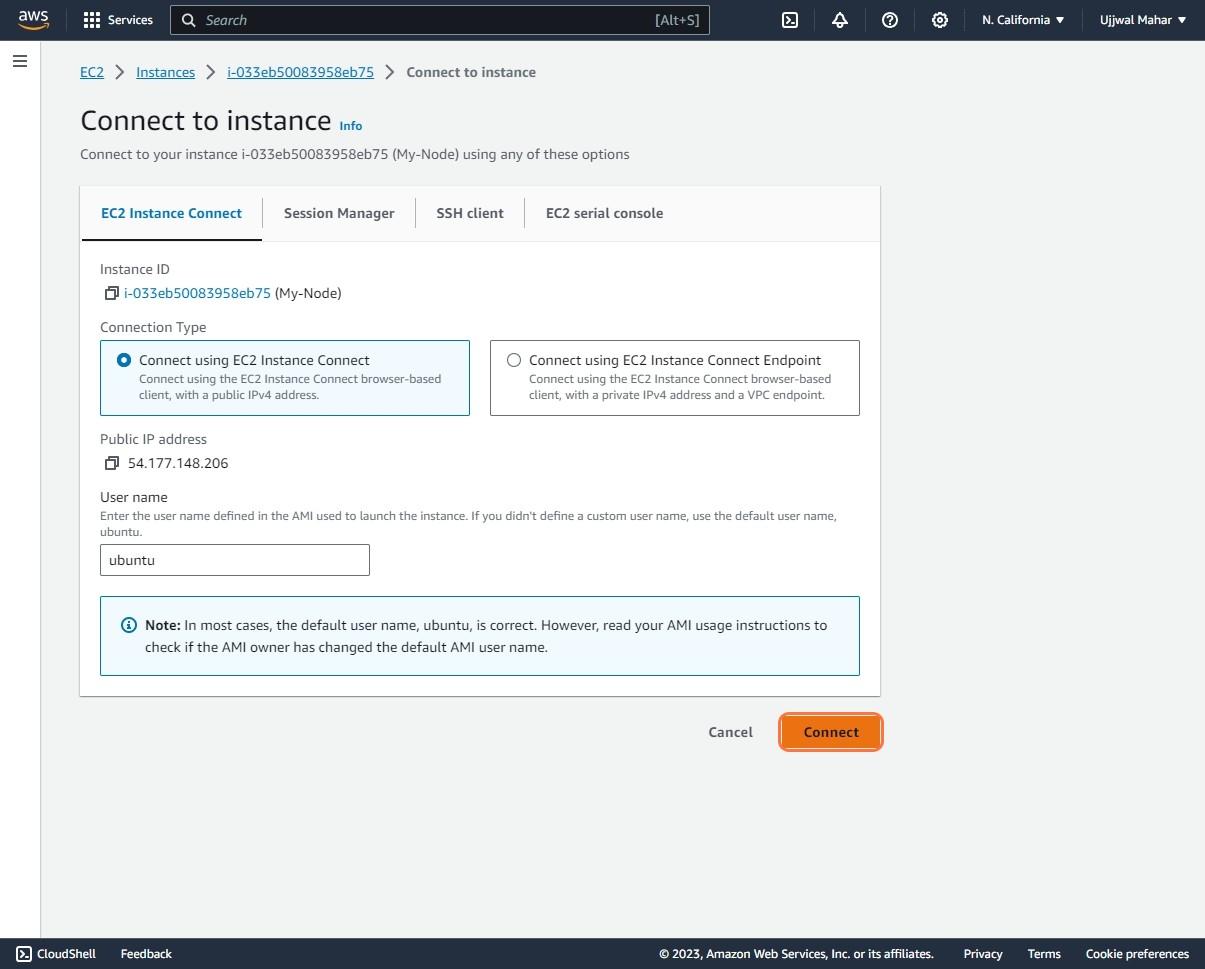
Connect and Configure GitHub Actions Runner to EC2 To connect to the EC2 instance, click on Connect.
GitHub Actions Runner
Git Action Runner acts as a link between the GitHub repository and the EC2 instance. This integration allows direct interaction between the two and enables automated build, test, and deployment processes. Let's set the GitHub Runner:
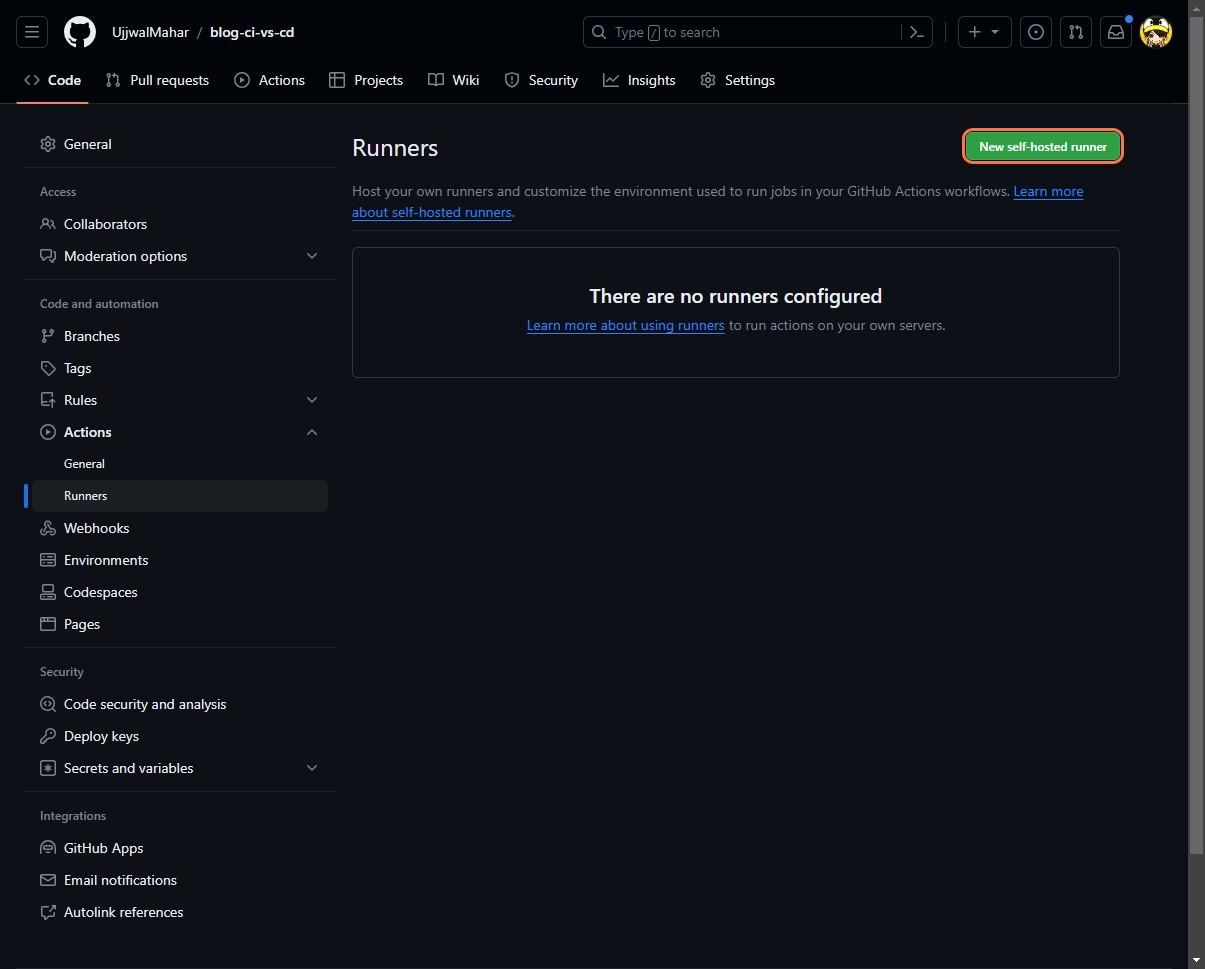
- Click on Settings, then on Actions, and then Runners.
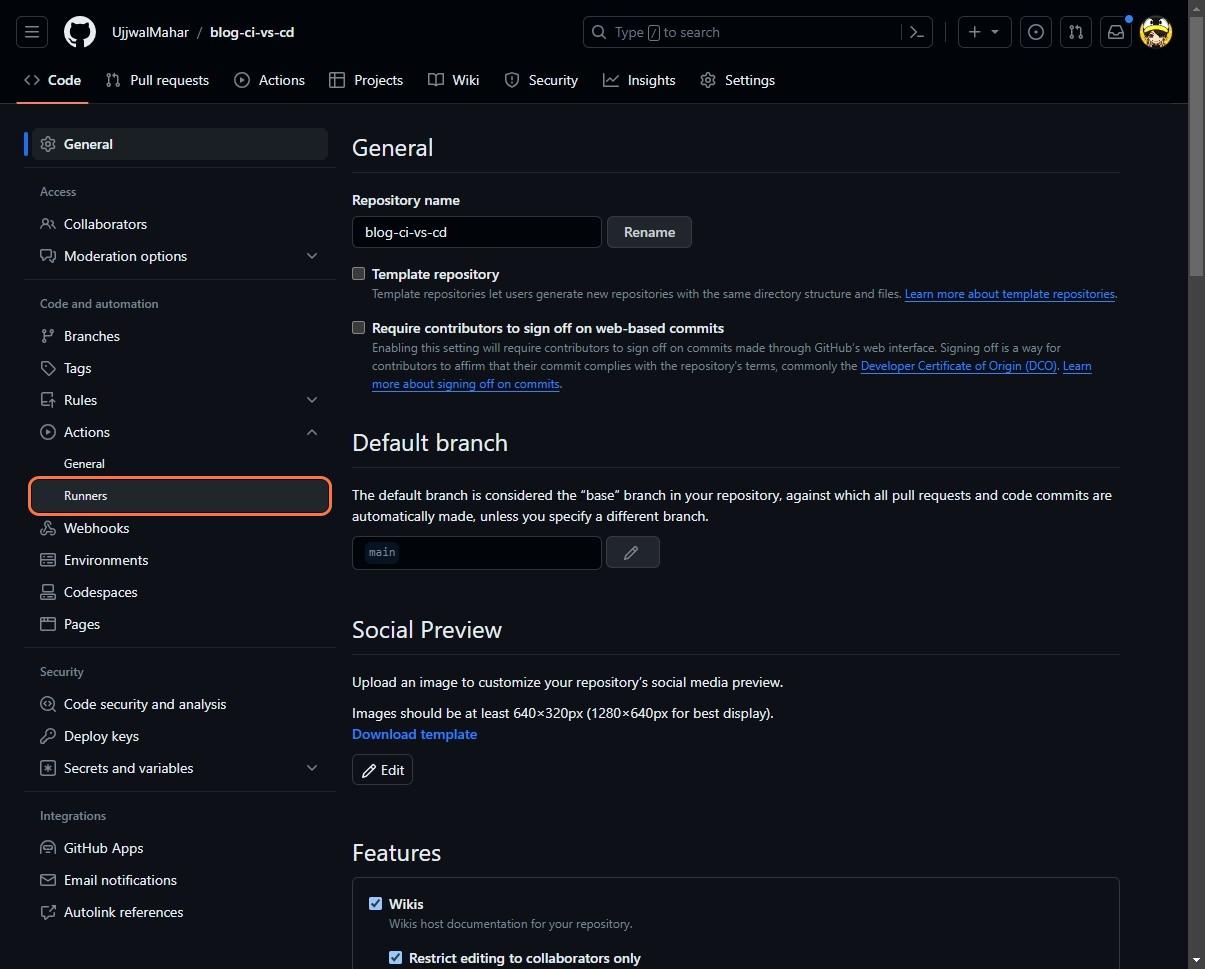
2. We will be setting up a self-hosted runner. Self-Hosted Runner is a system that you deploy and manage to execute jobs from GitHub Actions.
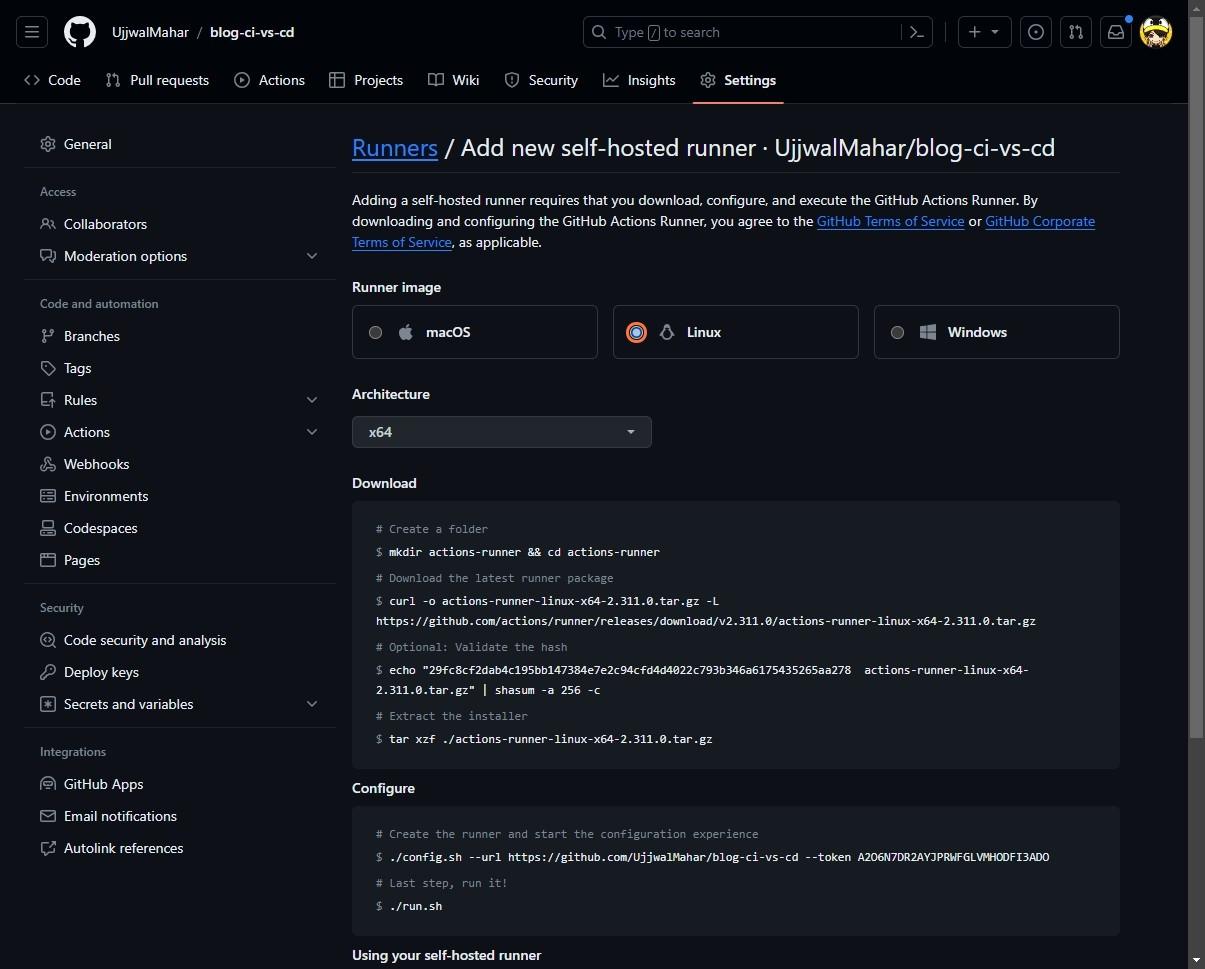
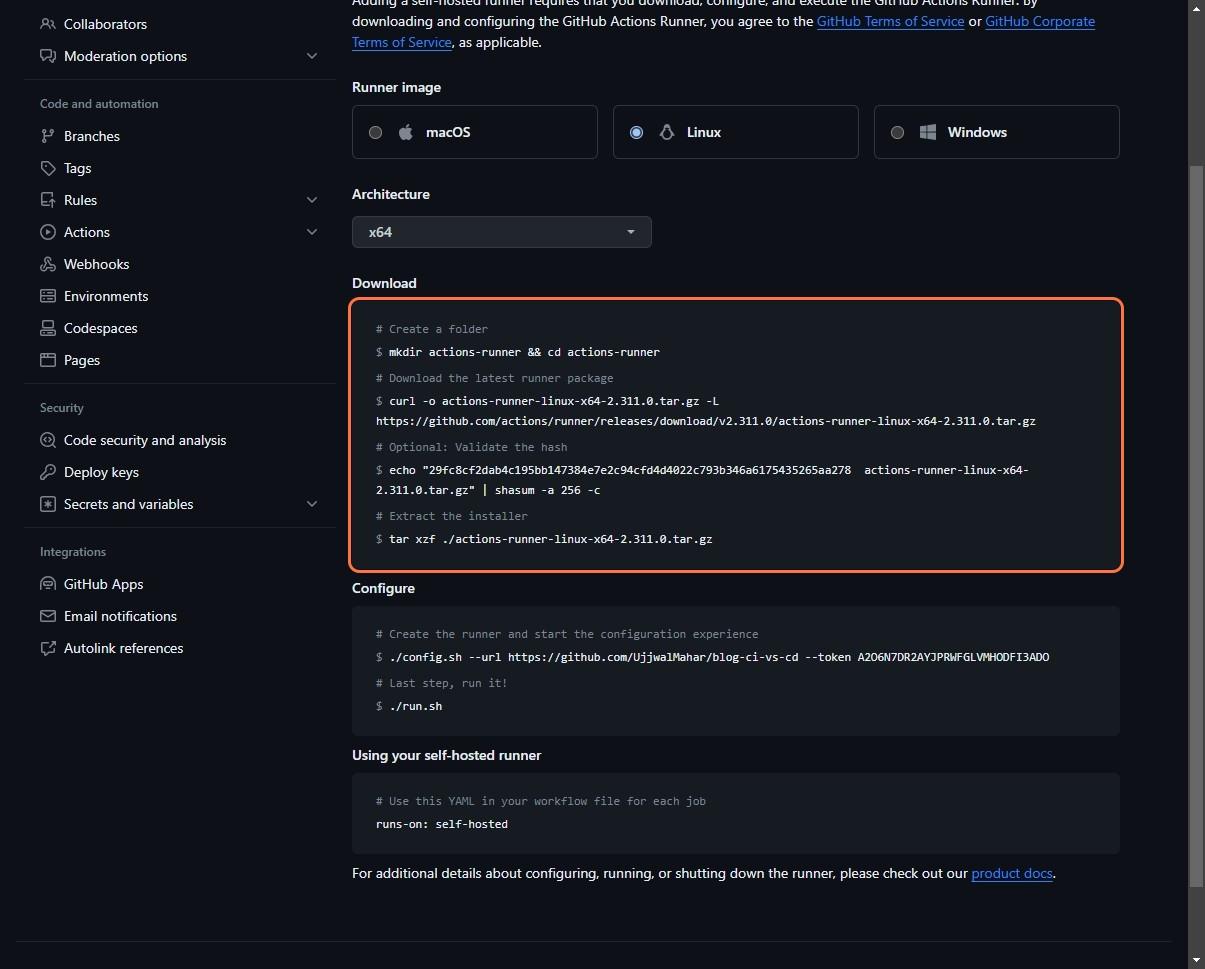
3. Then choose Runner Image as Linux because our machine (EC2) is Ubuntu. Select the arch as x64. Go to your EC2 and follow the steps to download and configure Runner on your machine.
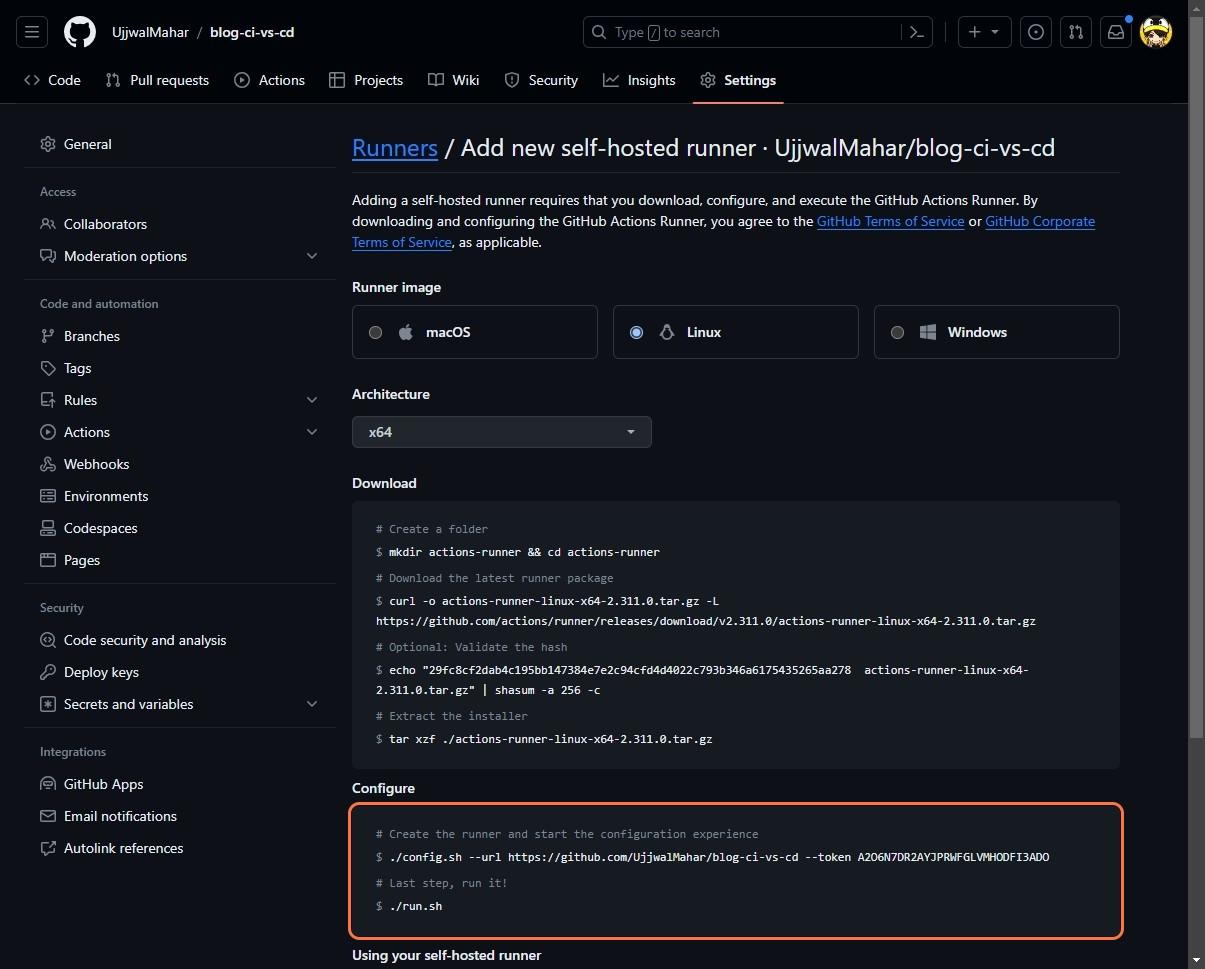
4. After running the ./ run.sh command, if the agent returns √ Connected to GitHub. We’ll install a service to run our runner agent in the background: sudo ./svc.sh install sudo ./svc.sh start The above code will start our runner service in the background so that the runner is ready whenever the workflow gets triggered.
Preparing our machine (EC2 Instance) with Node.js Till now, we have successfully pushed our code to GitHub, created an EC2 instance and set our Runner in the machine. The only thing left is to create an environment for our Node.js Application. We need to install Node and the required libraries to be able to run our application on the server. So, to install the node on our server, we need to follow these commands: sudo apt update curl -sL https://deb.nodesource.com/setup_lts.x | sudo -E bash - sudo apt-get install -y nodejs We also need a process manager for Node.js;p here, we have decided to go with PM2, this will allow our application to run continuously on the server and also monitor our application. sudo npm install -g pm2 Navigate to the application folder. cd ~ cd /home/ubuntu/actions-runner/_work/blog-ci-vs-cd/blog-ci-vs-cd Now, we can start our server using pm2 in the background. pm2 start app.js --name=server Now that we have started our server, we can check if our application is working or not. To check if our application is working or not, we can open a new tab and enter <your-public-ip>:3000, it should show us our application.
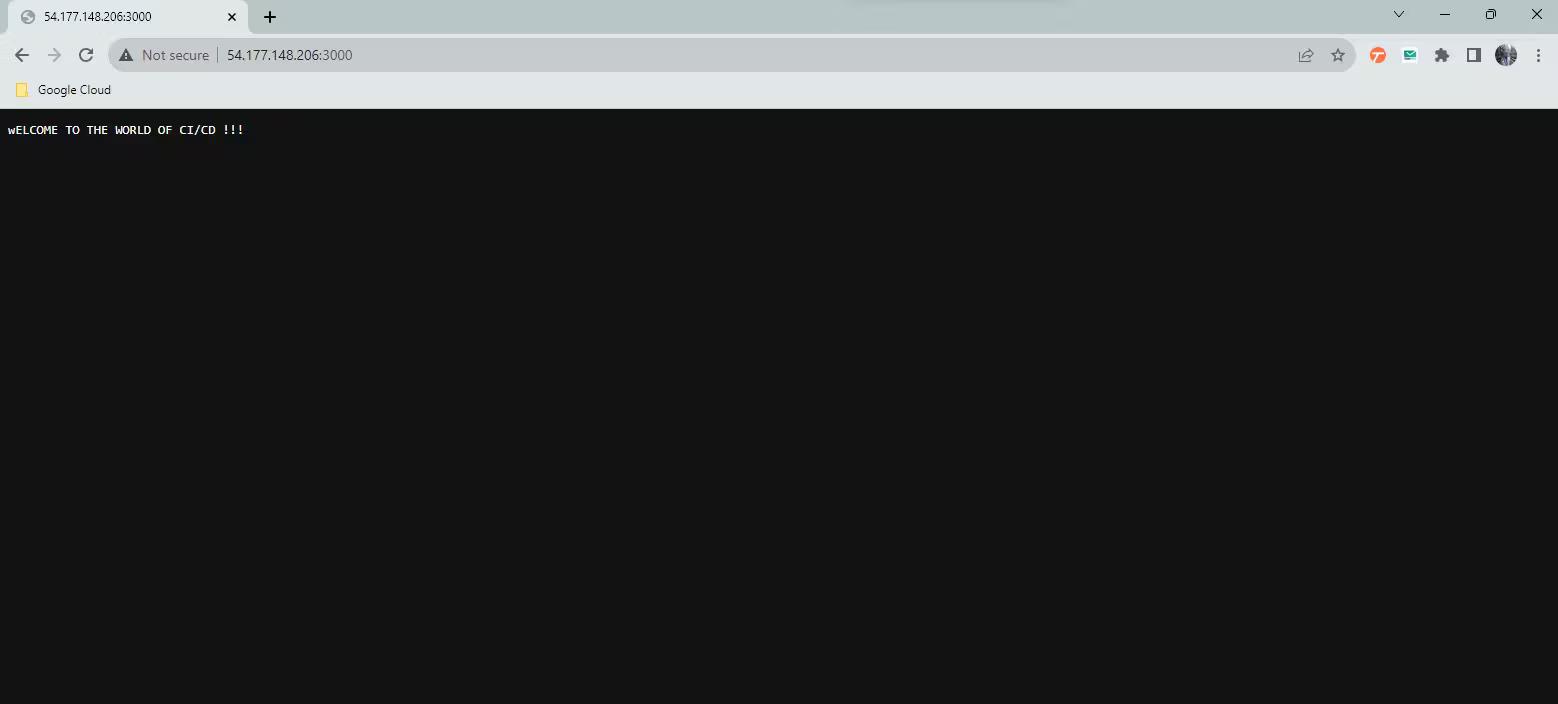
But wait, we made a mistake. Our "w" of Welcome is small. So now, we have to do it all over again? As we now have the power of CI/CD, let's see how it will help. We will be changing my code locally and pushing it to GitHub, it should automatically get deployed into our server. As soon as we pushed our code into GitHub, GitHub Actions immediately started working and executed its build.

Our build was successful. We should see it on our server, let's check it now.
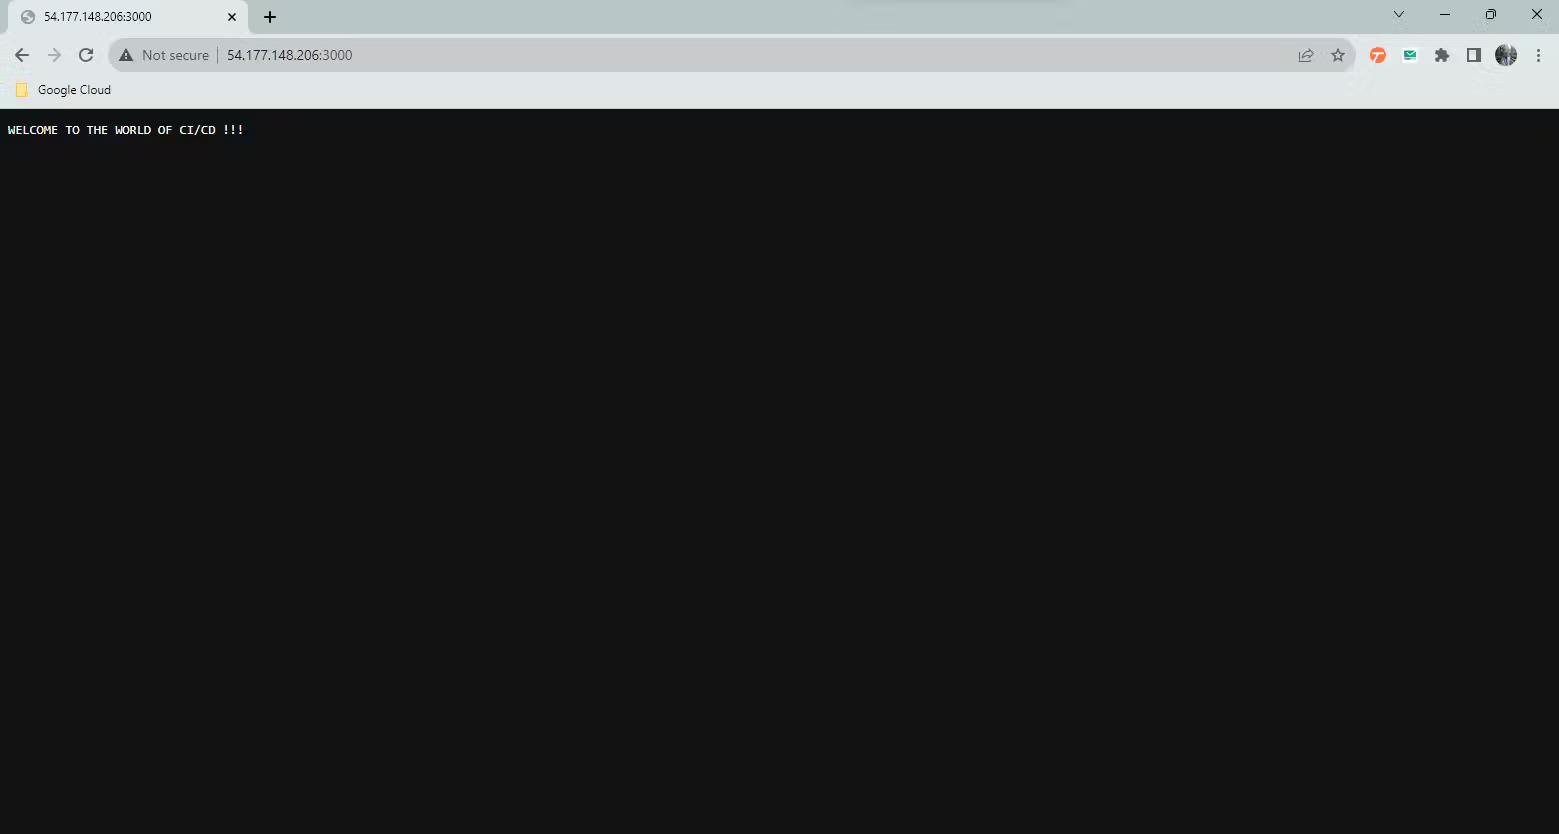
YES IT DID CHANGE! We were successful in creating our CI/CD pipeline for our Node.js application using GitHub Actions.
Conclusion
And that's it! In this blog, CloudZenia has taken a deep dive into the concepts of CI/CD with real-life examples and understood the difference between two similar terms, "CD". We learned by doing, we put our theory knowledge into practice by deploying a Node.js Application on an EC2 Instance using GitHub Actions. This hands-on experience of CI/CD solutions helped to make a strong foundation of the concepts of CI/CD. Thank you for joining us on this journey. We hope you found it as enlightening and exciting as we did. Until next time, happy coding!
Ujjwal Mahar Linkedin Nov 10, 2023
Filed under